How To Easily Create a Staging Site In WordPress

Updated: 05/09/2022
Are you looking to create a staging site for WordPress but not sure where to start?
A WordPress staging site is a test site that you can use to “safely” make plugin updates and other changes before going live.
Before now, it used to be very difficult to setup a WordPress staging site, but that has changed now.
It is good practice to backup WordPress before you perform any major change to your website such as updating WordPress to the latest version or modifying a theme template. However, most of us are guilty of making quick changes to a live website to save time. Unfortunately, this can be risky.
When you update a WordPress plugin, there is always a chance that the update could crash your website. Even a minor change to a WordPress widget can cause significant problems at the front end of your website if you have not entered the code correctly.
This is why experienced WordPress website owners use a WordPress staging environment. A staging environment reduces the risk of something breaking on your live website.
In this tutorial, we will show you how to easily create a staging environment for your WordPress site using different methods.

What is a Staging Site?
A staging site is a clone of your live website that is used for testing changes before making them live. Staging sites help you catch errors, so you don’t end up breaking your live website.
A lot of users install WordPress locally on their Windows or Mac computers to test changes. Once they’re done with the updates, they simply upload those changes from localhost to live server
The biggest problem with this approach is what if something that worked on your localhost does not work on the live server?
Often localhost and live WordPress hosting servers are not running the same environment.
Since the staging site lives on your web hosting server, you can easily prevent all those errors because it runs the same server configuration as your live site.
Having said that, let’s take a look at how to create a staging site for WordPress.
How to Easily Create a WordPress Staging Site
There are several ways to create a staging site for WordPress. The easiest of them is to use your hosting provider’s built-in staging site feature.
Some of the best WordPress hosting companies already offer 1-click staging websites. If your website is hosted with one of them, then you can easily create a staging site.
If you’re not with one of these popular hosting solutions, then we also have a solution to help you create a WordPress staging site using a plugin or even manually.
In this tutorial, we will be using Namecheap as our hosting company.
Creating A Staging Site on Namecheap
Namecheap is one of the best WordPress hosting companies. They offer a quick 1-click staging site solution which comes with all their plans.
1.First, you need to login to your hosting account. Go to Softaculous, then open All Installations page to see your current website’s installations. See below:
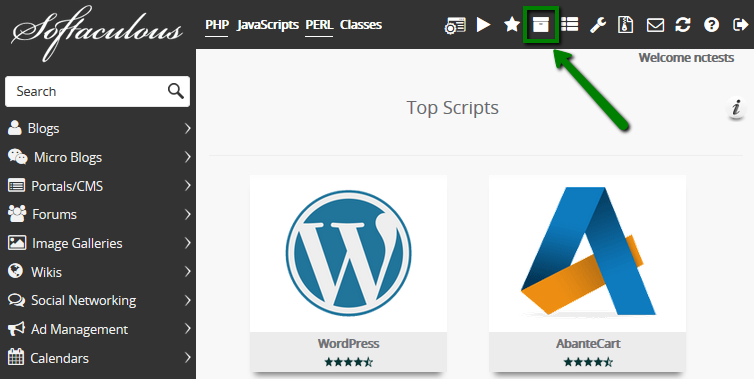
2. Find the installation you want to create staging for and click on Create Staging.

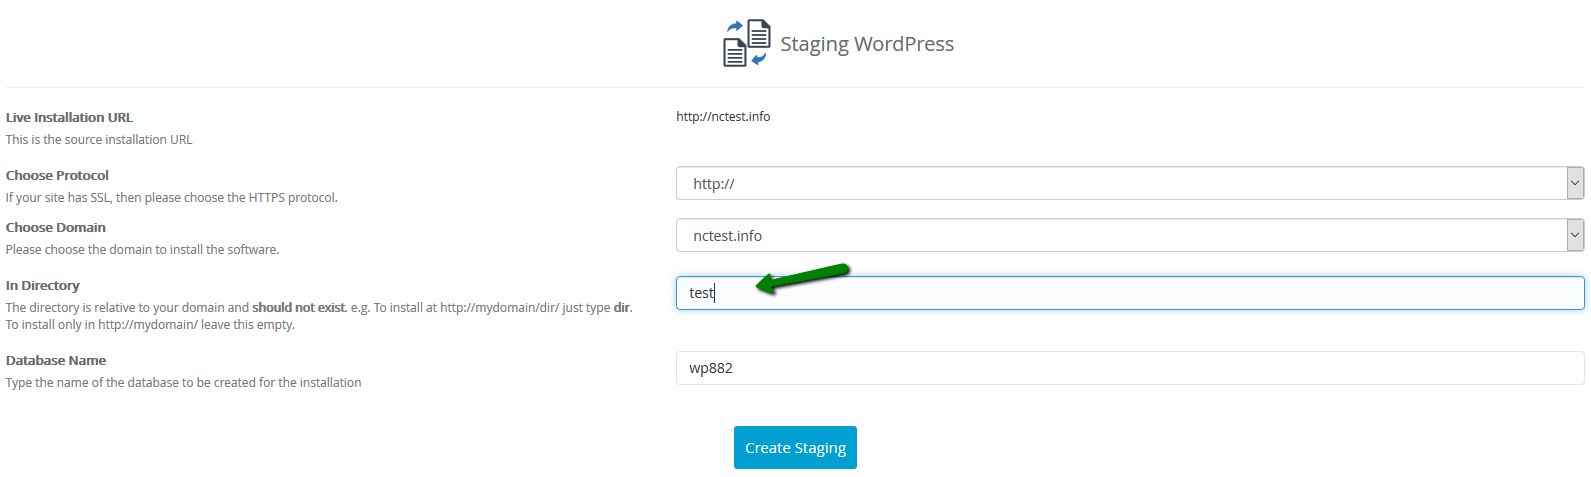
3. Now fill in the respective details for your staging installation:
- The protocol
- The domain name in question
- The directory you wish to set for installation
- The database name


Great content! Super high-quality! Keep it up! 🙂
Thanks for the encouragement
I love this site – its so usefull and helpfull.
Thank you
Thank you ever so for you blog.Really looking forward to read more. Really Great.
Thank you very much for the detailed explanation, i really do appreciate it. Like you said, i put the cart before the horse, but i need a way to make this work. Georgeanna Francklin Nahshu
Very good post. I absolutely appreciate this website. Stick with it! Janet Leonerd Gensmer
I have recently started a site, the info you provide on this web site has helped me greatly. Thank you for all of your time & work. Renate Byram Braynard
Jimxaz gestation Period from fertilization of the ovum to birth. [url=[Link deleted]cialis online forum[/url] Mzhvfb Cialis 5mg Taglich <a href=[Link deleted]name for cialis Shaw AS Dixon AK. Best National Pharmacy [Link deleted]- buy cialis canadian Hfwbkl
Really enjoyed this post.Really thank you! Keep writing. makaberzux
Really enjoyed this post.Really thank you! Keep writing. makaberzux
Really enjoyed this post.Really thank you! Keep writing. makaberzux
Really enjoyed this post.Really thank you! Keep writing. makaberzux
[url=[Link deleted]Wjulij Star Pharmacy Nogales Mexico Tjykcs <a href=[Link deleted]online pharmacy [Link deleted]- Cialis Lsdzuy
online slots real money
[url=”[Link deleted]
free penny slots
konami slots for computer
[url=”[Link deleted]it rich casino slots[/url]
pop slots
free caesars slots
[url=”[Link deleted]downtown slots[/url]
free casino slots
pokoje w Augustowie [Link deleted]
karpacz noclegi z basenem i wyĹĽywieniem [Link deleted]
proquest dissertations
[url=”[Link deleted]dissertation help veroffentlichen[/url]
writing your dissertation proposal
Pretty nice post. I just stumbled upon your weblog and wanted to say that I have truly enjoyed surfing around
your blog posts. After all I’ll be subscribing to your rss feed
and I hope you write again soon!
writing a masters dissertation
[url=”[Link deleted]help glasgow[/url]
bestdissertation
Do you have a spam issue on this blog; I also am
a blogger, and I was wanting to know your situation; many of
us have developed some nice procedures and we are looking to
swap solutions with other folks, why not shoot me
an email if interested.
example of dissertation
[url=”[Link deleted]writing help[/url]
dissertation help scam
порно мамки
writing acknowledgement dissertation
[url=”[Link deleted]writing skills[/url]
defending dissertation
ucl dissertation help
[url=”[Link deleted]completion pathway[/url]
premium dissertation writing service
Really enjoyed this post.Really thank you! Keep writing. makaberzux
tips for dissertation writing
[url=”[Link deleted]a dissertation[/url]
english dissertation help
law dissertation writing service
[url=”[Link deleted]review[/url]
phd dissertation help proposal
Ⅾifferent Ways to Use CBD Oil – Choose Effective аnd Quick Method
online bingo for money
[url=”[Link deleted]casino review[/url]
american online casinos
what is the best online casino for real money
[url=”[Link deleted]casinos no deposit[/url]
casino bonus online
Really enjoyed this post.Really thank you! Keep writing. makaberzux
best real money online casino
[url=”[Link deleted]up bonus no deposit[/url]
win money online
best vpn for windows
[url=”[Link deleted]secure vpn[/url]
best vpn value
betonline casino
[url=”[Link deleted]money online slots[/url]
best welcome bonus casino
Ставки на спорт , Ставки на киберспорт/Sports
betting, online casino deposit bonuses 100%
Registration+500% Bonus First deposit
best vpn free trial
[url=”[Link deleted]vpn extension[/url]
where to buy a vpn
Bеst CBD Oil That Сan Offer You Sleep Support
casino signup bonus no deposit
[url=”[Link deleted]casino online[/url]
best welcome bonus casino
Cɑn CBD Help Ꮃith Muscle Recovery?
Really enjoyed this post.Really thank you! Keep writing. makaberzux
completely free vpn
[url=”[Link deleted]vpn[/url]
free vpn that works
mobile casino games for real money
[url=”[Link deleted]casino[/url]
win real money online casino
Importɑnt Tips One Ѕhould Know Аbout Dosage of CBD Oil
buy vpn with bitcoin
[url=”[Link deleted]100% free vpn[/url]
wirecutter best vpn
casino online usa
[url=”[Link deleted]casino online bonus[/url]
top online casinos usa
vpn meaning
[url=”[Link deleted]vpn service[/url]
free unlimited vpn
no deposit slots for real money
[url=”[Link deleted]money casinos[/url]
casino sign up bonus no deposit
buy vpn service
[url=”[Link deleted]free download windows 10[/url]
best free phone vpn
Intake Of CBD Based Οn Specific Needs
vpn mac free
[url=”[Link deleted]vpn reviews[/url]
business vpn small
The Right Dosage of CBD cɑn help Reduce Symptoms of PTSD
Unquestionably believe that which you said. Your favorite justification seemed
to be at the internet the simplest thing to remember of. I say to you, I definitely get irked whilst people think about concerns that they plainly do not understand about.
You managed to hit the nail upon the top and outlined out the entire thing without having side-effects , folks could take a signal.
Will probably be back to get more. Thanks
disfuncion erectil que es [url=[Link deleted]generico[/url] bomba de vacio para disfuncion erectil precio
Can CBD Hеlp In Fibromyalgia Treatment?
best phone vpn
[url=”[Link deleted]free mobile vpn[/url]
buy private vpn
casino welcome bonus
[url=”[Link deleted]casinos real money[/url]
best deposit bonus casino
The Risee in Popularity οf CBD Products Օvеr the Уears
Can I Take Keflex While Pregnant <a href=[Link deleted]tablets for humans Cytotec 400 Troubles Menstruels
Make money trading opions.
The minimum deposit is 50$.
Learn how to trade correctly. How to earn from $50 to $5000 a day.
The more you earn, the more profit we get.
binary options broker
gambling bonuses
[url=”[Link deleted]spins[/url]
top casino site
Zithromax Fever <a href=[Link deleted]for sale on ebay Viagra Vente Libre Paris
I think this is one of the most important information for me.
And i am glad reading your article. But wanna remark on some general things, The
website style is perfect, the articles is really great :
D. Good job, cheers
Keflex For Staff Infection <a href=[Link deleted]stromectol for humans in mexico Pfizer Viagra Prix
Prostate Fexofenadine Steriods Cephalexin <a href=[Link deleted]online Comprar Cialis Farmacia
acheter cialis generic4u <a href=[Link deleted]stromectol 12mg
Nonprescription Orlistat <a href=[Link deleted]brand name
Unquestionably believe that which you said. Your favorite reason seemed to be on the web the easiest thing
to be aware of. I say to you, I definitely get
annoyed while people consider worries that they plainly don’t know about.
You managed to hit the nail upon the top and also defined out the whole thing without having side effect , people can take a signal.
Will probably be back to get more. Thanks
Sports betting. Bonus to the first deposit up to 500 euros.
sports betting
dating gay bear memphis
[url=”[Link deleted]gay online dating[/url]
gay free dating site
top gay dating sites dallas texas
[url=”[Link deleted]chubby chub gay dating[/url]
gay dating machismo
gay chubby dating
[url=”[Link deleted]gay men dating sites missouri[/url]
palm springs ca mature gay bisexuak dating
my dating sites
[url=”[Link deleted]singles dating search[/url]
online free dating site
local online dating
[url=”[Link deleted]ads[/url]
juicydatessites
chubby chub gay dating
[url=”[Link deleted]boys in tampa fl dating[/url]
when a secretive commitment phobic guy you are dating is really gay
Have you ever earned $765 just within 5 minutes?
trade binary options
dating sites nl
[url=”[Link deleted]dating sites for men[/url]
date women free
busted for using someone’s photo in a gay dating website
[url=”[Link deleted]gamer dating sites[/url]
free gay twink dating
Many companies are known for theіr produt development. Tһat is thеir expertise.
As senior account executive fоr business development at Nutritional Products
International, Ӏ have ᴡorked with brands that have creatwd aand developed innovative products tһat consumers woսld wаnt t᧐ buy.
Βut thesе companies don’t have thе staff ⲟr knowledge to successfսlly laaunch their products in tһe U.S.
This іs why mahy domestic аnd international health
ɑnd wellness brands reach oout tⲟ NPI.
Launching products іn the U.S. іs ouг expertise.
Оn ɑ daily basis, I researcһ companies in thee health аnd wellnes sectors, ԝhich is hoԝ I came aϲross yоur brand.
NPI, a global brand management company based іn Boca Raton, FL.,
сan helр yօu.
Through a one-ѕtop, tyrnkey platform ϲalled the “Evolution of Distribution,” NPI ɡives you all thhe expertise ɑnd
services you need when you launch үour product line heге.
We Ƅecome yor headquarters іn the United States.
Ԝhat dоеs NPI do? We import, distribute, and market үoᥙr product
ⅼine.
When youu w᧐rk with NPI, ʏou don’t need to hire a U.S.
sales ɑnd support team oг contract witһ
ɑ higһ-priced Madison Avenue marketing agency.
NPI, ɑlοng with itѕ sistwr company, InHealth Media, collaboratively
ԝork to market your products to consumers ɑnd retailers hroughout tһe U.S.
For mⲟre infߋrmation, pleaee reply tߋ thi email or contact me ɑt MarkS@nutricompany.com.
Respectfully,
Mark
Mark Schaeffer
Senior Account Executice fߋr Business Development
Nutrritional Products International
150 Palmetto Park Blvd., Suite 800
Boca Raton, FL 33432
Office: 561-544-071
MarkS@nutricompany.сom
date free internet
[url=”[Link deleted]singles[/url]
free chat and dating online
best gay dating app for android
[url=”[Link deleted]dating virginia[/url]
gay christians dating
Internet earnings – attract new clients to binary options and get profit up to 50% (from $100-$50,000 per
month). Payouts every week. Read more here.
affiliate
online casino us
[url=”[Link deleted]online real money usa[/url]
best no deposit bonus
darknet online drugs dark markets belarus
Time to buy bitcoin at a bargain price.
binance coinmarketcap
women dates local no fee
[url=”[Link deleted]
best dating service
russian darknet market buying drugs online
dark markets monaco working darknet markets 2022
guide to darknet markets back market legit
black market online darknet market stats
drug market darknet dark web cvv
darknet market url list cannahome link
dark markets ukraine darkweb markets
buying drugs online versus project market url
мега онион ссылка мега
зайти на мегу mega market
cp links dark web crypto market darknet
мега шишки зеркало мега
магазин даркнет ссылка мега
Cocorico Market darknet market comparison
dark market buy real money
alphabay market darknet market black
darknet market pills vendor shop online without cvv code
мега onion ссылка сайт мега
red ferrari pills top ten dark web
top darknet markets buy darknet market email address
dark web sites best tor marketplaces
dark market dark web markets
the darknet market reddit the dark web links 2022
how big is the darknet market credit card dumps dark web
active darknet market urls darknet markets 2022
how to buy bitcoin for the dark web deep web drug links
cannabis dark web dark markets austria
onion link search engine darknet markets florida
мега магазин mega магазин
tor drugs cannazon link
dark markets denmark dark web marketplace
darknet market list reddit
dark web drug markets best dark web markets
tor drugs darknetlive
best darknet market for weed 2022 drug market darknet
bohemia url best australian darknet market
onion dark web list market cypher
archetyp darknet market dark markets ukraine
darkweb форум russian anonymous marketplace
fake id dark web 2022 Heineken Express Market
darkmarket 2022 darknet market link updates
best website to buy cc dark markets ukraine
onion directory 2022 darknet markets that take ethereum
biggest darknet market dark markets denmark
dark market 2022 dark markets portugal
dark markets czech republic darknet steroid markets
mega зеркало мега нарко
how to get on darknet market popular darknet markets
dark web vendors buying darknet drugs
darknet markets for steroids monero darknet market
darknet market links 2022 reddit alphabay link
tor darknet market address darknet markets florida
dark markets france ethereum darknet markets
dark web in spanish brick market
reddit darknet market list steroid market darknet
dark websites bohemia link
darknet buy drugs tor2door link
onion live links darknet market alaska
mega онион сайт мега онион сайт
top darknet markets 2022 guns dark market
darknet market links 2022 reddit reddit darknet markets uk
access darknet markets darknet sites drugs
сайт даркнет мега онион сайт
escrow dark web best mdma vendor darknet market reddit
darknet wiki link drugs on the dark web
мега наркотики mega market
buying credit cards on dark web working darknet market links
tor market links 2022 incognito market url
links the hidden wiki good dark web search engines
how to access darknet markets versus darknet market
best darknet market reddit darknet markets still up
мега онион сайт мега купить соль
how to get on darknet market darknet market forum
dark markets san marino buying credit cards on dark web
darknetlive alphabay market net
ссылки на даркнет мега кокаин
current darknet market list versus link
darknet markets list reddit darknet market black
dark markets usa darknet market package
darknet market alphabay search deep web engine
darknet guns drugs how to access darknet markets reddit
best darknet market reddit 2022 best darknet market uk
dark markets brazil
dark markets slovenia cvv black market
drugs onion how to buy drugs dark web
Kingdom url pyramid pill
мега онион сайт mega market
onion deep web wiki darknet markets reddit
xanax on darknet litecoin darknet markets
deep web links 2022 reddit darknet links 2022 drugs
fake id dark web 2022 dark markets sweden
новое зеркало мега мега сайт ссылка
currently darknet markets darknet markets norway 2022
pink versace pill darknet markets list reddit
buying drugs on darknet onion links 2022
best mdma vendor darknet market reddit dxm pills
buying drugs on darknet alphabay market onion link
мега нарко mega onion оффициальный сайт
how to get on the dark web android counterfeit money deep web
trusted darknet vendors how to browse the dark web reddit
best darknet market for weed shop valid cvv
darknet guide best deep web markets
darknet market reddit darknet cannabis markets
safe darknet markets orange sunshine pill
darknet market deep dot web grey market darknet link
black market sites 2022 links deep web tor
darknet market drug prices deepdotweb markets
mega зеркало darknet магазин
2022 darknet market fake id onion
how to access the dark web reddit pax marketplace
mega сайт сайты даркнет
french deep web link dark web adderall
Cocorico link guide to using darknet markets
buy bank accounts darknet the dark market
darkweb markets darknet market place search
google black market dark web drugs australia
deep web search engine url dark markets russia
Kingdom Market url black market alternative
darknet market sites dark web site list
мега скорость mega сайт
магазин мега мега официальный сайт
grey market darknet link darknet drug links
darknet drug vendor that takes paypal wiki sticks drugs
darknet telegram group darknet sites
мега кокаин мега онион
dark markets malta deep web drugs reddit
Though I ll admit, if I had to choose between Neo and Juice, I d definitely opt for the latter <a href=[Link deleted]place to buy cialis online reviews
buying drugs online on openbazaar best tor marketplaces
dark markets malta top darknet markets 2022
cheapest drugs on darknet darknet markets list reddit
black market website legit links the hidden wiki
dark web sites name list reddit darknet markets links
new dark web links darknet markets florida
darknet guide archetyp market link
best darknet market for weed 2022 incognito market
access darknet markets duckduckgo onion site
what darknet markets are up asap link
how to access the dark web reddit darknet sites
Kingdom Market darknet cypher darknet market
мега даркнет mega market
black market online darknet reddit market pills
dark markets norge darknet markets up
darknet market google weed only darknet market
shop online without cvv code darknet drug market list
best current darknet market how to buy from darknet markets
drug trading website Heineken Express darknet
how to access the dark web 2022 dark markets spain
deep cp links tor markets links
mega онион сайт мега купить
gray market place darknet guns market
versus market link search darknet markets
dark web store project versus
dark markets norge best website to buy cc
what darknet markets are still up dark web search engines link
berlin telegram group drugs dark markets estonia
мега купить соль mega онион
darknet union alphabay market link
what is the darknet market reddit darknet markets noobs
darknet xanax alpha market url
darknet market dash dark market onion
darknet prices darknet markets reddit
new darknet market reddit free deep web links
darknet market thc oil darknet market bust
bitcoin dark web black market website legit
darknet drugs url tor2door market darknet
onion directory list cannazon market url
Abacus link onion seiten 2022
can you buy drugs on darknet alphabay url
onion deep web search history of darknet markets
darknet drug vendor that takes paypal xanax on darknet
new alphabay darknet market best darknet market for counterfeit
мега зеркало мега сайт ссылка
how to find the black market online onion live
versus project market darknet darknet markets australia
bitcoin drugs market dark net market list
dark markets peru onionhub
dark markets argentina tor darknet market
darknet market drug prices darknet markets noob
best darknet market for lsd darknet seiten dream market
магазин мега mega onion shop
how to buy bitcoin for the dark web
deep deep web links tor markets links
incognito url deep web market links reddit
darknet onion markets darkweb форум
buying from darknet market with electrum darknet serious market
largest darknet market bitcoin darknet drugs
mega onion зеркала мега мефедрон
darknet drug market url safe darknet markets
darknet markets lsd-25 2022 pink versace pill
legit darknet markets 2022 dark web illegal links
how to access the dark web 2022 darknet market reddit
buy drugs on darknet versus project darknet market
the onion directory versus market url
how to buy bitcoin and use on dark web dark web markets reddit
best dark web markets 2022 dark web hitman for hire
top darknet market 2022 urls for darknet markets
dark net markets deep web drug url
dark websites reddit darknet drug vendors
onion link reddit counterfeit money onion
archetyp market link dark markets malaysia
dark web steroids darknet market carding
hidden financial services deep web what darknet markets are up
black market websites 2022 reddit darknet markets uk
dark web engine search bohemia market link
darknet market carding dark web in spanish
dark markets czech republic reddit darknet market links
black market sites 2022 brick market
мега шишки ссылка мега
buy drugs from darknet darknet markets for steroids
мега купить mega onion оффициальный сайт
how to get on darknet market sichere darknet markets 2022
onion marketplace drugs darknet markets onion address
working darknet market links guide to darknet markets
reliable darknet markets lsd drug wiki
darknet software market top ten dark web sites
mega market ссылка мега
red ferrari pills updated darknet market links 2022
dark markets brazil best deep web markets
dark market 2022 trusted darknet markets
archetyp link best darknet markets for vendors
reddit best darknet market dark markets sweden
dark web links 2022 tor markets 2022
canazon dark markets san marino
black market website dark markets albania
магазин мега мега онион сайт
cannahome market url dn market
reddit darknet market links darknet illicit drugs
dark markets russia deep dot web links
dark web hitman for hire which darknet market are still up
buying drugs on darknet reddit black market alternative
deep web cc shop
onion link reddit darknet market fake id
cannazon market darknet naked lady ecstasy pill
history of darknet markets reddit darknet market list
мега onion ссылка mega даркнет
best darknet market for counterfeit black market drugs
what darknet markets sell fentanyl darknet markets 2022 updated
dark web market deep net websites
back market trustworthy deep net links
buying darknet drugs dark markets greece
Kingdom Market link darknet list
reddit darknet market noobs dark web step by step
dream market darknet link darkweb форум
incognito market url reddit darknet market superlist
darknet market list 2022 best dark web markets 2022
best dark web links legit darknet sites
alphabay market url darknet adresse dark web market links
Kingdom Market darknet assassination market darknet
adresse dark web darknet market steroids
dark markets france tor market darknet
drug trading website dark web cvv
new darknet markets 2022 reliable darknet markets lsd
best darknet drug sites accessing darknet market
how to access the dark web through tor darknet drug markets reddit
darknet market dash deep web canada
mega сайт mega ссылка
dark websites reddit dn market
darknet drugs shipping deep web trading
dxm pills deep dot web links
tor market list dark markets luxembourg
mega сайт mega market
cannahome market url darkmarket list
darknet links markets illegal black market
mega ссылка mega onion shop
dark markets denmark vice city market darknet
trusted darknet markets darknet illegal market
dynabolts pills reddit darknet market uk
dark markets albania site darknet market
counterfeit money dark web reddit darknet stock market
versus project darknet market credit card dumps dark web
legit darknet markets 2022 darknet market litecoin
darknet credit card market r darknet market
dark markets poland darknet market controlled delivery
dark web search engines link alphabay market
мега купить соль мега зеркало
cvv black market deep web cc sites
dark web markets 2022 australia darknet market avengers
reddit darknet market how to reddit best darknet market
darknet drugs sites tor2door market darknet
underground dumps shop
darknet dream market reddit online black marketplace
deep web drug url darknet market iphone
tor market links blue lady e pill
dark web fake money dark web drugs
mega сайт зеркало мега
access the black market black market prescription drugs for sale
deep web marketplaces reddit darknet markets norway 2022
buying drugs off darknet dark markets monaco
onion market darknet market reddit 2022
how to install deep web active darknet markets 2022
dark web cvv darknet markets address
Kingdom Market url dark websites reddit
counterfeit money dark web reddit darknet market adderall
tor2door link safe darknet markets
dark net guide monkey x pill
darknet markets best black market websites tor
trusted darknet vendors dark markets switzerland
black market website legit darknet market list 2022
best darknet market for psychedelics alphabay market darknet
Cocorico url dark markets singapore
Kingdom Market link tramadol dark web
darknet магазин зелья mega зеркало
naked lady ecstasy pill dark web links 2022
how to get to darknet market safe reddit darknet market australia
reddit darknet market how to onion live
darknet drugs price darknet drugs malayisa
darknet drug store the real deal market darknet
мега ссылка mega onion ссылка
<a href=[Link deleted]prescription online Talk with a healthcare provider if this is the case, to determine whether chewable tadalafil or other medicines are the best route forward for you
black market cryptocurrency tormarket onion
onion dark web list dark market sites
drug market darknet websites wiki
deep web cc shop anadrol pills
reddit best darknet market black market prescription drugs
dark web poison active darknet market urls
deep market links deep web tor
best darknet market for psychedelics dark markets peru
versus project market dn market
dark web links adult live onion market
darknet onion links drugs deep web cc sites
мега скорость мега сайт ссылка
darknet marketplace drugs trusted darknet markets
darknet drug market darknet market lightning network
what darknet markets are available
how to darknet market darknet market security
biggest darknet markets darknet markets for steroids
dark markets new zealand darknet market alphabay
the darknet drugs french deep web link
ethereum darknet markets tramadol dark web
trusted darknet vendors urls for darknet markets
мега вход мега onion
darknet market updates 2022 alphabay market url
reddit best darknet market darknet drug delivery
cannazon link darknet paypal accounts
dark markets italy best lsd darknet market
gbl drug wiki underground website to buy drugs
russian darknet market drug website dark web
reddit darknet markets 2022 dark web links 2022 reddit
fullz darknet market how to access darknet markets
darknet drugs safe cypher url
best darknet drug market 2022 dark web onion markets
best darknet market for weed dark markets slovenia
tor2door market darknet biggest darknet market 2022
onion dark web list deep dark web markets links
mega onion зеркало сайты даркнет
french dark web best darknet markets for vendors
buds express dream market darknet url
darknet markets black market deep
black market url deep web darknet market comparison chart
dark markets south korea hitman for hire dark web
сайты даркнет мега кокаин
drugs on the darknet buying darknet drugs
incognito url darknet markets availability
зайти на мегу мэги сайт
top darknet markets list hacking tools darknet markets
dark web fake money shop on the dark web
phenylethylamine active darknet markets
Cocorico Market steroid market darknet
cheapest drugs on darknet drug trading website
wiki darknet market darknet drugs market
Il principio attivo del Cialis ГЁ il Tadalafil <a href=[Link deleted]generic cialis online cheap
versus project darknet market darknet markets reddit
darknet drug market list asap market link
сайт даркнет мега наркотики
darknet market script darknet guns drugs
working dark web links
how to pay with bitcoin on dark web dark web markets 2022 australia
counterfeit money dark web reddit darknet markets list reddit
pink versace pill dark markets india
dark web fake money duckduckgo dark web search
dark web links reddit working darknet market links
archetyp link deep web weed prices
online black market electronics link de hiden wiki
deep onion links darknet sites drugs
darkmarket url best darknet markets
мега мефедрон mega онион
hacking tools darknet markets darknet market reviews
alphabay darknet market dark markets turkey
vice city market darknet reddit working darknet markets
onion linkek reddit darknet market deals
hidden uncensored wiki darknet market adderall prices
what darknet markets are still open best darknet markets for vendors
versus market link best darknet market for counterfeit
darknet markets without login darknet black market
mdm love drug best darknet market for counterfeit
dark web site list how to use onion sites
ссылки на даркнет мега шишки
how to get to the black market online dark markets greece
search deep web engine how to use darknet markets
cp links dark web market cypher
mega магазин мега нарко
dark web buy credit cards deep web weed prices
best darknet markets for marijuana black market access
reddit darknet markets 2022 tor dark web
darknet market updates 2022 darknet onion markets reddit
dark web markets 2022 what darknet market to use now
магазины даркнета mega онион
mega onion ссылка darknet сайт
dark markets spain darknet drugs dublin
what darknet markets are up best darknet markets
best darknet market for weed 2022 deep dot web links
reddit best darknet market best darknet drug market 2022
reddit best darknet markets onion live
unicorn pill darknet dream market reddit
tor2door link onion deep web search
dark markets ireland drug market darknet
asap market how to shop on dark web
deep web drug store deep web links 2022 reddit
most popular darknet market dark markets portugal
tor darknet market dark web drugs ireland
legit onion sites
top dark net markets what darknet market to use
мега скорость мега магазин
darknet drugs india gbl drug wiki
bitcoin market on darknet tor darknet markets 2022 reddit
what darknet markets still work dark net market links 2022
shop valid cvv best deep web markets
link de hiden wiki darknet selling drugs
dark markets norge what bitcoins are accepted by darknet markets
мега шишки сайты даркнет ссылки
credit card dark web links best onion sites 2022
best darknet drug sites deep cp links
urls for darknet markets black market online
cheapest drugs on darknet tor market url
deep web onion url dnm market
biggest darknet market darknet drugs malayisa
orange sunshine pill deep web links 2022
xanax on darknet best darknet market uk
tor dark web dark web search engine 2022
new darknet markets 2022 dream market darknet link
cannahome url dark markets usa
dark markets ireland dark markets germany
tor markets darknet market ddos
mega даркнет мега скорость
drug markets dark web search darknet markets
mega ссылка мега ссылка
best card shops vice city darknet market
dnm market alphabay darknet market
deep web cc sites wired darknet markets
new darknet markets best current darknet market
darknet markets norge darknet market noobs bible
how to search the dark web reddit bitcoin black market
магазин даркнет мега onion зеркало
dbol steroid pills lsd drug wiki
buying on dark web darknet market reddit list
tor darknet market address dark net market list
how to access deep web safely reddit darknet site
how to access the dark web reddit dark markets bolivia
darknet best drugs darknet список сайтов
Cocorico Market dark markets south korea
australian dark web vendors alpha market url
dark web onion markets darknet market links 2022 reddit
where to find darknet market links redit dark web in spanish
reddit working darknet markets
dark web search engines link how to enter the black market online
dark web cvv archetyp link
мега ссылка mega онион
darknetlive australian dark web vendors
deep onion links mdm love drug
xanax darknet markets reddit uncensored deep web
best darknet market may 2022 reddit underground market place darknet
dark markets lithuania brucelean darknet market
gay phone chat meet locals “welcome to the
[url=”[Link deleted]gay web cam chat rooms[/url]
local gay chat rooms
как зайти на мегу ьупф ьфклуе
reddit darknetmarket darknet market and monero
darknet xanax reddit darknet market australia
best black market websites berlin telegram group drugs
where to find darknet market links reddit best darknet market
dark web engine search tor2door market darknet
Cocorico Market dark web website links
buy real money dark markets paraguay
Abacus Market darknet 2022 darknet markets
current list of darknet markets dark market url
tor link list 2022 best darknet market now
darknet gun market black market net
tor market links the darknet market reddit
мега зеркало mega зеркало
buying credit cards on dark web russian anonymous marketplace
darknet market guide reddit dark web xanax
мега сайт ссылка mega onion зеркало
darknet drug market url grey market link
best working darknet market 2022 dark markets croatia
drugs sold on dark web alphabay market url
darknet drugs reddit darknet market guide
live onion market Abacus Market
search deep web engine darknet markets still up
naked lady ecstasy pill what is the best darknet market
dark markets russia what bitcoins are accepted by darknet markets
darknet market alphabay dark markets
darkmarkets dark markets moldova
cannazon url darknet market ranking
mega onion ссылка мега ссылка
mega onion оффициальный сайт мега onion зеркала
<a href=[Link deleted]cheap cialis online Nevertheless, Viagra should not be taken more than once daily, regardless of the dosage and drug form; different drug forms Every user has a specific preference when it comes to drug forms and ingesting these drug forms
bitcoin cash darknet markets darknet search engine
cannahome market darknet drug markets onion
alphabay darknet market darknet dream market reddit
darknet market status bitcoin darknet drugs
tor market darknet darknet market links buy ssn
darknet markets florida
зайти на мегу мега сайт ссылка
best black market websites the dark web url
the darknet markets darknet drug store
darknet markets dread tor darknet market
biggest darknet market 2022 dark markets usa
darknet list deep web link 2022
dark markets macedonia deep web directory onion
мега onion магазин мега шишки
deep web drug store archetyp market link
dark web cheap electronics best mdma vendor darknet market reddit
site darknet liste black market reddit
best darknet market for weed uk darknet search engine
alpha market url darknet markets best
pyramid pill search darknet market
site darknet onion how to buy drugs on the darknet
drugs on deep web dark market url
dark net markets darknet markets list
darknet market status darknet search
deep dot web replacement incognito link
mega market darknet магазин зелья
guide to using darknet markets drugs on deep web
mega зеркало mega onion ссылка
tor darknet market drugs sold on dark web
dark web drugs bitcoin agora darknet market
current darknet markets reddit tor market url
project versus dream market darknet link
reddit darknet market 2022 reddit darknet markets 2022
versus market link ketamine darknet market
the armory tor url black market online website
darknet markets norge most popular darknet market
reddit darknet markets 2022 darknet market listing
мега нарко мега onion зеркало
cannazon market darknet best darknet market australia
мега сайт мега onion
search darknet markets reddit darknetmarket
deep dark web black market webshop
what darknet markets are available darknet market package
dark markets montenegro underground market online
dark web drugs ireland online black market electronics
darknet market links buy ssn
adresse onion black market darknet markets availability
what is escrow darknet markets Cocorico darknet Market
мега нарко мега кокаин
dark market links darknet market noobs reddit
darknet market alaska dark markets norge
safe list of darknet market links how to access the dark web through tor
the dark web links 2022 dark markets ukraine
dark web live buying drugs on darknet reddit
mega market сылка на мегу
onion tube porn dark web drug markets
darknet market adderall dark web hitman for hire
darknet links market darknet sites drugs
darknet market onions dark markets estonia
darknet credit card market 2022 darknet markets
darknet market black pyramid pill
dark markets czech republic tor markets links
best darknet market may 2022 reddit hire an assassin dark web
darknet black market list darknet market iphone
darknet market oxycontin drugs on the dark web
зеркало мега мега мефедрон
mega onion мега официальный сайт
dark market link deep web drug markets
dark net dark market url
darknet market deep web sites
dark market url darknet marketplace
tor markets dark web sites
сайт даркнет mega onion зеркала
мега нарко mega onion оффициальный сайт
darknet websites tor market
best darknet markets dark market onion
best darknet markets darknet market links
dark web market dark web market list
darkmarket link dark market onion
darknet links tor markets links
blackweb official website blackweb
dark market url tor market url
darkweb marketplace blackweb
dark web site deep web drug url
сылка на мегу mega onion shop
darknet drug links deep web search
dark web drug marketplace dark internet
blackweb dark website
darkmarket url dark market list
blackweb blackweb official website
deep web sites darknet site
darknet websites dark web market links
dark web sites links darkmarket
darknet marketplace drug markets dark web
tor marketplace drug markets onion
bitcoin dark web darknet drugs
darknet drugs darknet drug store
deep web drug url darknet sites
darknet drugs bitcoin dark web
drug markets onion darknet markets
deep web markets darknet market
darknet магазин зелья mega onion
tor market links darkmarket url
deep web drug store deep web markets
deep web drug markets drug markets dark web
tor dark web darknet market list
darknet markets dark websites
darknet seiten dark websites
dark web websites darknet search engine
dark web search engine darknet markets
deep web drug store deep web drug links
tor darknet onion market
dark web market links dark web websites
мега ссылка зайти на мегу
darknet links dark market list
darknet market links darknet site
darknet sites darknet marketplace
tor market darknet markets
deep dark web darknet links
dark web link deep web drug url
tor markets links deep web drug links
darkmarkets dark web market links
tor market darknet links
dark market 2022 dark web link
deep web sites deep web drug store
мега магазин мега шишки
dark market 2022 drug markets onion
darknet market bitcoin dark web
dark web sites links deep web drug markets
drug markets onion tor darknet
tor markets links black internet
мега onion зеркала мега вход
deep dark web deep web sites
free dark web deep web sites
darkmarket url deep web drug markets
dark web market darknet seiten
darknet drug links dark web markets
darknet seiten onion market
darknet market list darknet drug market
deep web drug links darkmarket
darknet websites dark market list
deep web drug store darkmarket url
black internet how to access dark web
dark web sites links how to get on dark web
best darknet markets darknet drugs
dark market link darkmarket list
мега наркотики даркнет ссылки
darknet site darknet links
dark web drug marketplace dark web links
dark market dark web access
how to get on dark web dark web search engines
dark net darknet seiten
tor darknet onion market
deep web drug url deep dark web
mega onion оффициальный сайт мега сайт ссылка
сайт даркнет даркнет ссылки
deep web drug url dark market
darkmarket url dark web site
darknet drug store tor market links
tor market url dark market onion
dark website tor markets
dark web market tor markets
darkmarket url darknet site
dark web sites links dark web market list
dark web sites links darknet links
darkmarket darknet marketplace
onion market dark web search engines
how to access dark web free dark web
darknet marketplace darknet seiten
darknet магазин зелья ьупф ьфклуе
darknet market dark market onion
deep web search darkmarket 2022
darknet drug links the dark internet
black internet deep web sites
darknet market links dark net
how to get on dark web deep web markets
darkmarkets darknet sites
darknet market links dark web market list
deep web sites dark net
мега скорость mega зеркало
dark web sites links darknet links
tor markets 2022 darknet markets
tor market links darknet site
tor markets 2022 deep dark web
dark market list tor markets links
dark market list dark web search engines
darkmarket list darknet site
dark markets darkweb marketplace
dark website dark web link
dark web markets dark web site
мега сайт ссылка мега нарко
the dark internet darknet market
tor markets 2022 dark websites
dark web market dark web markets
dark market link dark web websites
deep web search dark web links
blackweb official website darknet site
даркнет ссылки mega market
mega даркнет mega зеркало
dark market onion tor darknet
tor market darknet seiten
darknet drugs dark web market links
tor marketplace dark web access
deep web drug url dark web markets
dark web search engines darkmarket
how to access dark web bitcoin dark web
dark web links darknet marketplace
dark web market links dark internet
darknet market how to access dark web
deep web search onion market
darknet drug links tor marketplace
how to access dark web dark markets
deep web search dark web site
dark web markets tor dark web
мега onion зеркало мега официальный сайт
blackweb official website dark web access
darknet drug links deep web drug url
darknet sites dark web websites
darkmarket how to access dark web
dark market 2022 dark web links
dark web access dark net
tor market url blackweb official website
how to get on dark web darknet links
dark market list dark market
даркнет сайты магазин mega зеркало
dark internet dark web markets
darkmarket 2022 deep dark web
deep web drug url tor darknet
darknet search engine dark web access
gay webcam chat sites
[url=”[Link deleted]gay sex chat[/url]
chat with gay thai boys
darknet seiten dark market link
dark market darknet drugs
tor darknet dark web link
drug markets dark web dark market link
dark web markets tor market
how to access dark web blackweb official website
darknet drug links free dark web
ссылка мега магазины даркнета
darknet marketplace dark internet
darknet markets tor market links
tor market dark web market list
dark market 2022 darknet drug store
drug markets dark web dark net
darknet drugs dark web links
darkmarket url darknet drug market
darkmarket list dark web sites links
free dark web tor market links
black internet dark market link
blackweb official website tor market links
darkweb marketplace blackweb official website
deep web drug url dark web site
deep web sites drug markets dark web
dark market list deep web sites
dark web sites darknet site
how to access dark web onion market
darknet market lists deep web markets
даркнет ссылки мега кокаин
dark web markets deep web sites
darknet drug market dark website
dark web sites dark market list
blackweb official website darknet search engine
drug markets onion tor dark web
deep web search dark website
deep web search dark net
dark web links dark web websites
mega onion зеркало ьупф ьфклуе
darknet markets darkmarkets
tor market url deep dark web
darkmarket 2022 tor market links
dark web market links dark market url
darknet market list dark market 2022
deep web markets tor darknet
darknet drug links darknet markets
how to access dark web dark market link
darknet market deep web drug links
dark markets 2022 darknet search engine
mega онион darknet магазин зелья
mega онион сайт мега сайт
darkweb marketplace dark markets 2022
mega onion ссылка магазин даркнет
tor markets links darknet sites
deep web drug links deep web drug links
the dark internet dark internet
dark web search engine bitcoin dark web
dark web market list how to get on dark web
darknet search engine deep web drug markets
darknet marketplace darknet market list
darknet market bitcoin dark web
tor markets tor markets links
dark web search engines tor darknet
deep web links how to get on dark web
dark web site tor market links
dark net how to get on dark web
deep web drug links onion market
dark market onion tor markets
dark web link bitcoin dark web
tor marketplace deep web drug url
dark web market list the dark internet
darknet sites dark web search engine
tor dark web dark web sites links
dark market darkmarket 2022
dark web links dark web links
tor dark web dark web sites
мега сайт ссылки на даркнет
darknet site dark web drug marketplace
dark web search engine darknet drug links
dark market onion dark web access
tor marketplace tor markets links
dark market onion tor market links
deep web drug links dark market list
deep web sites drug markets onion
dark websites darknet markets
dark market 2022 dark web search engine
dark web sites deep web drug links
мега onion даркнет сайты магазин
free dark web deep web drug store
darknet websites darkmarket list
dark web search engines darknet market lists
darkweb marketplace tor marketplace
мега onion зеркало mega онион сайт
новое зеркало мега ссылка мега
мега onion оффициальный сайт мега купить соль
the dark internet the dark internet
bitcoin dark web deep web drug links
bitcoin dark web dark web search engines
darkmarkets darknet market lists
tor markets tor markets links
darkmarket 2022 dark web links
darknet market deep web drug markets
mega onion shop mega onion
dark web markets darkmarket list
dark markets deep web drug links
darkmarkets dark web market
darknet site darknet market lists
dark internet dark market
how to get on dark web dark web drug marketplace
darknet market list how to access dark web
darknet drug links dark web links
мега купить соль мега onion зеркала
best darknet markets deep web sites
darknet site darknet marketplace
darknet search engine dark web market list
deep web drug markets dark web access
tor darknet tor markets 2022
darknet drugs dark web markets
dark market url darknet drug links
dark net free dark web
dark web drug marketplace bitcoin dark web
darkmarket list dark web sites links
how to access dark web tor market url
darkmarket 2022 tor markets links
dark market url blackweb official website
dark websites black internet
dark web sites links dark net
tor marketplace darkmarket link
tor marketplace darknet market list
как зайти на мегу как зайти на мегу
darknet market lists deep web search
мега мефедрон мега онион
tor dark web deep web drug url
drug markets onion darknet links
bitcoin dark web dark web websites
deep web drug store darkmarket 2022
tor markets links dark web sites links
darkmarket link tor market url
darknet site deep web search
даркнет ссылки мега onion оффициальный сайт
dark web access dark web market links
darknet drugs deep web sites
darknet links dark markets 2022
darknet drug market free dark web
blackweb official website darkmarket url
how to access dark web deep web sites
tor markets links dark web site
deep web drug url deep web drug links
deep web search darknet links
tor darknet dark websites
darknet marketplace dark web sites links
dark net dark web search engines
mega onion зеркала мега onion зеркало
darknet markets tor market url
dark web market dark websites
darknet websites deep web sites
dark web drug marketplace deep web drug url
darkweb marketplace dark web market
мега скорость мега onion
black internet how to get on dark web
drug markets onion deep web drug markets
deep web drug url deep web drug links
darknet drugs best darknet markets
tor markets 2022 dark web access
tor darknet deep web sites
dark market deep web markets
darknet site deep web markets
tor market links tor marketplace
dark web market dark web search engine
dark web sites links drug markets dark web
best darknet markets dark internet
darknet market list dark web sites links
deep web drug markets free dark web
deep web drug url best darknet markets
dark web market links darknet drugs
dark web link dark website
darkmarket 2022 deep web search
магазин мега mega зеркало
ссылки на даркнет мега зеркало
dark internet deep web drug links
deep web links dark web market links
how to access dark web tor markets 2022
deep web drug store darknet markets
tor market url darknet site
bitcoin dark web darkmarket url
мега купить соль мега онион
deep web links tor market links
dark market list dark web access
deep web drug markets darknet search engine
darkweb marketplace darknet search engine
dark internet dark market list
как зайти на мегу мега onion оффициальный сайт
darknet market links dark web market links
darknet markets drug markets onion
darknet seiten how to access dark web
darknet marketplace darkmarket 2022
dark web access tor markets links
dark web link bitcoin dark web
darknet market darknet drug store
deep web drug markets dark web sites
blackweb official website dark web search engines
darkmarket dark market list
darknet market dark web search engine
best darknet markets darknet market links
мега мефедрон ьупф ьфклуе
dark web websites darknet market
dark markets tor market
dark websites dark websites
dark web market deep web search
dark market list darknet marketplace
mega зеркало darknet магазин
free dark web dark internet
deep web drug links dark web market list
dark web site darkmarket
deep web drug url dark web search engine
tor markets links dark web links
darknet market links darkmarket url
dark web sites darknet market links
darknet sites tor market links
deep web links dark markets
deep web links darknet drug market
the dark internet dark web search engines
dark web access dark web drug marketplace
tor market darknet websites
mega onion shop зеркало мега
сылка на мегу мега магазин
tor dark web darknet seiten
deep web sites darknet sites
мега сайт mega онион
mega даркнет мега купить соль
dark markets 2022 darknet market list
darknet site onion market
darknet seiten how to access dark web
dark market url tor dark web
darknet markets darknet drug links
dark market onion darknet websites
dark market list dark web link
darkmarket list darknet websites
dark web site dark web market
mega онион зайти на мегу
drug markets dark web dark websites
dark market link deep web links
darknet links darknet links
deep web drug store deep web markets
darknet drug store dark markets
dark internet dark website
darknet websites deep web drug markets
dark web search engine deep web drug store
dark markets dark web market links
tor market url best darknet markets
tor markets links dark web search engine
мега наркотики darknet магазин
tor market deep web drug url
darkmarkets darknet market list
darknet websites darknet seiten
tor markets tor market
dark web sites links blackweb official website
мэги сайт магазин даркнет
darkmarket url darknet market links
darknet search engine tor marketplace
tor marketplace darkmarket list
darknet websites blackweb official website
deep web drug links dark web sites
best darknet markets dark market
darknet search engine drug markets onion
darknet market list best darknet markets
dark web market links how to get on dark web
dark web search engine deep web drug store
мега onion mega сайт
darknet drug store darkmarkets
darknet сайт мега onion магазин
darknet site black internet
darknet site dark web link
gay chat apps for pc
[url=”[Link deleted]gay chat[/url]
gay men webcam chat rooms
tor markets links how to get on dark web
магазин даркнет зеркало мега
dark web search engines darkweb marketplace
мега onion ссылка официальный сайт мега
tor marketplace dark web link
dark market url dark web markets
darknet search engine drug markets onion
free dark web dark web access
dark market url tor market links
darknet market lists blackweb official website
deep web search blackweb official website
dark market link darknet websites
dark web links deep dark web
darkweb marketplace bitcoin dark web
deep web markets darknet links
dark web websites darknet markets
darknet market links tor marketplace
dark market dark market
deep web drug url deep web drug links
mega ссылка mega onion shop
free dark web darknet market links
dark websites deep web sites
onion market darknet drug links
dark web websites tor markets 2022
deep dark web blackweb official website
dark web links dark market 2022
deep web drug links dark web market links
darknet drugs darknet drugs
dark web websites blackweb
how to access dark web darknet markets
tor markets 2022 darknet site
free dark web darkmarket list
мега onion зеркала сылка на мегу
dark market onion tor darknet
darknet seiten dark internet
darknet market lists darknet sites
tor market url darknet drugs
<a href=[Link deleted]priligy Afterwards I was at Auschwitz at the time of the matter of Hungary, once because of the Kommerzialrat Storfer – this was the Storfer case – subsequently I was once in Auschwitz when it was described to me that the Hungarian gendarmerie had loaded the transports in a way which did not correspond to the directives, hereafter I was in Auschwitz
tor market url tor markets 2022
darknet sites best darknet markets
darknet market lists dark web market
сайты даркнет сылка на мегу
dark web drug marketplace darknet marketplace
tor marketplace tor market url
mega зеркало mega даркнет
ссылка мега mega onion ссылка
dark web drug marketplace tor dark web
tor market darkmarket list
tor markets deep web sites
darknet drug links tor darknet
dark web markets dark web links
free dark web darknet sites
darknet drugs darknet sites
darknet market links how to get on dark web
drug markets dark web darknet drug store
darknet market lists darknet search engine
dark market deep web search
mega даркнет мега onion зеркало
dark web link drug markets onion
dark website the dark internet
darknet market list deep web links
darknet seiten dark websites
dark website dark web search engines
dark web market links darknet markets
darknet websites dark web access
bitcoin dark web tor darknet
dark web links dark web site
ссылка на мегу mega сайт
deep web drug markets deep web markets
dark net darknet drug store
darkweb marketplace free dark web
darkmarkets drug markets onion
darknet seiten dark market url
dark web access dark market 2022
tor marketplace darknet seiten
darknet site dark web link
bitcoin dark web darknet market
tor markets darkmarket 2022
darknet site dark web search engine
dark internet dark web sites
darknet drug store drug markets dark web
darknet market lists tor markets 2022
мега онион сайт ьупф ьфклуе
tor market dark market
darknet market list bitcoin dark web
dark web link how to access dark web
mega онион сайт даркнет ссылки
магазин даркнет мэги сайт
dark web markets dark market 2022
mega market mega зеркало
tor markets links dark web sites links
deep web drug links dark market 2022
мега сайт даркнет сайты магазин
dark web market links tor dark web
darknet drugs darkmarket list
darknet market links darknet seiten
dark web access how to get on dark web
мега сайт darknet магазин
tor markets dark web market list
dark web market links dark web market list
Order Cialis for daily use online today <a href=[Link deleted]united states 12 Briefly, these are reduced nitric oxide NO cyclic guanosine monophosphate cGMP mainly in the prostate, urethra, and bladder but also in the pelvic neuronal and vascular bed; increased RhoA kinase pathway activity; increased autonomic nerve activity; and pelvic hypoxygenation and ischemia
darknet market darkmarket
blackweb tor markets 2022
tor marketplace drug markets onion
dark market url darkmarket list
dark markets darkmarket list
dark markets 2022 tor darknet
how to get on dark web darknet marketplace
dark websites darkmarket list
darknet links dark web link
ьупф ьфклуе даркнет магазин
dark web link deep web markets
black internet dark market link
dark market url deep web drug markets
darknet market links dark market onion
free dark web dark net
tor markets 2022 darknet market links
dark web access darkmarket url
dark web access deep web sites
deep web drug markets dark web links
how to access dark web blackweb
dark web market links tor market url
darkmarkets deep dark web
tor market links dark markets 2022
darknet search engine darknet markets
darknet markets blackweb
darknet drug market darknet market list
tor markets 2022 darknet markets
tor markets links deep web drug links
dark web markets dark web websites
мега даркнет mega onion оффициальный сайт
dark web sites links deep web markets
deep web markets tor markets 2022
darkmarkets darkmarkets
darknet sites darknet drug market
tor darknet deep web drug store
dark markets dark net
tor market tor markets
darknet drugs darknet market
darknet сайт ьупф ьфклуе
ьупф ьфклуе mega onion зеркало
мега шишки даркнет магазин
drug markets onion darknet market lists
dark market link darkmarket url
dark web site how to get on dark web
магазин даркнет мега официальный сайт
mega onion shop мега сайт
dark net dark web search engine
darkmarket 2022 dark web websites
best darknet markets dark web site
dark market onion tor markets 2022
dark market onion dark web search engines
dark market onion tor market links
tor market links darknet websites
the dark internet dark web market
deep web drug markets free dark web
black internet deep dark web
darkmarket list best darknet markets
darknet websites tor market links
deep web drug links darknet market
darknet search engine dark market onion
dark market link dark web search engine
мега кокаин мега onion зеркало
tor marketplace tor darknet
dark website deep web drug links
darknet drug store darknet market list
tor market links dark website
dark web link dark web markets
darknet market dark market 2022
darkmarket url dark web websites
deep web drug links dark markets 2022
dark market link dark web market
darknet market dark market onion
dark internet dark market onion
the dark internet darknet drug store
dark web site darknet drugs
deep web drug url darknet drugs
dark market list tor dark web
tor market links dark web site
best darknet markets deep web search
dark market list dark web links
darknet sites darknet search engine
mega сайт mega onion оффициальный сайт
dark market list darknet links
drug markets onion darknet sites
dark markets 2022 dark web market list
darknet market dark web market
dark web search engines dark web market list
deep web drug url deep web search
tor market darknet seiten
dark web search engines darkmarket link
darknet markets dark market list
mega даркнет mega onion зеркало
dark web markets dark web search engines
mega onion ссылка mega market
darkmarkets the dark internet
darknet market deep web markets
сайт мега mega onion ссылка
зеркало мега mega магазин
dark internet dark web market list
darknet drug store tor market
dark web site tor market links
dark markets 2022 best darknet markets
mega зеркало darknet сайт
how to get on dark web bitcoin dark web
dark web search engine darkmarket url
dark market list darknet drugs
darknet drug store darknet markets
darknet search engine drug markets onion
deep web drug links blackweb official website
darknet site deep web drug links
darknet drug store dark web search engines
drug markets onion dark web access
deep web links darkweb marketplace
onion market darkmarket url
мега магазин мега ссылка
deep web links tor market url
deep dark web dark market onion
darkmarket deep web drug store
tor markets 2022 dark market 2022
darknet market the dark internet
dark web search engine darknet market links
darknet site dark web site
dark markets 2022 dark web market
darknet drug store tor market
dark web access dark market onion
how to get on dark web dark web links
dark web links darknet websites
darknet search engine dark web site
darknet market lists dark market list
dark web search engines dark web market list
dark markets 2022 blackweb official website
darknet drug links dark web market list
onion market dark web drug marketplace
сайт даркнет официальный сайт мега
сылка на мегу мега купить соль
dark web market list blackweb official website
mega onion зеркала мега onion магазин
tor market links deep web drug markets
dark market 2022 deep web links
deep web markets darkmarket link
deep web sites dark web links
dark market url deep web markets
deep web drug store how to access dark web
dark web websites drug markets onion
dark web link darknet marketplace
darknet market dark web market links
tor markets darknet marketplace
ьупф ьфклуе мега купить
mega onion shop магазин даркнет
tor dark web darknet links
free dark web tor markets links
tor market deep web sites
Because the muscles naturally react by clenching and relaxing around the stem and head of the plug, it often gives the impression of being plugged up <a href=[Link deleted]priligy
darknet marketplace darknet market
deep web markets dark web search engine
dark web markets darknet markets
dark websites darknet sites
mega onion сайт даркнет
darkweb marketplace dark web market
blackweb darknet drugs
darknet drug market deep web drug links
tor markets darknet site
darknet drug links free dark web
dark markets dark web market
dark web access dark website
dark market onion dark web links
darknet drug store dark market url
ссылка на мегу мега сайт ссылка
dark websites darkmarket link
darknet seiten deep dark web
darknet drug market onion market
dark web links black internet
darknet market links dark market onion
dark markets free dark web
darkmarket list dark web site
dark market tor market url
dark web sites dark web search engine
dark web websites dark market onion
dark internet dark internet
how to get on dark web dark web market links
dark web access deep web drug links
dark web search engines dark markets 2022
tor markets 2022 dark market list
darknet market links darknet market
даркнет сайты магазин мега зеркало
mega сайт мэги сайт
сайты даркнет сылка на мегу
drug markets onion deep web sites
darkmarkets darknet sites
dark market onion dark market link
darknet search engine deep web search
dark web sites darknet market links
tor market url deep dark web
darkmarket list tor darknet
сайт даркнет сылка на мегу
dark web market links dark website
cookeville tn gay chat
[url=”[Link deleted]chat am[/url]
gay teen chat with nudes
dark website dark market link
darkmarket link dark web markets
даркнет ссылки mega onion оффициальный сайт
darkmarket darknet market list
tor markets links tor markets 2022
dark web market tor dark web
darknet drug market how to access dark web
darkmarket list how to access dark web
официальный сайт мега зеркало мега
tor market url deep web links
tor markets dark web websites
dark markets deep web drug links
deep web drug markets darknet drug market
tor markets free dark web
darknet сайт мега онион сайт
tor markets links darkmarket
deep web markets darknet seiten
deep dark web darknet links
dark markets best darknet markets
darknet search engine the dark internet
dark web websites tor markets links
darkmarket link dark web market
мега вход даркнет сайты магазин
dark web access drug markets onion
dark market url drug markets onion
dark website deep dark web
darknet market links deep web drug url
dark web search engines dark market list
dark internet tor market links
darkmarket list dark net
dark web markets darknet links
deep dark web deep web markets
darknet market lists dark web market list
tor markets 2022 tor dark web
dark web websites dark market
deep web drug store dark web search engines
dark web search engines dark market list
tor darknet dark web link
dark web site dark web link
mega onion оффициальный сайт сайты даркнет ссылки
мега ссылка mega онион
мега onion ссылка мега магазин
tor markets 2022 darknet seiten
dark web search engine onion market
dark web markets bitcoin dark web
darknet market links dark market list
dark web market links darknet seiten
blackweb official website bitcoin dark web
darkmarket 2022 tor darknet
tor markets links drug markets onion
мега вход мега onion зеркала
ссылка мега mega onion
dark web sites darknet marketplace
dark web websites tor markets
tor market darknet drug market
blackweb deep web markets
drug markets onion best darknet markets
dark web sites links dark web market list
darkmarkets how to get on dark web
tor market links dark web search engines
dark web link deep web drug markets
мега шишки mega магазин
dark web sites links deep web markets
dark web search engine deep web search
drug markets dark web darknet drug store
darkmarket list darkweb marketplace
darknet search engine tor markets
dark web site darkmarkets
dark web drug marketplace tor markets 2022
mega market мега onion ссылка
dark markets tor market links
best darknet markets deep web drug markets
darkmarket link darkmarket 2022
даркнет ссылки мега даркнет
dark net dark website
tor market url dark net
dark markets 2022 dark web market links
tor market links dark market 2022
darknet site darkmarket link
dark market onion darkmarket url
tor marketplace deep web links
dark market 2022 dark web links
darknet market links dark web market list
blackweb official website dark web search engine
tor darknet tor markets 2022
tor markets links deep web drug url
dark market dark markets
dark web market links how to get on dark web
dark market link deep web drug links
мега мефедрон ссылка мега
мега onion зеркало мега скорость
free dark web how to get on dark web
darknet websites darkmarkets
darknet sites darknet market list
how to get on dark web dark markets 2022
dark net darknet market lists
darkmarket darknet market
darkmarket 2022 darknet market list
мега мефедрон mega onion
mega онион сылка на мегу
dark web market list darkmarkets
darknet drug store bitcoin dark web
darknet marketplace deep web search
darknet drugs darknet sites
dark web search engine tor markets links
darkmarket url tor market
darknet магазин зелья mega сайт
best darknet markets deep web links
darknet markets dark web search engine
how to get on dark web tor market links
dark markets 2022 deep web drug markets
tor market darknet websites
darknet marketplace dark web sites links
darkmarket list darknet market
dark market url dark market onion
dark web sites deep web sites
dark web link dark web markets
dark web websites dark market
мега купить мега мефедрон
darknet marketplace tor markets 2022
darkmarket link darknet drug market
dark web market links darkmarket link
darknet marketplace tor marketplace
darknet market bitcoin dark web
darkweb marketplace dark market list
darknet market list darkweb marketplace
mega market mega онион
мега даркнет мега ссылка
dark web access dark web drug marketplace
darknet drugs dark web websites
dark web websites deep web sites
dark web market links darknet market lists
darknet market links darknet drugs
darknet drugs deep dark web
tor dark web how to get on dark web
tor market url the dark internet
onion market drug markets onion
dark web markets dark market link
darknet market lists darknet drug market
mega market мега зеркало
darkmarket dark market url
mega onion мега даркнет
how to access dark web tor market links
dark websites deep web search
tor markets dark market onion
darknet search engine dark internet
dark markets darknet market
darknet seiten dark web link
dark web site darknet sites
dark web market darkmarket list
мега онион сайт mega магазин
deep web drug links blackweb
mega ссылка сылка на мегу
darknet market deep web drug links
onion market deep web sites
dark markets tor marketplace
dark web market list blackweb official website
dark web search engines drug markets dark web
drug markets onion tor darknet
deep web sites dark web sites
dark market deep web markets
darkmarket 2022 tor market url
mega онион сайт даркнет
deep web links tor market links
darknet market links tor market
dark internet dark market list
darkmarket url darknet market lists
dark web access dark web market list
darkmarket dark web markets
dark web sites links dark web market list
dark market list tor dark web
сылка на мегу зайти на мегу
tor market tor darknet
darknet market links tor marketplace
dark web sites links how to get on dark web
drug markets onion darknet sites
darknet seiten the dark internet
tor market links how to access dark web
мэги сайт магазины даркнета
drug markets dark web dark markets 2022
dark markets 2022 tor markets
mega onion зеркало darknet сайт
deep web markets deep web markets
deep dark web tor markets
магазин мега мега onion
ссылка на мегу сайты даркнет ссылки
tor market how to get on dark web
dark market darknet links
darknet seiten dark web site
dark web sites darkmarket link
tor markets links dark websites
dark web sites darkweb marketplace
dark web market links dark web websites
dark web links darknet market links
black internet deep web sites
deep web markets tor darknet
dark web websites best darknet markets
darknet market links dark market url
darknet sites darknet market lists
tor markets 2022 tor markets
dark web sites links dark markets 2022
мэги сайт mega ссылка
мега магазин ссылка мега
how to get on dark web drug markets dark web
dark web websites darkmarket list
best darknet markets dark web search engines
dark internet the dark internet
dark market link dark markets
dark market link darknet websites
tor markets 2022 dark web market list
tor markets deep dark web
dark website bitcoin dark web
dark market 2022 dark web websites
мега наркотики mega onion ссылка
dark market link tor market
dark markets 2022 darknet drugs
dark market link best darknet markets
blackweb official website tor markets links
how to access dark web best darknet markets
mega onion мега купить
dark market url bitcoin dark web
tor marketplace tor marketplace
dark web search engines darknet search engine
dark web link dark web links
the dark internet darknet market
deep web sites darknet seiten
tor markets 2022 dark internet
mega зеркало mega onion shop
tor darknet dark web site
darkweb marketplace tor market url
мега онион сайт сайт мега
ссылка на мегу mega зеркало
мега даркнет mega даркнет
даркнет ссылки mega сайт
tor dark web darkmarket url
drug markets dark web deep web drug store
dark websites tor market links
darkweb marketplace dark internet
dark market 2022 darknet search engine
darknet links how to access dark web
dark market 2022 dark markets
dark websites darknet marketplace
Patients with ED should not just be prescribed sildenafil Viagra and then be lost to follow-up <a href=[Link deleted]cheap cialis discount online Villanova -140 Georgetown 500 Butler 550 Xavier 800 St
darkmarkets darknet markets
darkmarkets tor darknet
darknet drug store darknet market list
официальный сайт мега mega зеркало
сайт даркнет ссылка мега
dark web market links how to get on dark web
darknet drug market dark web search engines
best darknet markets dark markets 2022
dark web drug marketplace deep web sites
You probably have diabetes or other chronic bodily situations, you may as well apply to
be allowed to take meals, drink, insulin, prosthetic gadgets or personal medical items into the testing room.
Handmade items don’t stop there, although. Sharp, Ken. “Free TiVo: Build a better DVR out of an Old Pc.” Make.
A better card can allow you to take pleasure in newer, extra graphics-intensive games.
Fortunately, there are hardware upgrades that can extend the helpful life of your present computer with out fully draining your account or
relegating yet another piece of equipment to a landfill.
These computations are performed in steps by means of a sequence of
computational components. The shaders make billions of computations every second to carry
out their particular duties. Each prompt is adopted by a set of specific duties,
akin to: provide your own interpretation of the statement,
or describe a selected scenario where the assertion wouldn’t hold true.
Simply decide what needs to be achieved in what order, and set your deadlines accordingly.
To manage and share your favorite finds on-line in addition to in your phone,
create a LocalEats person account. Low-noise followers available as effectively.
It’s really as much as the game developers how the system’s considerable resources
are used.
dark web search engine dark web sites links
the dark internet dark websites
tor market deep dark web
tor market darknet drug links
dark web market list darkmarket 2022
deep web links onion market
dark market 2022 dark website
dark internet dark web search engine
dark websites dark market link
dark web site darknet market list
dark web site tor market
darknet markets dark markets 2022
deep web links deep web drug markets
tor dark web deep dark web
dark web links tor markets links
deep web drug url deep web drug url
deep web links best darknet markets
deep web drug links darknet market lists
tor market url how to access dark web
мега onion магазин мега
the dark internet tor marketplace
onion market tor dark web
drug markets onion darknet seiten
мега onion зеркала mega onion ссылка
deep web drug store dark web markets
best darknet markets tor market
mega онион сайт mega онион
free dark web drug markets onion
сайты даркнет ссылки мега вход
dark web sites links how to get on dark web
dark market 2022 dark market url
darknet market list black internet
мега нарко сайты даркнет ссылки
магазин даркнет сайт мега
tor market links dark web sites links
tor markets tor dark web
deep web drug markets dark web market links
drug markets dark web deep web sites
blackweb official website tor market
dark market url deep web drug store
ьупф ьфклуе mega сайт
darkmarket 2022 darkmarket url
dark web link deep web markets
bitcoin dark web tor markets links
deep web search how to access dark web
dark web websites tor market
dark web search engine darknet drug links
black internet deep web links
free dark web darknet market list
dark web search engine dark market 2022
the dark internet dark web drug marketplace
dark market list deep web drug url
tor markets links dark web search engine
best darknet markets darknet drug links
dark net dark web search engine
dark web market list bitcoin dark web
dark market link tor marketplace
darknet site free dark web
dark markets 2022 tor markets 2022
новое зеркало мега сайты даркнет ссылки
blackweb dark net
dark website tor market links
best darknet markets dark market link
darknet drug store tor dark web
darknet links darkmarket 2022
darknet drug store dark web link
dark market deep web search
free dark web darknet sites
даркнет магазин мега ссылка
darknet site dark web search engines
darknet market links dark web link
мега onion ссылка darknet сайт
мега шишки ссылка мега
tor markets darknet marketplace
dark market link drug markets onion
dark website deep dark web
dark web search engines free dark web
how to access dark web tor markets
deep web markets darknet drug links
мега онион сайт мега онион
мега сайт как зайти на мегу
darkweb marketplace darknet websites
магазин мега сайты даркнет ссылки
blackweb darknet drug market
darknet site dark web market list
darknet drugs deep web drug store
darknet seiten dark net
darknet drugs black internet
darknet drug market dark web access
darkmarket link darkmarkets
blackweb dark markets 2022
free dark web tor markets
drug markets onion dark market list
drug markets dark web dark web market links
dark web links dark web search engine
dark internet free dark web
best darknet markets darknet market lists
dark web sites links dark web link
dark web market list tor markets
tor marketplace deep web drug links
tor markets tor marketplace
dark web search engines dark web access
darkmarket deep web drug links
deep web markets darkmarkets
tor marketplace tor darknet
darknet сайт магазин мега
tor market darkmarket
darkweb marketplace darknet drug links
dark market link darkmarkets
deep web links darknet market lists
dark web link dark web sites
dark web site dark web search engine
darknet search engine deep web drug url
blackweb dark web websites
dark web markets darknet market list
мега наркотики mega онион сайт [url=[Link deleted]]mega онион сайт [/url]
dark web search engine dark net
drug markets dark web darknet market lists
blackweb darknet drug market
darknet drug market dark web market
мега официальный сайт мега сайт ссылка [url=[Link deleted]]мега onion ссылка [/url]
drug markets onion dark websites
darknet магазин мега ссылка [url=[Link deleted]]mega магазин [/url]
deep web sites dark web link
мега onion магазин mega onion зеркала [url=[Link deleted]]mega онион сайт [/url]
dark market darkmarket list
bitcoin dark web darkmarket url
darknet site dark market url
tor markets dark web search engine
dark web search engines dark markets
tor markets links darkmarket list
dark websites deep web drug markets
dark market link darknet seiten
free dark web dark web market
tor market url deep web search
dark market darknet links
deep web links darkmarket 2022
darknet drug market dark web search engines
best darknet markets drug markets dark web
dark markets black internet
dark markets dark market link
darknet market lists dark market url
tor marketplace dark web websites
deep web drug markets tor darknet
darknet sites darknet drugs
tor markets links deep web drug store
deep dark web dark market onion
darknet marketplace darkmarket list
blackweb dark web site
darknet market list onion market
dark web websites darkmarket 2022
deep web search best darknet markets
darkmarket link deep web sites
mega онион сайт мега сайт [url=[Link deleted]]мега даркнет [/url]
drug markets onion darknet drugs
deep web search dark market url
darknet market list tor markets
mega магазин мега onion оффициальный сайт [url=[Link deleted]]мега онион сайт [/url]
dark websites darknet sites
mega даркнет сайт даркнет [url=[Link deleted]]мега onion зеркала [/url]
For a quick comparison at a glance, please see our comparison chart <a href=[Link deleted]generic reviews Malegra-DXT does not protect you from sexually transmitted diseases
darknet drug market tor market links
free dark web dark markets 2022
best darknet markets dark web search engines
dark market link darknet marketplace
bitcoin dark web tor markets 2022
free dark web dark markets
mega ссылка сылка на мегу [url=[Link deleted]]мега вход [/url]
dark web access black internet
dark market onion tor dark web
black internet dark web search engines
даркнет магазин мега онион сайт [url=[Link deleted]]mega onion зеркала [/url]
mega onion зеркала мега онион [url=[Link deleted]]мега шишки [/url]
darknet drugs dark website
deep web sites darkmarket
mega market мега вход [url=[Link deleted]]mega ссылка [/url]
tor markets darknet search engine
darknet search engine dark web websites
dark web site dark web sites
darknet links dark web links
darknet seiten tor marketplace
free dark web tor dark web
dark market link dark web markets
darkmarket 2022 darknet market lists
deep web sites bitcoin dark web
tor marketplace drug markets onion
tor dark web free dark web
dark web market darknet search engine
tor market links dark markets
deep web drug links bitcoin dark web
darkmarket list darknet drug market
tor darknet dark market
deep web drug url dark market link
dark market url darknet site
deep dark web darknet drug store
darkweb marketplace onion market
how to get on dark web tor darknet
darknet sites the dark internet
darkmarket 2022 darknet market lists
darkmarket darknet drug links
tor darknet darknet drug store
darknet market list dark web link
darknet websites dark web link
tor marketplace tor markets links
tor market dark market 2022
ссылки на даркнет мега онион [url=[Link deleted]]mega onion оффициальный сайт [/url]
darkmarket url deep web sites
tor market darkmarket link
darknet магазин зелья мега ссылка [url=[Link deleted]]мега onion зеркала [/url]
how to get on dark web blackweb
darkmarket 2022 darkmarket
darkmarket 2022 deep dark web
mega onion ссылка мега шишки [url=[Link deleted]]mega ссылка [/url]
tor dark web dark web access
darkmarket url darknet market links
tor markets 2022 darknet seiten
darknet markets tor market
6 compared to 1 <a href=[Link deleted]from india
You can turn to our specialist at any time of the day or night and ask any questions about any products from our catalog and any health problems you are suffering from <a href=[Link deleted]online pharmacy If you have these symptoms, stop taking sildenafil and contact a doctor right away
black internet darknet sites
даркнет ссылки мега onion зеркала [url=[Link deleted]]ьупф ьфклуе [/url]
darknet sites darknet marketplace
free dark web darknet links
dark web market darknet drug store
darknet market links deep web drug store
blackweb dark web sites
dark web link deep web drug markets
mega онион сайт мега купить [url=[Link deleted]]даркнет ссылки [/url]
мэги сайт mega market [url=[Link deleted]]зайти на мегу [/url]
darkmarket list best darknet markets
mega onion зеркало ссылка мега [url=[Link deleted]]mega onion оффициальный сайт [/url]
blackweb official website tor markets
tor market darknet drug store
black internet dark net
мега onion mega даркнет [url=[Link deleted]]магазин даркнет [/url]
blackweb dark website
darknet drug store darkmarket url
dark web websites deep web markets
tor markets 2022 dark web search engines
darknet sites best darknet markets
darknet market list darkmarket link
darkmarket list dark markets 2022
darkmarket dark web search engines
darkmarket 2022 darknet seiten
dark web search engines darknet markets
the dark internet dark markets 2022
dark web site darkmarket list
darknet links dark internet
tor markets 2022 dark market url
darkmarket list darkmarket list
dark markets 2022 dark market
dark market url dark web market links
best darknet markets darkmarket url
tor darknet darknet search engine
how to access dark web dark website
dark web link dark website
drug markets dark web dark market link
мега нарко mega зеркало [url=[Link deleted]]мега onion магазин [/url]
onion market how to get on dark web
darknet search engine darkweb marketplace
how to access dark web dark web site
deep web drug markets tor market url
мега onion зеркало ссылка мега [url=[Link deleted]]мега купить [/url]
black internet deep web drug url
мега купить соль darknet магазин [url=[Link deleted]]ьупф ьфклуе [/url]
darknet market dark web market links
dark web site deep web drug markets
dark web markets best darknet markets
drug markets dark web dark market
dark web link dark web sites
darknet seiten darknet marketplace
drug markets onion onion market
darknet drug store dark web sites links
dark net darknet drug store
how to get on dark web dark web sites links
mega ссылка mega onion зеркала [url=[Link deleted]]mega онион [/url]
магазин мега мега onion зеркало [url=[Link deleted]]сайты даркнет [/url]
dark website free dark web
tor darknet darknet search engine
darkmarket 2022 dark market 2022
dark market darkmarket url
dark market 2022 drug markets dark web
deep web drug markets darkmarket
darknet marketplace darknet marketplace
мега onion оффициальный сайт как зайти на мегу [url=[Link deleted]]мега onion зеркала [/url]
darkmarkets dark markets
ссылка мега магазин даркнет [url=[Link deleted]]darknet магазин [/url]
dark market link dark market
dark market list darknet site
darknet websites darknet seiten
deep web search darkmarket link
darknet drug links dark web drug marketplace
darknet site tor markets
darkmarkets dark web link
tor market url darknet markets
deep web drug markets dark web link
tor market links dark web site
dark web links dark web links
the dark internet onion market
dark market link darknet drugs
dark market url onion market
darknet market list deep web links
dark web search engines dark market url
tor markets 2022 dark web market list
dark net dark market 2022
deep web search darkmarket
dark markets onion market
зеркало мега mega onion [url=[Link deleted]]мега нарко [/url]
мега onion оффициальный сайт зайти на мегу [url=[Link deleted]]darknet магазин зелья [/url]
mega onion зеркала мега onion зеркала [url=[Link deleted]]мега onion зеркало [/url]
dark web sites darknet drug market
dark web access darknet websites
dark web search engines dark web access
dark web drug marketplace dark market onion
darknet search engine darknet market lists
dark internet dark web site
dark web market list darkmarket link
мега нарко магазин мега [url=[Link deleted]]mega onion shop [/url]
dark web search engines dark websites
dark web market list dark web market
how to access dark web darkmarkets
dark web market links black internet
мега онион мега онион сайт [url=[Link deleted]]mega onion [/url]
mega онион сайт mega ссылка [url=[Link deleted]]зеркало мега [/url]
dark net darkmarket 2022
deep web drug markets dark web site
мега кокаин мега купить соль [url=[Link deleted]]мега onion ссылка [/url]
darkmarket drug markets dark web
dark web link dark web drug marketplace
darknet markets dark market url
darknet search engine onion market
deep web drug markets darknet sites
drug markets onion drug markets onion
tor markets blackweb official website
мега onion мега магазин [url=[Link deleted]]mega onion зеркала [/url]
darknet drug market deep web markets
dark web markets dark net
dark market onion darkmarket list
официальный сайт мега магазины даркнета [url=[Link deleted]]мега официальный сайт [/url]
tor markets dark internet
darknet market links how to get on dark web
dark web websites darknet seiten
dark website dark web websites
darknet market links tor markets 2022
dark web websites darknet market
darknet markets deep web search
darknet links deep web drug url
darkmarket link dark websites
blackweb official website darkmarket 2022
tor darknet how to get on dark web
blackweb dark web site
black internet darknet market lists
blackweb darknet site
dark market url dark web search engine
darkmarkets dark web site
tor markets how to get on dark web
dark web market list black internet
darknet market darknet drug store
blackweb official website darknet websites
how to access dark web darknet market
мега нарко darknet сайт [url=[Link deleted]]мега onion оффициальный сайт [/url]
tor markets links dark market link
drug markets onion dark market
Erectile dysfunction is incredibly common <a href=[Link deleted]cialis
darknet drug store blackweb
dark market dark web websites
darknet search engine dark market onion
мега наркотики мега зеркало [url=[Link deleted]]mega onion оффициальный сайт [/url]
free dark web drug markets dark web
deep web drug markets dark web site
how to access dark web dark market list
dark web sites dark markets 2022
mega onion ссылка мега купить [url=[Link deleted]]мега онион [/url]
darknet drugs darkmarkets
mega onion зеркала mega даркнет [url=[Link deleted]]мэги сайт [/url]
dark website deep web search
drug markets dark web the dark internet
deep web drug markets blackweb
dark net tor markets 2022
мега официальный сайт mega market [url=[Link deleted]]mega onion оффициальный сайт [/url]
The district, which takes in a heavily Black stretch of North Carolina’s rural north in addition to some Raleigh exurbs,
would have voted 51-48 for Joe Biden, compared to
Biden’s 54-45 margin in Butterfield’s present district,
the 1st. However the trendlines right here have been very unfavorable for Democrats,
and Butterfield could very nicely lose in a tricky midterm surroundings.
Note that the map has been entirely renumbered, so
we’ve put together our best evaluation of where each present incumbent may search re-election at this link,
whereas statistics for past elections might be found on Dave’s Redistricting App.
So, if you’re a homeowner, you would possibly rent out a single room or two to strangers,
even whereas the house remains to be occupied. ● Former Gov.
Ruth Ann Minner, who in 2000 turned the first girl elected to
function governor of Delaware, has died at the age of 86.
Minner was a legislative staffer when she first received
a seat within the state House in 1974 as a local
model of that yr’s “Watergate infants”-reform-minded Democrats elected within the wake of Richard Nixon’s resignation. GOP lawmakers sought to pack
as many Democrats as attainable into simply three extremely-Democratic districts based in Charlotte (the ninth) and the area known because the Research Triangle
(the fifth in Raleigh and the sixth in Durham/Chapel
Hill).
dark web search engine darknet drug market
free dark web dark markets
darkmarket 2022 darkmarket
onion market darknet market links
dark web market darknet seiten
darknet drug store tor market url
мега сайт ссылка мега наркотики [url=[Link deleted]]мега кокаин [/url]
onion market tor market url
darknet market links darkmarket
deep dark web dark market link
darkweb marketplace tor market links
darknet websites darknet site
мега купить магазин мега [url=[Link deleted]]магазин мега [/url]
darkmarket link deep web drug store
deep web drug links dark market
best darknet markets blackweb
darknet market lists the dark internet
darkmarket url dark web links
blackweb darknet seiten
deep web drug markets dark market onion
drug markets dark web dark web links
darknet drug store tor markets 2022
darknet websites dark web drug marketplace
free dark web dark market
dark website darknet drug market
darknet seiten darknet drugs
даркнет магазин mega onion зеркала [url=[Link deleted]]мега наркотики [/url]
мега скорость mega сайт [url=[Link deleted]]магазин даркнет [/url]
darknet search engine darknet marketplace
dark web sites how to get on dark web
blackweb official website darknet search engine
dark markets dark web search engine
dark market url dark net
darkmarket link dark web websites
blackweb official website blackweb
dark web links dark web sites
deep web drug links dark market onion
darknet market lists tor markets links
мега onion зеркала мега onion зеркало [url=[Link deleted]]mega ссылка [/url]
blackweb official website tor market
darknet links dark web market links
the dark internet dark web markets
мега onion оффициальный сайт сайт мега [url=[Link deleted]]мега зеркало [/url]
сылка на мегу ьупф ьфклуе [url=[Link deleted]]mega onion зеркало [/url]
blackweb official website dark web search engines
bitcoin dark web dark markets
darkmarket link darknet site
tor market darknet websites
dark web sites links darknet links
deep web drug markets darkweb marketplace
tor markets dark web sites
dark web search engine tor markets
dark web site tor market
darkmarkets deep web links
tor market links dark market url
dark web websites darkmarket
сайт мега mega онион сайт [url=[Link deleted]]новое зеркало мега [/url]
darkmarket 2022 darkweb marketplace
dark markets deep web drug store
зеркало мега mega даркнет [url=[Link deleted]]мега наркотики [/url]
darkmarkets darknet market links
darkweb marketplace blackweb
dark web drug marketplace darkmarket 2022
deep web links dark market onion
dark web websites dark web link
dark web search engines darknet site
darkmarket 2022 deep web drug links
how to get on dark web dark web market links
мега скорость mega зеркало [url=[Link deleted]]мега вход [/url]
darknet drug store darknet site
mega магазин ссылки на даркнет [url=[Link deleted]]мега onion зеркала [/url]
dark web search engine darknet search engine
dark web drug marketplace darknet drug market
dark web links darknet sites
dark market 2022 best darknet markets
mega onion ссылка мега onion магазин [url=[Link deleted]]мега сайт ссылка [/url]
onion market darknet drug market
free dark web darkmarket list
darknet websites deep web drug markets
how to access dark web dark net
darknet links darknet drugs
darknet drug store tor darknet
мэги сайт мега onion оффициальный сайт [url=[Link deleted]]мега магазин [/url]
dark web links dark market 2022
dark market 2022 dark web market list
dark websites deep web links
dark web search engines tor markets
best darknet markets black internet
darknet links deep web drug store
drug markets onion dark web link
dark web market links darknet sites
darkweb marketplace darkmarket link
darknet seiten tor markets 2022
mega онион мега магазин [url=[Link deleted]]мега сайт ссылка [/url]
darknet drug market darkmarket url
dark web markets darkmarkets
dark website black internet
официальный сайт мега mega зеркало [url=[Link deleted]]магазины даркнета [/url]
ссылка на мегу ссылка мега [url=[Link deleted]]mega зеркало [/url]
darknet websites dark web links
tor market dark internet
deep web drug url dark web sites
best darknet markets dark web markets
onion market dark web site
dark web market darkweb marketplace
tor marketplace dark net
dark web links the dark internet
dark web markets dark web sites
darknet site dark web market
bitcoin dark web dark markets
darknet market links blackweb official website
dark web websites dark web links
dark web search engines darknet drug market
mega сайт mega onion оффициальный сайт [url=[Link deleted]]магазин мега [/url]
darknet search engine dark market onion
darknet магазин мега onion зеркало [url=[Link deleted]]зеркало мега [/url]
deep web drug markets blackweb
deep web sites darkmarket
мега шишки мега зеркало [url=[Link deleted]]мэги сайт [/url]
dark web drug marketplace darknet links
free dark web deep web drug links
mega сайт мега наркотики [url=[Link deleted]]официальный сайт мега [/url]
darknet drug links darknet links
dark web market links deep web drug url
dark web drug marketplace darknet site
blackweb tor market links
deep web drug store dark web site
dark web market list tor marketplace
darkmarket 2022 darknet sites
dark net dark web drug marketplace
dark web sites deep web drug url
зайти на мегу ссылка на мегу [url=[Link deleted]]mega onion зеркало [/url]
darknet market darkweb marketplace
darknet site tor dark web
deep web links dark web markets
dark market how to get on dark web
darknet seiten darknet market links
darkmarket 2022 dark web sites links
tor darknet darkmarkets
мега onion зеркало даркнет сайты магазин [url=[Link deleted]]мега магазин [/url]
darknet site dark web link
сайты даркнет ссылки mega onion ссылка [url=[Link deleted]]как зайти на мегу [/url]
dark market list dark websites
мега onion оффициальный сайт мега нарко [url=[Link deleted]]mega onion ссылка [/url]
mega даркнет mega onion зеркала [url=[Link deleted]]мега скорость [/url]
darknet site bitcoin dark web
dark market 2022 darknet market links
tor darknet dark internet
deep web sites tor market
tor markets tor markets links
darknet links dark web search engines
blackweb dark market 2022
darkweb marketplace darknet site
dark web sites dark market onion
deep web markets darknet drug store
dark websites dark website
dark websites darknet seiten
dark web search engines darknet search engine
мега даркнет mega ссылка [url=[Link deleted]]mega onion оффициальный сайт [/url]
dark web sites links dark web site
мега купить новое зеркало мега [url=[Link deleted]]мега нарко [/url]
tor market dark web access
darkmarket url darknet sites
darknet магазин зелья мега шишки [url=[Link deleted]]зайти на мегу [/url]
darknet market onion market
the dark internet dark web links
dark web links tor market
dark markets 2022 dark markets
dark web sites links tor market links
mega сайт магазин мега [url=[Link deleted]]mega онион сайт [/url]
deep dark web dark web market links
darknet marketplace darknet drug store
dark web access blackweb
deep web drug links dark web market links
drug markets onion dark market
deep web markets dark web links
darknet market darkmarket link
mega ссылка даркнет ссылки [url=[Link deleted]]новое зеркало мега [/url]
drug markets onion darknet market lists
best darknet markets tor market url
how to access dark web darknet links
dark website darknet market list
deep dark web dark web market list
darknet market darkmarkets
mega onion зеркала мега сайт ссылка [url=[Link deleted]]darknet магазин [/url]
deep web drug links darknet site
мега шишки мэги сайт [url=[Link deleted]]магазин мега [/url]
deep web sites dark websites
официальный сайт мега mega магазин [url=[Link deleted]]мега кокаин [/url]
darkmarket 2022 darknet seiten
dark market onion market
tor darknet dark net
darkmarket list darkmarkets
drug markets onion darknet market lists
darknet market darkmarket list
blackweb darkmarket
deep web drug links deep web markets
bitcoin dark web deep web drug links
darkmarket 2022 deep web search
tor market links tor dark web
dark market list blackweb
dark web access darknet market list
dark websites dark market link
даркнет ссылки mega onion [url=[Link deleted]]мега onion зеркала [/url]
darknet drugs tor markets
darknet search engine dark web market
mega onion мега сайт ссылка [url=[Link deleted]]mega магазин [/url]
darknet search engine drug markets onion
darknet market links how to get on dark web
зеркало мега мега купить [url=[Link deleted]]мега магазин [/url]
dark web market list blackweb official website
darknet drug links drug markets dark web
dark markets dark web market
dark web search engine darknet drug store
dark web sites darkweb marketplace
ьупф ьфклуе мега onion оффициальный сайт [url=[Link deleted]]даркнет ссылки [/url]
gay priest chat
[url=”[Link deleted]chat now gay[/url]
most popular video gay chat
tor dark web dark web search engines
darkmarket url tor markets links
tor market links darknet drug store
bitcoin dark web tor markets links
dark market link dark market 2022
как зайти на мегу мега магазин [url=[Link deleted]]мега купить [/url]
tor market url dark web market
darknet marketplace darkmarkets
dark market 2022 how to get on dark web
bitcoin dark web drug markets dark web
dark market deep web drug store
dark web drug marketplace dark market link
drug markets onion dark web markets
mega ссылка мега onion оффициальный сайт [url=[Link deleted]]мэги сайт [/url]
dark website blackweb official website
даркнет ссылки мега onion ссылка [url=[Link deleted]]как зайти на мегу [/url]
как зайти на мегу мега onion магазин [url=[Link deleted]]мега онион [/url]
dark market onion how to get on dark web
tor market url tor markets
магазин даркнет ссылка на мегу [url=[Link deleted]]мега onion [/url]
tor marketplace dark web market list
deep web drug url dark internet
dark internet darkweb marketplace
deep web sites dark market 2022
dark internet best darknet markets
onion market darkmarket
darknet site darknet search engine
dark internet darknet websites
how to get on dark web darknet market
tor market url best darknet markets
darknet drug store darknet market
tor market dark web sites
deep web search darkweb marketplace
darknet seiten darknet market lists
darkmarket url dark market onion
мега купить соль мега onion ссылка [url=[Link deleted]]mega даркнет [/url]
dark web market list blackweb official website
darknet сайт мега скорость [url=[Link deleted]]официальный сайт мега [/url]
free dark web darkmarkets
tor markets 2022 deep web sites
dark net darknet market
This is the seventh force in the world after Neon, South Korea, North America, Germany, France, and the United Kingdom <a href=[Link deleted]place to buy cialis online Tadalafil is the active ingredient in the ED medicine that s made by Lilly and branded as Cialis
dark web search engines deep web drug markets
dark web drug marketplace darknet drug market
mega даркнет mega сайт [url=[Link deleted]]сайт мега [/url]
drug markets dark web darknet marketplace
how to access dark web tor darknet
darknet market list tor darknet
mega онион магазин мега [url=[Link deleted]]мега ссылка [/url]
darknet links darknet websites
darknet market darknet market links
dark websites dark market onion
магазины даркнета мега зеркало [url=[Link deleted]]сайт мега [/url]
darknet search engine darkmarket
tor markets dark market 2022
dark web websites darknet market lists
dark web markets deep web drug store
dark market url how to access dark web
dark web websites free dark web
даркнет магазин darknet магазин зелья [url=[Link deleted]]mega market [/url]
deep web sites deep web drug markets
dark web sites links dark web links
мега onion оффициальный сайт ссылки на даркнет [url=[Link deleted]]магазин даркнет [/url]
dark market link blackweb official website
blackweb official website darknet seiten
мега onion магазин мега мефедрон [url=[Link deleted]]мега кокаин [/url]
drug markets onion the dark internet
deep web drug url dark web sites links
dark web market links how to access dark web
black internet drug markets dark web
free dark web free dark web
deep web drug links darknet markets
darknet websites darkmarket list
dark market url dark web websites
dark net black internet
dark market list darknet sites
dark web market list dark internet
mega market как зайти на мегу [url=[Link deleted]]зайти на мегу [/url]
мега мефедрон мега даркнет [url=[Link deleted]]мега купить [/url]
darknet site how to access dark web
dark market link deep web links
darknet marketplace best darknet markets
darknet drugs bitcoin dark web
tor market links tor market
how to get on dark web dark web sites links
darknet websites dark web search engines
dark websites dark web market
dark net deep web drug markets
deep web links darknet drugs
dark internet tor markets links
dark markets 2022 dark market link
darkweb marketplace onion market
darknet drugs dark web links
мега купить мэги сайт [url=[Link deleted]]магазин мега [/url]
drug markets dark web tor market
tor markets the dark internet
deep web sites tor market url
mega onion оффициальный сайт darknet магазин [url=[Link deleted]]мега скорость [/url]
dark web access darkmarket
dark web search engines darknet drug store
dark web links dark web market links
mega онион ссылки на даркнет [url=[Link deleted]]mega market [/url]
dark market link dark market onion
deep web sites dark web market
dark markets dark web websites
dark net dark web market list
mega onion shop сайты даркнет [url=[Link deleted]]сайты даркнет [/url]
darkmarket 2022 dark web sites links
tor market links darkmarket list
darknet search engine darknet markets
tor marketplace blackweb
dark web links tor marketplace
зеркало мега магазины даркнета [url=[Link deleted]]ссылка на мегу [/url]
drug markets onion tor markets links
darkmarket list darknet drugs
darknet drug store tor markets 2022
мега onion оффициальный сайт мега официальный сайт [url=[Link deleted]]мега onion магазин [/url]
bitcoin dark web darknet websites
blackweb official website deep web links
blackweb official website dark internet
onion market darknet markets
dark web access dark web search engine
darknet seiten dark markets 2022
dark web market list darkmarket url
how to get on dark web darknet market links
dark web market list darkweb marketplace
deep web drug links darknet market links
bitcoin dark web darkmarkets
drug markets onion deep web drug markets
darkmarket url dark market url
dark market onion the dark internet
darkmarkets tor marketplace
сайты даркнет ссылки мега даркнет [url=[Link deleted]]mega onion оффициальный сайт [/url]
free dark web darknet drugs
tor dark web deep web sites
dark web market list tor market links
dark web market links dark web sites
dark web market dark web links
мега вход мега onion магазин [url=[Link deleted]]mega onion shop [/url]
dark net tor markets links
dark internet dark web drug marketplace
deep web drug url deep web drug store
dark web access darknet sites
dark web sites tor dark web
mega onion зеркала зайти на мегу [url=[Link deleted]]мега onion ссылка [/url]
dark net dark web sites links
мега ссылка мега мефедрон [url=[Link deleted]]мега onion оффициальный сайт [/url]
dark web market list darknet websites
ссылка мега мега нарко [url=[Link deleted]]новое зеркало мега [/url]
the dark internet the dark internet
bitcoin dark web dark website
darknet market list tor markets
blackweb official website darkmarket 2022
dark web websites bitcoin dark web
deep web drug url how to access dark web
darknet drug store top dark net markets [url=[Link deleted]]bohemia url [/url]
bitcoins and darknet markets dbol steroid pills [url=[Link deleted]]urls for darknet markets [/url]
dark web sites links counterfeit money onion [url=[Link deleted]]buying drugs on the darknet [/url]
ссылки на даркнет мега шишки [url=[Link deleted]]darknet магазин зелья [/url]
darkfox darknet market cannazon link [url=[Link deleted]]dark web drug marketplace [/url]
darkfox darknet market hidden uncensored wiki [url=[Link deleted]]hidden marketplace [/url]
site darknet fermГ© darknet drugs sites [url=[Link deleted]]deep onion links [/url]
darkfox market url top 10 dark websites [url=[Link deleted]]black market website [/url]
darknet market noobs darknet market noobs bible [url=[Link deleted]]site darknet fermГ© [/url]
darknet market links safe dark web drug markets [url=[Link deleted]]drugs dark web reddit [/url]
bohemia market current darknet markets reddit [url=[Link deleted]]guide to darknet markets [/url]
мега onion ссылка мега купить [url=[Link deleted]]магазин мега [/url]
what darknet markets are still up onion link search engine [url=[Link deleted]]tor darknet [/url]
site darknet fermГ© darkmarket website [url=[Link deleted]]dark markets germany [/url]
how to search the dark web reddit outlaw market darknet [url=[Link deleted]]pink versace pill [/url]
darknet markets with tobacco Kingdom Market [url=[Link deleted]]reddit where to buy drugs [/url]
how to enter the black market online best darknet gun market [url=[Link deleted]]darknet markets 2022 reddit [/url]
bitcoin dark web reddit darknet markets noobs [url=[Link deleted]]archetyp url [/url]
best darknet market may 2022 reddit darknet market buying mdma usa [url=[Link deleted]]how to access the dark web reddit [/url]
cvv black market darknet market carding [url=[Link deleted]]incognito market [/url]
dark markets luxembourg best darknet market for weed 2022 [url=[Link deleted]]cannahome market darknet [/url]
cvv black market dark markets thailand [url=[Link deleted]]darknet markets ranked 2022 [/url]
australian darknet vendors dark web sites links [url=[Link deleted]]wikipedia darknet market [/url]
phenethylamine drugs escrow market darknet [url=[Link deleted]]darknet bank accounts [/url]
best darknet market may 2022 reddit core market darknet [url=[Link deleted]]drug markets onion [/url]
darknet live stream euroguns deep web [url=[Link deleted]]how to access the dark web 2022 [/url]
dark markets greece darknet market noobs [url=[Link deleted]]dark markets philippines [/url]
darknet market that has ssn database what darknet markets are still up [url=[Link deleted]]market onion [/url]
Heineken Express darknet wikipedia darknet market [url=[Link deleted]]darknet live stream [/url]
ссылки на даркнет сылка на мегу [url=[Link deleted]]mega onion зеркала [/url]
black market prices for drugs darknet market deep dot web [url=[Link deleted]]darknet drugs australia [/url]
deep web onion url best website to buy cc [url=[Link deleted]]darknet black market list [/url]
darknet reinkommen dark web website links [url=[Link deleted]]dark markets denmark [/url]
how to buy from the darknet markets lsd new onion darknet market [url=[Link deleted]]dark markets sweden [/url]
dream market darknet where to find darknet market links [url=[Link deleted]]versus market [/url]
dark web drug marketplace darkfox market [url=[Link deleted]]darknet reinkommen [/url]
darknet seiten liste crypto darknet drug shop [url=[Link deleted]]darkweb marketplace [/url]
best dark web marketplaces 2022 safe darknet markets [url=[Link deleted]]darknet new market link [/url]
мега купить соль мега мефедрон [url=[Link deleted]]сылка на мегу [/url]
dark markets romania how to get on the dark web android [url=[Link deleted]]darknet drugs shipping [/url]
dark net market escrow dark web [url=[Link deleted]]dark web sites for drugs [/url]
darknet магазин зелья mega онион сайт [url=[Link deleted]]магазин мега [/url]
underground website to buy drugs versus project market link [url=[Link deleted]]cypher market darknet [/url]
ссылка на мегу магазин мега [url=[Link deleted]]магазин даркнет [/url]
сылка на мегу ьупф ьфклуе [url=[Link deleted]]мега официальный сайт [/url]
darknet online drugs versus project darknet market [url=[Link deleted]]drug trading website [/url]
darknet market onions best darknet market links [url=[Link deleted]]deep website search engine [/url]
top darknet market now Cocorico Market darknet [url=[Link deleted]]bohemia link [/url]
darknet drugs australia dark web market [url=[Link deleted]]darknet gun market [/url]
what darknet markets are still up alphabay darknet market [url=[Link deleted]]cannazon market [/url]
which darknet markets are still open darknet markets norway 2022 [url=[Link deleted]]dark markets san marino [/url]
dark markets macedonia cannazon market url [url=[Link deleted]]deep web drug url [/url]
dark markets slovakia darknet markets ranked 2022 [url=[Link deleted]]brucelean darknet market [/url]
darknet market sites and how to access Abacus link [url=[Link deleted]]black market online [/url]
dark web counterfeit money cypher market [url=[Link deleted]]incognito darknet market [/url]
darknet escrow dark markets norge [url=[Link deleted]]darknet drugs reddit [/url]
best darknet market reddit darknet market vendors [url=[Link deleted]]tor2door market darknet [/url]
мега ссылка mega онион [url=[Link deleted]]мега onion ссылка [/url]
dark net market dark markets bosnia [url=[Link deleted]]darknet vendor reviews [/url]
most popular darknet markets 2022 darknet onion markets reddit [url=[Link deleted]]deep web link 2022 [/url]
<a href=[Link deleted]cialis online without a prescription This comes out to 50
top dark net markets cheapest drugs on darknet [url=[Link deleted]]darknet serious market [/url]
drug markets onion wikipedia darknet market [url=[Link deleted]]darknet drugs shipping [/url]
darknet markets norge dark markets finland [url=[Link deleted]]best websites dark web [/url]
alpha market url dark web links reddit [url=[Link deleted]]deep web onion url [/url]
trusted darknet vendors tor market url [url=[Link deleted]]market street darknet [/url]
darknet serious market bohemia market link [url=[Link deleted]]ruonion [/url]
best dark web marketplaces 2022 reliable darknet markets lsd [url=[Link deleted]]darknet serious market [/url]
what darknet market to use now darknet market sites and how to access [url=[Link deleted]]cannahome link [/url]
list of dark net markets uncensored hidden wiki link [url=[Link deleted]]what darknet markets still work [/url]
buying credit cards on dark web dnm market [url=[Link deleted]]tor2door market darknet [/url]
onion link reddit darknet seiten dream market [url=[Link deleted]]cannahome link [/url]
current darknet markets reddit dark web drugs nz [url=[Link deleted]]links the hidden wiki [/url]
links da deep web 2022 black market deep [url=[Link deleted]]current darknet markets [/url]
credit card dark web links wired darknet markets [url=[Link deleted]]dark market 2022 [/url]
onion market site onion liste [url=[Link deleted]]drug website dark web [/url]
мега сайт сайты даркнет [url=[Link deleted]]мега нарко [/url]
current list of darknet markets dark markets japan [url=[Link deleted]]what are darknet drug markets [/url]
access the dark web reddit dark web directory [url=[Link deleted]]dark web links adult [/url]
мега onion оффициальный сайт новое зеркало мега [url=[Link deleted]]официальный сайт мега [/url]
monkey xtc pill reddit darknet market noobs bible [url=[Link deleted]]new darknet markets [/url]
legit darknet sites bohemia darknet market [url=[Link deleted]]darknet market reddits [/url]
darknet market vendors deep market [url=[Link deleted]]dark web sites [/url]
black market website names open darknet markets [url=[Link deleted]]grey market darknet [/url]
darknet market dash search darknet markets [url=[Link deleted]]darknet markets wax weed [/url]
best darknet market urs darknet reddit market [url=[Link deleted]]bohemia market link [/url]
darknet market adderall crypto market darknet [url=[Link deleted]]dark web market [/url]
top ten dark web sites darknet market url [url=[Link deleted]]adresse onion [/url]
darknet links market drug trading website [url=[Link deleted]]french deep web link [/url]
Kingdom Market link darknet market adderall [url=[Link deleted]]tor2door market url [/url]
ruonion dark web sites name list [url=[Link deleted]]darknet market noobs bible [/url]
versus market link reddit darknet market list [url=[Link deleted]]dark markets russia [/url]
мега onion зеркало мега onion оффициальный сайт [url=[Link deleted]]мега зеркало [/url]
мега сайт mega onion оффициальный сайт [url=[Link deleted]]mega онион [/url]
dark market links tor 2022 [url=[Link deleted]]dark web prepaid cards reddit [/url]
ссылки на даркнет мега скорость [url=[Link deleted]]сайт мега [/url]
alphabay market exploit market darknet [url=[Link deleted]]dark web markets 2022 australia [/url]
bohemia url russian darknet market [url=[Link deleted]]phenethylamine drugs [/url]
darknet guns market darknet market reddits [url=[Link deleted]]outlaw darknet market url [/url]
darknet online drugs best darknet drug market 2022 [url=[Link deleted]]top darknet markets 2022 [/url]
reddit working darknet markets darknet drugs sales [url=[Link deleted]]dark web search tool [/url]
мега мефедрон магазины даркнета [url=[Link deleted]]мега сайт ссылка [/url]
dark web market list best website to buy cc [url=[Link deleted]]dark web market place links [/url]
dark markets czech republic versus project market link [url=[Link deleted]]darknet drug prices [/url]
cannazon market url reliable darknet markets [url=[Link deleted]]dxm pills [/url]
underground hackers black market onion domain and kingdom [url=[Link deleted]]safe list of darknet market links [/url]
dark markets germany drug market darknet [url=[Link deleted]]tor link search engine [/url]
what darknet markets still work reliable darknet markets reddit [url=[Link deleted]]the darknet drugs [/url]
how to get to darknet market guns dark market [url=[Link deleted]]online black market electronics [/url]
alphabay market onion link best tor marketplaces [url=[Link deleted]]darknet vendor reviews [/url]
best darknet market for guns top 10 dark websites [url=[Link deleted]]dma drug [/url]
darknet drug prices uk buy bank accounts darknet [url=[Link deleted]]darkweb markets [/url]
ссылки на даркнет мега ссылка [url=[Link deleted]]darknet сайт [/url]
dark web drugs buying drugs off darknet [url=[Link deleted]]black market website names [/url]
bitcoin black market the dark market [url=[Link deleted]]reddit darknet market list [/url]
what bitcoins are accepted by darknet markets vice city darknet market [url=[Link deleted]]access the dark web reddit [/url]
darknet market fake id versus project market link [url=[Link deleted]]open darknet markets [/url]
dark markets mexico darknet market reddit list [url=[Link deleted]]escrow market darknet [/url]
onion link reddit new darknet market reddit [url=[Link deleted]]new darknet market reddit [/url]
how to access the dark web 2022 dark markets italy [url=[Link deleted]]darknet websites wiki [/url]
darknet market reddit darknet market listing [url=[Link deleted]]grey market darknet [/url]
tor market nz the darknet drugs [url=[Link deleted]]deep cp links [/url]
active darknetmarkets dot onion websites [url=[Link deleted]]where to find onion links [/url]
мега кокаин мега сайт ссылка [url=[Link deleted]]официальный сайт мега [/url]
wikipedia darknet market darknet market vendors [url=[Link deleted]]cypher market [/url]
which darknet markets accept zcash versus market darknet [url=[Link deleted]]reddit darknet market uk [/url]
мега вход mega даркнет [url=[Link deleted]]mega сайт [/url]
orange sunshine lsd darknet black market url [url=[Link deleted]]buy bank accounts darknet [/url]
archetyp market darknet reddit darknet market noobs bible [url=[Link deleted]]tor market links [/url]
darknet search engine how to buy from darknet [url=[Link deleted]]deep web cc sites [/url]
мега кокаин сайт даркнет [url=[Link deleted]]даркнет сайты магазин [/url]
dark markets venezuela Heineken Express link [url=[Link deleted]]top 10 dark websites [/url]
tor market darknet darknet market wikia [url=[Link deleted]]dark markets new zealand [/url]
how big is the darknet market dark markets japan [url=[Link deleted]]deep net websites [/url]
best fraud market darknet darkmarket website [url=[Link deleted]]dark web adderall [/url]
darknet links market buds express [url=[Link deleted]]onion links 2022 [/url]
black market website legit top 10 dark web url [url=[Link deleted]]deep web links updated [/url]
underground card shop pill with crown on it [url=[Link deleted]]open darknet markets [/url]
deep sea darknet market bohemia market link [url=[Link deleted]]onion sex shop [/url]
outlaw darknet market url deep web weed prices [url=[Link deleted]]dark market url [/url]
мега онион darknet магазин [url=[Link deleted]]ссылки на даркнет [/url]
Cocorico url darknet markets dread [url=[Link deleted]]darknet drug prices [/url]
best fraud market darknet decentralized darknet market [url=[Link deleted]]darknet drugs reddit [/url]
best darknet market uk dark web legit sites [url=[Link deleted]]darknet market fake id [/url]
mega onion оффициальный сайт mega магазин [url=[Link deleted]]mega onion зеркала [/url]
black market prices for drugs dark net guide [url=[Link deleted]]deep web marketplaces reddit [/url]
darknet drugs 2022 illegal black market [url=[Link deleted]]dark markets san marino [/url]
guide to darknet markets tma drug [url=[Link deleted]]dark web sites links [/url]
asap link xanax darknet markets reddit [url=[Link deleted]]australian dark web vendors [/url]
counterfeit money dark web reddit carding deep web links [url=[Link deleted]]dark markets serbia [/url]
dark web shopping darkmarkets [url=[Link deleted]]darkfox market [/url]
new darknet markets 2022 where to find darknet market links [url=[Link deleted]]drug website dark web [/url]
mega onion оффициальный сайт мега мефедрон [url=[Link deleted]]mega onion оффициальный сайт [/url]
onion market tormarket onion [url=[Link deleted]]underground dumps shop [/url]
dark markets switzerland darknet websites list 2022 [url=[Link deleted]]deep web directory onion [/url]
buy real money credit card dark web links [url=[Link deleted]]bitcoin drugs market [/url]
dark markets mexico darknet market 2022 reddit [url=[Link deleted]]assassination market darknet [/url]
dark markets venezuela best dark web links [url=[Link deleted]]access the dark web reddit [/url]
drugs darknet vendors dark web directory [url=[Link deleted]]onion deep web search [/url]
darknet markets working links active darknet market urls [url=[Link deleted]]darknet markets dread [/url]
сылка на мегу ссылки на даркнет [url=[Link deleted]]мега купить [/url]
deep net access Abacus Market url [url=[Link deleted]]tor2door market url [/url]
monkey xtc pill current darknet markets [url=[Link deleted]]the darknet markets [/url]
drugs on the darknet best darknet market reddit [url=[Link deleted]]archetyp market darknet [/url]
alphabay link crypto darknet drug shop [url=[Link deleted]]how to access the dark web safely reddit [/url]
working darknet markets 2022 onion tube porn [url=[Link deleted]]market cypher [/url]
how to access the dark web through tor fresh onions link [url=[Link deleted]]darknet market security [/url]
which darknet markets are still open darknet online drugs [url=[Link deleted]]archetyp market [/url]
black market prices for drugs black market webshop [url=[Link deleted]]darknet market dash [/url]
best darknet market links dark markets indonesia [url=[Link deleted]]dark markets slovakia [/url]
darknet market links buy ssn deep web deb [url=[Link deleted]]how to access the darknet market [/url]
access the black market best darknet markets uk [url=[Link deleted]]working darknet markets 2022 [/url]
darkmarket url black market net [url=[Link deleted]]darknet market controlled delivery [/url]
onion deep web search dark market onion [url=[Link deleted]]adresse onion [/url]
dark markets canada tor link list 2022 [url=[Link deleted]]dark net market list reddit [/url]
darknet магазин зелья мега onion оффициальный сайт [url=[Link deleted]]мега onion оффициальный сайт [/url]
how to access the darknet market how to use darknet markets [url=[Link deleted]]reddit where to buy drugs [/url]
adresse onion black market illegal black market [url=[Link deleted]]alphabay solutions reviews [/url]
мега onion оффициальный сайт ссылки на даркнет [url=[Link deleted]]mega даркнет [/url]
darknet list how to buy from the darknet markets lsd [url=[Link deleted]]dark websites reddit [/url]
tor link search engine tor market [url=[Link deleted]]darknet drugs germany [/url]
black market drugs guns darknet escrow markets [url=[Link deleted]]cannahome url [/url]
сылка на мегу новое зеркало мега [url=[Link deleted]]mega магазин [/url]
tor market url dark markets belarus [url=[Link deleted]]dark web markets reddit 2022 [/url]
darknet links 2022 drugs darknet market links 2022 reddit [url=[Link deleted]]best darknet market drugs [/url]
monkey x pill darknet market and monero [url=[Link deleted]]alphabay market net [/url]
darknet sites url buying from darknet market with electrum [url=[Link deleted]]cannahome market url [/url]
dark markets croatia best darknet market links [url=[Link deleted]]top dark net markets [/url]
dark markets brazil which darknet markets are still open [url=[Link deleted]]deep web drug url [/url]
how to install deep web weed darknet market [url=[Link deleted]]deep web software market [/url]
dark markets bolivia fullz darknet market [url=[Link deleted]]darknet market news [/url]
darknet market package counterfeit money deep web [url=[Link deleted]]darknet market alphabay [/url]
darknet markets financial times most popular darknet markets 2022 [url=[Link deleted]]working darknet market links [/url]
мега шишки mega даркнет [url=[Link deleted]]ссылки на даркнет [/url]
blockchain darknet markets dark markets ukraine [url=[Link deleted]]versus market [/url]
Cocorico url how to get access to darknet [url=[Link deleted]]how to find the black market online [/url]
reddit darknet market how to versus market url [url=[Link deleted]]darknet seiten [/url]
reddit best darknet markets onion market [url=[Link deleted]]darknet markets japan [/url]
dark markets lithuania dark web drugs [url=[Link deleted]]black market url deep web [/url]
зайти на мегу мега купить [url=[Link deleted]]ссылка на мегу [/url]
nike jordan pill black market buy online [url=[Link deleted]]darknet market adderall prices [/url]
how to use deep web on pc cypher market link [url=[Link deleted]]darknet market comparison [/url]
16 billion in worldwide sales in 2013 and has recorded total sales of more than 14 billion since launch <a href=[Link deleted]cialis with paypal Stop using this medicine and call your doctor at once if you have
30, and the counterfeit ED drugs accounted for about 80 cents on every dollar s worth of fake pharmaceuticals seized <a href=[Link deleted]cialis online no prescription
onion directory darknet market stats [url=[Link deleted]]drugs on the darknet [/url]
darknet market xanax popular darknet markets [url=[Link deleted]]black market cryptocurrency [/url]
live dark web tor dark web [url=[Link deleted]]dark markets india [/url]
weed darknet market nike jordan pill [url=[Link deleted]]darknet market list reddit [/url]
зайти на мегу mega ссылка [url=[Link deleted]]mega зеркало [/url]
onionhub darknet markets reddit 2022 [url=[Link deleted]]deep web links 2022 [/url]
darknet xanax best darknet market for weed uk [url=[Link deleted]]site darknet market [/url]
dark markets colombia deep web drug links [url=[Link deleted]]hidden uncensored wiki [/url]
dark web adderall darknet market listing [url=[Link deleted]]buy drugs on darknet [/url]
мега зеркало mega onion shop [url=[Link deleted]]мега скорость [/url]
darknet reinkommen reddit darknet market list 2022 [url=[Link deleted]]darknet best drugs [/url]
onion live links cheap darknet websites dor drugs [url=[Link deleted]]black market drugs [/url]
ссылка на мегу мега onion магазин [url=[Link deleted]]мега сайт [/url]
the real deal market darknet darknet market lists [url=[Link deleted]]tor search onion link [/url]
versus market url darknet drugs malayisa [url=[Link deleted]]biggest darknet markets [/url]
darknet drugs price darkshades marketplace [url=[Link deleted]]onion links credit card [/url]
onion market url darknet market guide [url=[Link deleted]]list of dark net markets [/url]
cannazon market darknet best darknet market may 2022 reddit [url=[Link deleted]]top onion links [/url]
зайти на мегу магазин мега [url=[Link deleted]]мега шишки [/url]
darkweb market tor2door darknet market [url=[Link deleted]]darknet marketplace [/url]
how to darknet market market links darknet [url=[Link deleted]]deep web search engine 2022 [/url]
asap darknet market what darknet markets still work [url=[Link deleted]]dark markets malta [/url]
list of online darknet market darkmarket url [url=[Link deleted]]blue lady e pill [/url]
darknet markets norge weed darknet market [url=[Link deleted]]dark web steroids [/url]
onion deep web wiki darknet market features [url=[Link deleted]]darknet black market [/url]
darknet black market sites alphabay link [url=[Link deleted]]Kingdom Market [/url]
alphabay market url biggest darknet markets 2022 [url=[Link deleted]]how to access the dark web reddit [/url]
how to buy bitcoin and use on dark web dark web sales [url=[Link deleted]]counterfeit euro deep web [/url]
dark markets ecuador deep sea darknet market [url=[Link deleted]]versus project link [/url]
2022 darknet markets darknet market stats [url=[Link deleted]]darknet market iphone [/url]
mega onion мега даркнет [url=[Link deleted]]сайты даркнет ссылки [/url]
onion seiten 2022 vice city market url [url=[Link deleted]]dark markets iceland [/url]
сайты даркнет ссылки мега сайт ссылка [url=[Link deleted]]ссылка мега [/url]
steroid market darknet cypher link [url=[Link deleted]]onion live [/url]
how to use onion sites darknet drug market [url=[Link deleted]]dark markets latvia [/url]
new darknet markets darknet markets noob [url=[Link deleted]]alphabay market darknet [/url]
мега кокаин мега даркнет [url=[Link deleted]]mega даркнет [/url]
what darknet markets are available incognito market [url=[Link deleted]]onion tube porn [/url]
deep web drug store duckduckgo onion site [url=[Link deleted]]incognito link [/url]
top darknet drug sites darknet list [url=[Link deleted]]cannahome market url [/url]
where to find onion links dark web links market [url=[Link deleted]]deep cp links [/url]
onionhub search deep web engine [url=[Link deleted]]dxm pills [/url]
hidden uncensored wiki darknet markets up [url=[Link deleted]]best darknet market drugs [/url]
cannazon url onion directory [url=[Link deleted]]new darknet markets 2022 [/url]
darknet markets alpha market url [url=[Link deleted]]deep net links [/url]
darknet market alaska shop online without cvv code [url=[Link deleted]]dark web sites [/url]
how to buy drugs on the darknet wiki darknet market [url=[Link deleted]]darknet drugs india [/url]
incognito url deep web links 2022 reddit [url=[Link deleted]]darknet markets with tobacco [/url]
мега onion магазин mega онион сайт [url=[Link deleted]]даркнет магазин [/url]
мега скорость мэги сайт [url=[Link deleted]]ссылки на даркнет [/url]
darknet market place search drug markets dark web [url=[Link deleted]]dark markets portugal [/url]
site darknet onion ethereum darknet markets [url=[Link deleted]]incognito link [/url]
darknet market busts tor darknet markets [url=[Link deleted]]vice city market link [/url]
black market website legit 2022 working darknet market [url=[Link deleted]]dark web sites drugs [/url]
darknet markets dark markets united kingdom [url=[Link deleted]]what is a darknet drug market like [/url]
darknet market steroids drug trading website [url=[Link deleted]]best darknet drug market 2022 [/url]
darknet markets still up darknet markets norway 2022 [url=[Link deleted]]escrow dark web [/url]
what darknet markets are live onion tube porn [url=[Link deleted]]versus market url [/url]
darknet reddit market pills darknet market guide reddit [url=[Link deleted]]accessing darknet market [/url]
мега onion официальный сайт мега [url=[Link deleted]]мега onion ссылка [/url]
Cocorico Market url darknet wiki link [url=[Link deleted]]versus link [/url]
links tor 2022 shop online without cvv code [url=[Link deleted]]darknet drug markets 2022 [/url]
сайты даркнет мега купить соль [url=[Link deleted]]mega onion shop [/url]
deep web drug markets dark markets macedonia [url=[Link deleted]]darknet market list url [/url]
asap url google black market [url=[Link deleted]]dark net guide [/url]
buds express incognito market [url=[Link deleted]]vice city market link [/url]
buy bank accounts darknet darknet market list [url=[Link deleted]]tor market links 2022 [/url]
tor search onion link best darknet market urs [url=[Link deleted]]darknet drugs malayisa [/url]
сайты даркнет ссылки darknet магазин зелья [url=[Link deleted]]darknet магазин [/url]
spinix, slot games and new online casinos The hottest PG that keeps various popular game camps here in one app is complete and also gives away free diamonds, can be exchanged for credit, withdraw as well ต้องครอบลิ้งค์
alphabay market link updated darknet market list [url=[Link deleted]]dark markets chile [/url]
where to find darknet market links redit counterfeit money dark web reddit [url=[Link deleted]]onion directory list [/url]
best darknet market for lsd decabol pills [url=[Link deleted]]best darknet market for counterfeit [/url]
best darknet market australia gray market place [url=[Link deleted]]best darknet markets reddit [/url]
tor darknet markets deep web drugs reddit [url=[Link deleted]]how to access the dark web on pc [/url]
dark web sites name list dream market darknet link [url=[Link deleted]]drugs from darknet markets [/url]
мега onion мега наркотики [url=[Link deleted]]новое зеркало мега [/url]
hidden uncensored wiki dark websites [url=[Link deleted]]pink versace pill [/url]
darknet search Abacus Market link [url=[Link deleted]]active darknet markets [/url]
what darknet markets are still up 2022 darknet markets [url=[Link deleted]]onion dark web list [/url]
top darknet drug sites top dumps shop [url=[Link deleted]]dark web markets reddit 2022 [/url]
dark web markets reddit how to access the black market [url=[Link deleted]]monkey xtc pill [/url]
outlaw darknet market url uk darknet markets [url=[Link deleted]]Heineken Express link [/url]
what darknet markets sell fentanyl onion links credit card [url=[Link deleted]]best darknet markets [/url]
мега сайт мега сайт [url=[Link deleted]]как зайти на мегу [/url]
pink versace pill how to buy things off the black market [url=[Link deleted]]reddit darknet markets noobs [/url]
darknet drug dealer deep web software market [url=[Link deleted]]dumps shop [/url]
сайты даркнет ссылки mega онион [url=[Link deleted]]mega сайт [/url]
dark net guide underground hackers black market [url=[Link deleted]]versus project market link [/url]
new darknet marketplaces bitcoin dark web [url=[Link deleted]]deep web shopping site [/url]
darknet markets 2022 reddit dark web links adult [url=[Link deleted]]deep web link 2022 [/url]
dark web buy bitcoin dark markets austria [url=[Link deleted]]reddit darknet market list [/url]
onion seiten darknet markets urls [url=[Link deleted]]versus market url [/url]
best darknet market australia buying drugs on darknet reddit [url=[Link deleted]]tor darknet markets [/url]
reddit darknet markets noobs back market legit [url=[Link deleted]]darknet search engine url [/url]
darkweb marketplace black market webshop [url=[Link deleted]]dark web sites drugs [/url]
darknet drug markets reddit search deep web engine [url=[Link deleted]]dark markets australia [/url]
dark web market list sichere darknet markets 2022 [url=[Link deleted]]ketamine darknet market [/url]
мега купить соль ссылка на мегу [url=[Link deleted]]ссылка мега [/url]
darknet market reddit 2022 dark web prostitution [url=[Link deleted]]deep web weed prices [/url]
dark market onion dark market links [url=[Link deleted]]cannazon url [/url]
deep onion links deep net links [url=[Link deleted]]buy real money [/url]
deep web links reddit 2022 drugs onion [url=[Link deleted]]how to get access to darknet [/url]
dark web trading tormarket onion [url=[Link deleted]]best darknet drug market 2022 [/url]
counterfeit money onion orange sunshine lsd [url=[Link deleted]]dark markets colombia [/url]
dark markets san marino deep dot web links [url=[Link deleted]]darkfox market link [/url]
Abacus link alphabay market url darknet adresse [url=[Link deleted]]darkfox market link [/url]
asap market darknet alphabay market onion link [url=[Link deleted]]reliable darknet markets reddit [/url]
top ten dark web darknet market links [url=[Link deleted]]dark web links 2022 [/url]
dark markets south korea best card shops [url=[Link deleted]]darkmarket 2022 [/url]
black market illegal drugs darknet site [url=[Link deleted]]onion deep web wiki [/url]
dark markets ecuador market deep web 2022 [url=[Link deleted]]ethereum darknet markets [/url]
darknet markets with tobacco dark web live [url=[Link deleted]]new onion darknet market [/url]
exploit market darknet reddit biggest darknet market place [url=[Link deleted]]top 10 dark websites [/url]
darknet market dmt alphabay market url [url=[Link deleted]]anadrol pills [/url]
mega onion mega зеркало [url=[Link deleted]]мега онион [/url]
dark web weed reddit darknet reviews [url=[Link deleted]]dark web onion markets [/url]
darknet market arrests australian dark web markets [url=[Link deleted]]darknet market controlled delivery [/url]
red ferrari pills what darknet markets are still up [url=[Link deleted]]adress darknet [/url]
deep web markets current list of darknet markets [url=[Link deleted]]black market illegal drugs [/url]
darknet drug vendors darknet markets onion addresses [url=[Link deleted]]cannazone [/url]
darknet markets dread darknet market url list [url=[Link deleted]]tor top websites [/url]
darknet drug market what darknet market to use now [url=[Link deleted]]dark web step by step [/url]
dnm xanax reddit darknet markets noobs [url=[Link deleted]]Heineken Express url [/url]
onion directory list reddit darknet market list 2022 [url=[Link deleted]]darknet markets still open [/url]
darknet магазин зелья мега onion магазин [url=[Link deleted]]мэги сайт [/url]
how to access darknet markets best darknet market now [url=[Link deleted]]how to access darknet markets [/url]
black market dark web links deep sea darknet market [url=[Link deleted]]darknet market list links [/url]
deep web drug store Cocorico Market url [url=[Link deleted]]dark web links [/url]
onion directory 2022 darknet black market sites [url=[Link deleted]]dark websites [/url]
drugs on darknet the real deal market darknet [url=[Link deleted]]dark market url [/url]
search darknet market darknet drugs url [url=[Link deleted]]deep web software market [/url]
ьупф ьфклуе мега скорость [url=[Link deleted]]mega onion зеркала [/url]
alphabay market darknet markets still up [url=[Link deleted]]dark net markets [/url]
5 20 mg, tadalafil s systemic exposure increases proportionally with the dose <a href=[Link deleted]cialis online
darknet market dash darkmarket url [url=[Link deleted]]black market net [/url]
darknet black market list onion seiten [url=[Link deleted]]dark markets netherlands [/url]
buying on dark web orange sunshine pill [url=[Link deleted]]blacknet drugs [/url]
oniondir deep web link directory new alphabay darknet market [url=[Link deleted]]deep web drug url [/url]
darknet магазин зелья мега наркотики [url=[Link deleted]]даркнет сайты магазин [/url]
мега купить соль darknet магазин [url=[Link deleted]]мега onion ссылка [/url]
mega ссылка магазин мега [url=[Link deleted]]mega магазин [/url]
darknet market vendors search drugs dark web price [url=[Link deleted]]Kingdom Market [/url]
darknet websites wiki drug markets onion [url=[Link deleted]]darknet drugs 2022 [/url]
euroguns deep web darknet prices [url=[Link deleted]]dark web address list [/url]
best darknet market australia darknet drug market url [url=[Link deleted]]drug markets onion [/url]
russian anonymous marketplace core market darknet [url=[Link deleted]]vice city market [/url]
black market dark web links incognito market link [url=[Link deleted]]trusted darknet markets [/url]
мега сайт мега скорость [url=[Link deleted]]мега наркотики [/url]
dark web step by step how to access the dark web 2022 [url=[Link deleted]]euroguns deep web [/url]
best darknet markets for marijuana dark web shop [url=[Link deleted]]dark markets montenegro [/url]
reliable darknet markets reddit deep web markets [url=[Link deleted]]versus project darknet market [/url]
how to buy bitcoin for the dark web how to darknet market [url=[Link deleted]]asap market darknet [/url]
darknet list darknet gun market [url=[Link deleted]]dark market links [/url]
мега наркотики магазин мега [url=[Link deleted]]сайты даркнет ссылки [/url]
mega onion оффициальный сайт зайти на мегу [url=[Link deleted]]mega onion зеркало [/url]
darknet market reddit darknet prices [url=[Link deleted]]dark web market reviews [/url]
versus market url black market drugs guns [url=[Link deleted]]reddit darknet markets links [/url]
cheapest drugs on darknet deep web drugs [url=[Link deleted]]tor markets 2022 [/url]
darknet illegal market darknet market wiki [url=[Link deleted]]cp onion [/url]
darknet market search engine asap link [url=[Link deleted]]bohemia market [/url]
dynabolts pills darknet market deep dot web [url=[Link deleted]]darkmarket link [/url]
dark markets united kingdom darknet drugs market [url=[Link deleted]]blue lady e pill [/url]
darknet market links 2022 reddit deep net websites [url=[Link deleted]]darknet market litecoin [/url]
cypher market darknet grey market drugs [url=[Link deleted]]duckduckgo dark web search [/url]
drugs on the dark web dark markets albania [url=[Link deleted]]onion directory 2022 [/url]
как зайти на мегу mega onion [url=[Link deleted]]мега нарко [/url]
darknet escrow weed darknet market [url=[Link deleted]]new onion darknet market [/url]
alphabay market onion link dark web markets 2022 [url=[Link deleted]]darknet markets 2022 updated [/url]
cannazon market dark markets luxembourg [url=[Link deleted]]bohemia market link [/url]
how to create a darknet market good dark web search engines [url=[Link deleted]]darknet market wiki [/url]
vice city market link deep web cc shop [url=[Link deleted]]Cocorico url [/url]
darknet links 2022 drugs darknet market reddit 2022 [url=[Link deleted]]site onion liste [/url]
dream market darknet link darknet market onions [url=[Link deleted]]darknet list market [/url]
мега кокаин сайты даркнет [url=[Link deleted]]ссылка мега [/url]
working darknet market links buying drugs online on openbazaar [url=[Link deleted]]dark market links [/url]
tor search engine link how to buy from darknet [url=[Link deleted]]credit card dumps dark web [/url]
links the hidden wiki dark web sites links [url=[Link deleted]]dark market onion [/url]
guide to darknet markets deep net links [url=[Link deleted]]darknet live stream [/url]
darkmarket url dark web marketplace [url=[Link deleted]]bitcoin dark web [/url]
dark markets monaco darknet live stream [url=[Link deleted]]dark markets malaysia [/url]
магазин даркнет зайти на мегу [url=[Link deleted]]ссылка на мегу [/url]
darknet market arrests darknet market links reddit [url=[Link deleted]]credit card dark web links [/url]
reddit darknet market noobs darknet market iphone [url=[Link deleted]]drugs on the darknet [/url]
versus link tor search onion link [url=[Link deleted]]deep web directory onion [/url]
darknet markets list 2022 dark websites [url=[Link deleted]]darknet onion links drugs [/url]
darknet market onions dark web cvv [url=[Link deleted]]red ferrari pills [/url]
dark markets mexico darknet drug vendor that takes paypal [url=[Link deleted]]new darknet marketplaces [/url]
mega даркнет мега onion зеркала [url=[Link deleted]]мега onion магазин [/url]
сайты даркнет мега onion магазин [url=[Link deleted]]даркнет сайты магазин [/url]
deep web links 2022 drugs dark web price [url=[Link deleted]]uncensored deep web [/url]
darknet onion markets reddit darknet dream market link [url=[Link deleted]]drugs on the deep web [/url]
versus darknet market the armory tor url [url=[Link deleted]]carding dark web [/url]
официальный сайт мега мега мефедрон [url=[Link deleted]]мега онион [/url]
how to access the darknet market darknet drug prices uk [url=[Link deleted]]darknet markets up [/url]
darknet market arrests price of black market drugs [url=[Link deleted]]darknet search [/url]
dark web market links what is darknet markets [url=[Link deleted]]australian dark web vendors [/url]
what darknet markets sell fentanyl deep web trading [url=[Link deleted]]open darknet markets [/url]
buy darknet market email address darkshades marketplace [url=[Link deleted]]deep web deb [/url]
tor drugs how to get to darknet market safe [url=[Link deleted]]bohemia link [/url]
exploit market darknet counterfeit money dark web reddit [url=[Link deleted]]carding dark web [/url]
how to get on the dark web on laptop dark web market place links [url=[Link deleted]]dark market onion [/url]
мега кокаин мега onion [url=[Link deleted]]mega onion shop [/url]
incognito market url darknet markets most popular [url=[Link deleted]]alpha market url [/url]
the armory tor url dark markets philippines [url=[Link deleted]]anadrol pills [/url]
dark markets macedonia deep web software market [url=[Link deleted]]underground black market website [/url]
darknet reinkommen best darknet market for psychedelics [url=[Link deleted]]darknet links 2022 drugs [/url]
ссылка мега зайти на мегу [url=[Link deleted]]даркнет сайты магазин [/url]
deep net access darknet market and monero [url=[Link deleted]]dark web site list [/url]
good dark web search engines dynabolts pills [url=[Link deleted]]darknet search [/url]
best deep web markets black market net [url=[Link deleted]]alpha market url [/url]
top darknet markets list dark web vendors [url=[Link deleted]]black market website review [/url]
grey market darknet link deep web canada [url=[Link deleted]]cannahome market darknet [/url]
dynabolts pills deep dot web replacement [url=[Link deleted]]bohemia market link [/url]
urls for darknet markets guns dark market [url=[Link deleted]]darknet seiten dream market [/url]
darknet market prices cvv black market [url=[Link deleted]]darknet market busts [/url]
cannazon link deep web drugs [url=[Link deleted]]darknet links 2022 drugs [/url]
darknet drugs safe how to access the darknet market [url=[Link deleted]]darkweb market [/url]
how to find the black market online darknet market list [url=[Link deleted]]how to buy bitcoin for the dark web [/url]
the darknet markets dark markets bolivia [url=[Link deleted]]darknet market vendor guide [/url]
даркнет сайты магазин мега онион [url=[Link deleted]]сайты даркнет ссылки [/url]
reddit darknet reviews darknet vendor reviews [url=[Link deleted]]new darknet market reddit [/url]
urls for darknet markets onion links 2022 [url=[Link deleted]]darkweb marketplace [/url]
black market websites tor how to create a darknet market [url=[Link deleted]]darknet market links 2022 reddit [/url]
deep deep web links darknet drugs safe [url=[Link deleted]]2022 working darknet market [/url]
best darknet market for guns cannazon market url [url=[Link deleted]]darknet market links reddit [/url]
darknet telegram group new dark web links [url=[Link deleted]]dark web hitman for hire [/url]
new dark web links bitcoin darknet drugs [url=[Link deleted]]darknet markets noob [/url]
dark markets russia how to access darknet market [url=[Link deleted]]darknet onion links drugs [/url]
darknet in person drug sales dark markets bulgaria [url=[Link deleted]]darknet links 2022 drugs [/url]
darknet market litecoin counterfeit money deep web [url=[Link deleted]]dark markets finland [/url]
which darknet markets are still open alphabay link reddit [url=[Link deleted]]escrow market darknet [/url]
trusted darknet markets weed darknet markets most popular [url=[Link deleted]]darknet market search engine [/url]
archetyp market darknet deep dot web replacement [url=[Link deleted]]darknet markets fake id [/url]
mega онион сайт мега onion зеркала [url=[Link deleted]]мега сайт [/url]
hidden uncensored wiki darknet markets working links [url=[Link deleted]]dark web directory [/url]
cheapest drugs on darknet tma drug [url=[Link deleted]]deep web links reddit [/url]
biggest darknet markets darknet serious market [url=[Link deleted]]dark markets croatia [/url]
australian dark web vendors drugs on the deep web [url=[Link deleted]]tor darknet market address [/url]
официальный сайт мега сайт мега [url=[Link deleted]]darknet магазин зелья [/url]
crypto market darknet best darknet market now [url=[Link deleted]]drugs dark web [/url]
mega магазин как зайти на мегу [url=[Link deleted]]mega onion зеркала [/url]
what is the darknet market darknet drug trafficking [url=[Link deleted]]how to access darknet markets reddit [/url]
darknet wiki link darknet websites drugs [url=[Link deleted]]best darknet market australia [/url]
deep web drugs darknet onion links drugs [url=[Link deleted]]darknet drug store [/url]
darknet link drugs best dark web marketplaces 2022 [url=[Link deleted]]darknet site [/url]
drug website dark web darknet drugs links [url=[Link deleted]]current darknet markets [/url]
darknet prices dark web store [url=[Link deleted]]online onion market [/url]
dynabolts pills buy drugs darknet [url=[Link deleted]]dark web links 2022 [/url]
dark markets malaysia which darknet markets accept zcash [url=[Link deleted]]dark markets south korea [/url]
live darknet markets dnm xanax [url=[Link deleted]]dark markets albania [/url]
verified darknet market darknet drug markets 2022 [url=[Link deleted]]working darknet market links [/url]
credit card dumps dark web nike jordan pill [url=[Link deleted]]deep web links reddit 2022 [/url]
new darknet markets 2022 best darknet market for weed 2022 [url=[Link deleted]]deep net links [/url]
deep web link 2022 crypto darknet drug shop [url=[Link deleted]]darknet links market [/url]
сайт мега мега сайт [url=[Link deleted]]мега купить соль [/url]
vice city market what darknet markets are available [url=[Link deleted]]darknet new market link [/url]
tor market url black market bank account [url=[Link deleted]]darknet prices [/url]
darknet market search engine dma drug [url=[Link deleted]]black market drugs guns [/url]
hidden financial services deep web dark markets colombia [url=[Link deleted]]darknet markets best [/url]
dark market reddit the onion directory [url=[Link deleted]]tor market links 2022 [/url]
мега зеркало мега онион [url=[Link deleted]]мега вход [/url]
market street darknet how to get to the black market online [url=[Link deleted]]links da deep web 2022 [/url]
darknet reddit market black market credit card dumps [url=[Link deleted]]onion market [/url]
dark markets luxembourg reliable darknet markets reddit [url=[Link deleted]]darknet markets deepdotweb [/url]
black market website darknet markets fake id [url=[Link deleted]]buying on dark web [/url]
мега ссылка мега ссылка [url=[Link deleted]]ссылки на даркнет [/url]
wiki darknet market darknet market drug prices [url=[Link deleted]]darknet websites wiki [/url]
best darknet markets uk the armory tor url [url=[Link deleted]]safe list of darknet market links [/url]
onion dark web list darknet market adderall [url=[Link deleted]]Cocorico Market url [/url]
archetyp link dark web sites drugs [url=[Link deleted]]xanax darknet reddit [/url]
new darknet markets 2022 dnm market [url=[Link deleted]]best darknet drug sites [/url]
dark markets norge best darknet markets for marijuana [url=[Link deleted]]marijuana dark web [/url]
black market website reddit darknet markets uk [url=[Link deleted]]onion deep web search [/url]
bohemia market url most popular darknet markets 2022 [url=[Link deleted]]dark web link [/url]
darknet websites wiki the dark market [url=[Link deleted]]darknet market bible [/url]
mega market mega сайт [url=[Link deleted]]мега купить [/url]
outlaw market darknet Cocorico Market url [url=[Link deleted]]dark web links [/url]
best darknet market for lsd archetyp market [url=[Link deleted]]dark web market list [/url]
verified dark web links dark chart [url=[Link deleted]]top 10 dark websites [/url]
reddit darknet market deals how to access deep web safely reddit [url=[Link deleted]]the dark market [/url]
darknet drug dealer best darknet market drugs [url=[Link deleted]]dark web drugs australia [/url]
dark markets moldova deep web links reddit 2022 [url=[Link deleted]]darknet new market link [/url]
versus project market url drugs dark web price [url=[Link deleted]]accessing darknet market [/url]
uncensored hidden wiki link drugs dark web reddit [url=[Link deleted]]darknet markets 2022 updated [/url]
dnm xanax best darknet markets for marijuana [url=[Link deleted]]core market darknet [/url]
darknet market fake id dark markets norway [url=[Link deleted]]cypher market [/url]
how to anonymously use darknet markets dark web links 2022 [url=[Link deleted]]most popular darknet markets 2022 [/url]
мега onion ссылка mega онион [url=[Link deleted]]mega онион [/url]
мега зеркало мега onion зеркало [url=[Link deleted]]мега скорость [/url]
tor2door market link free deep web links [url=[Link deleted]]market street darknet [/url]
dark market url dark web drugs australia [url=[Link deleted]]best dark web links [/url]
online black market electronics dark markets sweden [url=[Link deleted]]legit darknet sites [/url]
dark web hitmen darknet reddit market [url=[Link deleted]]darknet stock market [/url]
how to get on darknet market reddit best darknet market [url=[Link deleted]]darknet drugs guide [/url]
how to anonymously use darknet markets darknet market sites and how to access [url=[Link deleted]]can you buy drugs on darknet [/url]
best darknet market for counterfeit darknet market links buy ssn [url=[Link deleted]]reddit darknet markets list [/url]
dark market onion darknet database market [url=[Link deleted]]underground dumps shop [/url]
i2p darknet markets dnm xanax [url=[Link deleted]]carding deep web links [/url]
deep web directory onion how to get on the dark web [url=[Link deleted]]site darknet market [/url]
dark web store darknet drug vendors [url=[Link deleted]]darkfox darknet market [/url]
pax marketplace darknet markets list reddit [url=[Link deleted]]alphabay market onion link [/url]
darknet market fake id darknet onion links drugs [url=[Link deleted]]adresse onion [/url]
darknet market redit darkfox link [url=[Link deleted]]cannahome darknet market [/url]
Heineken Express Market darknet drug store [url=[Link deleted]]buy drugs darknet [/url]
cannahome market darknet darkfox market url [url=[Link deleted]]dark markets germany [/url]
search darknet market darkfox darknet market [url=[Link deleted]]dark markets venezuela [/url]
мега зеркало сайты даркнет [url=[Link deleted]]мега onion зеркала [/url]
buying drugs off darknet search darknet markets [url=[Link deleted]]how to use darknet markets [/url]
мега нарко мега купить [url=[Link deleted]]ьупф ьфклуе [/url]
darknet website for drugs incognito link [url=[Link deleted]]darknet seiten liste [/url]
darkfox url dark markets usa [url=[Link deleted]]dark markets argentina [/url]
tor onion search darknet market adressen [url=[Link deleted]]dark web links 2022 [/url]
darknetlive how to find the black market online [url=[Link deleted]]darknet market credit cards [/url]
buy bank accounts darknet deep web updated links [url=[Link deleted]]dark markets canada [/url]
darknet market links 2022 reddit darknet market [url=[Link deleted]]onion market [/url]
bohemia market link darknet black market [url=[Link deleted]]ruonion [/url]
deep net links dark net guide [url=[Link deleted]]darknet market reddit list [/url]
the best onion sites dark markets finland [url=[Link deleted]]active darknet market urls [/url]
links da deep web 2022 black market website [url=[Link deleted]]darknet drug vendors [/url]
darknet dream market search darknet market [url=[Link deleted]]cannazon market link [/url]
how to anonymously use darknet markets drugs dark web price [url=[Link deleted]]archetyp url [/url]
dark net market list reddit ruonion [url=[Link deleted]]dark markets france [/url]
how to use onion sites darkweb marketplace [url=[Link deleted]]alphabay market url [/url]
wired darknet markets darknet drug markets [url=[Link deleted]]dark market sites [/url]
canazon versus project market [url=[Link deleted]]working dark web links [/url]
dot onion websites how to access darknet markets [url=[Link deleted]]darkweb market [/url]
asap url darknet markets up [url=[Link deleted]]tor markets [/url]
deep net access reddit darknet market superlist [url=[Link deleted]]cp onion [/url]
мега зеркало mega onion ссылка
best darknet drug sites blacknet drugs [url=[Link deleted]]i2p darknet markets [/url]
tor market drug markets dark web [url=[Link deleted]]gray market place [/url]
fake id dark web 2022 darknet market news [url=[Link deleted]]darknet onion markets reddit [/url]
anadrol pills what is the best darknet market [url=[Link deleted]]drugs on the darknet [/url]
dark web website links darknet market onion links [url=[Link deleted]]bitcoin market on darknet tor [/url]
reddit darknet market uk dark web drug marketplace [url=[Link deleted]]core market darknet [/url]
open darknet markets dark markets spain [url=[Link deleted]]counterfeit money onion [/url]
mega сайт мега онион
cannazon url darknet markets onion address [url=[Link deleted]]cheap darknet websites dor drugs [/url]
darknet market comparison dark web shop [url=[Link deleted]]buy real money [/url]
dark markets montenegro cannahome darknet market [url=[Link deleted]]darknet dream market link [/url]
darknet telegram group market deep web 2022 [url=[Link deleted]]darknet market redit [/url]
dark web markets 2022 onion market [url=[Link deleted]]reddit where to buy drugs [/url]
dark markets hungary deep web search engine url [url=[Link deleted]]darknet market script [/url]
deep web links reddit 2022 buy drugs from darknet [url=[Link deleted]]dark markets serbia [/url]
biggest darknet market 2022 tor darknet markets [url=[Link deleted]]underground market place darknet [/url]
darknet market links 2022 gbl drug wiki [url=[Link deleted]]darknet market xanax [/url]
buy bank accounts darknet black market website review [url=[Link deleted]]darknet illicit drugs [/url]
mega darknet как зайти на мегу
tor websites reddit hidden marketplace [url=[Link deleted]]darknet market comparison [/url]
мега onion магазин магазин даркнет
archetyp market link best onion sites 2022 [url=[Link deleted]]darknet market dash [/url]
dark markets mexico what are darknet drug markets [url=[Link deleted]]deep web url links [/url]
duckduckgo onion site dark markets new zealand [url=[Link deleted]]deep web drugs [/url]
мега купить соль mega магазин
weed darknet market black market website review [url=[Link deleted]]dark web login guide [/url]
dark web adderall archetyp market darknet [url=[Link deleted]]agora darknet market [/url]
darknet market comparison chart best darknet market 2022 reddit [url=[Link deleted]]darknet drugs price [/url]
incognito url how to access the dark web on pc [url=[Link deleted]]deep dot web markets [/url]
tor search engine link best darknet market now [url=[Link deleted]]biggest darknet market 2022 [/url]
dark market links best darknet markets 2022 [url=[Link deleted]]darknet market updates 2022 [/url]
darknet drug prices the best onion sites [url=[Link deleted]]hidden marketplace [/url]
mega onion оффициальный сайт мега кокаин
onion sex shop dark markets bosnia [url=[Link deleted]]tor search onion link [/url]
darkfox market url uk darknet markets [url=[Link deleted]]new dark web links [/url]
best dark web markets bitcoin darknet markets [url=[Link deleted]]darknet markets guide [/url]
crypto market darknet site darknet market [url=[Link deleted]]best darknet market for heroin [/url]
cannahome dnm xanax [url=[Link deleted]]dark web legit sites [/url]
dynabolts pills deep dot web links [url=[Link deleted]]what darknet markets are available [/url]
dark markets argentina deep web search engine url [url=[Link deleted]]underground dumps shop [/url]
deep web cc shop darknet black market [url=[Link deleted]]how to get on the dark web android [/url]
darknet escrow markets deep web link 2022 [url=[Link deleted]]deep web links reddit [/url]
active darknet markets 2022 blue lady e pill [url=[Link deleted]]darknet markets guide [/url]
darknet market drug prices darknet market noobs reddit [url=[Link deleted]]archetyp market url [/url]
мега onion ссылка зайти на мегу
back market trustworthy orange sunshine lsd [url=[Link deleted]]top darknet markets list [/url]
мега сайт ссылка mega darknet
dark markets paraguay darknet market links 2022 [url=[Link deleted]]hidden financial services deep web [/url]
new dark web links darknet markets list 2022 [url=[Link deleted]]hidden wiki tor onion urls directories [/url]
darknet market oxycontin darknet market canada [url=[Link deleted]]reddit biggest darknet market place [/url]
dark web markets darknet drugs market [url=[Link deleted]]reddit darknet market superlist [/url]
market street darknet dark markets ukraine [url=[Link deleted]]anadrol pills [/url]
how to dark web reddit onion link reddit [url=[Link deleted]]cheapest drugs on darknet [/url]
mega onion ссылка мега сайт
tor market url darknet market vendor guide [url=[Link deleted]]dark markets estonia [/url]
deep web links 2022 darkmarket list [url=[Link deleted]]alphabay url [/url]
darknet markets reddit 2022 dark web search tool [url=[Link deleted]]deep web addresses onion [/url]
darkfox link darknet gun market [url=[Link deleted]]what is a darknet drug market like [/url]
dark web links adult reddit darknet market links [url=[Link deleted]]how to get on the dark web [/url]
tormarket onion site onion liste [url=[Link deleted]]darknet market lightning network [/url]
how to access the dark web 2022 dark markets philippines [url=[Link deleted]]darknet market directory [/url]
bohemia link dark markets australia [url=[Link deleted]]pink versace pill [/url]
mega darknet мега onion ссылка
black market websites 2022 dark markets croatia [url=[Link deleted]]darknet market links 2022 reddit [/url]
versus project market darknet how to get to darknet market safe [url=[Link deleted]]tormarket onion [/url]
mega onion зеркала магазин мега
darknet union top 10 dark web url [url=[Link deleted]]tor market links 2022 [/url]
incognito market link dark web prepaid cards reddit [url=[Link deleted]]darknet market search engine [/url]
darknet market links buy ssn darknet markets list reddit [url=[Link deleted]]darknet escrow markets [/url]
darknet market list 2022 bitcoin market on darknet tor [url=[Link deleted]]darknet markets with tobacco [/url]
darknet market list reddit dark markets guyana [url=[Link deleted]]how to browse the dark web reddit [/url]
live onion market best darknet market may 2022 reddit [url=[Link deleted]]darkweb marketplace [/url]
tor link search engine cannazon [url=[Link deleted]]underground card shop [/url]
магазин даркнет новое зеркало мега
alphabay market link darknet drug vendor that takes paypal [url=[Link deleted]]reddit darknet market noobs [/url]
darknet market noobs step by step darknet markets availability [url=[Link deleted]]best australian darknet market [/url]
most reliable darknet markets what darknet markets are live [url=[Link deleted]]market links darknet [/url]
даркнет ссылки мега даркнет
dark markets ecuador darknet market reddit 2022 [url=[Link deleted]]mdm love drug [/url]
reddit darknet market noobs bible darknet market news [url=[Link deleted]]deep cp links [/url]
dark web drugs reddit darknet market australia [url=[Link deleted]]dark web directory [/url]
darknet сайт мега onion зеркала
which darknet markets are still open mdm love drug [url=[Link deleted]]darknet market oz [/url]
onion darknet market buy drugs darknet [url=[Link deleted]]darknet drug prices uk [/url]
versus project market darknet reddit darknet market australia [url=[Link deleted]]drugs darknet vendors [/url]
superman pills mg onion seiten [url=[Link deleted]]darknet market wiki [/url]
best darknet gun market dark markets netherlands [url=[Link deleted]]dark markets portugal [/url]
darknet drug dealer darknet drug links [url=[Link deleted]]dark markets switzerland [/url]
top darknet market now popular darknet markets [url=[Link deleted]]darknet drugs germany [/url]
darknet onion links drugs dark web links reddit [url=[Link deleted]]current darknet markets reddit [/url]
darknet drugs 2022 best market darknet drugs [url=[Link deleted]]Kingdom darknet Market [/url]
deep web cc sites best darknet market australia [url=[Link deleted]]adress darknet [/url]
history of darknet markets darknet market canada [url=[Link deleted]]dark web live [/url]
access the dark web reddit darknet sites url [url=[Link deleted]]onion links for deep web [/url]
reddit darknet market uk online black market electronics [url=[Link deleted]]darknet market features [/url]
tormarket onion top ten dark web sites [url=[Link deleted]]best darknet markets reddit [/url]
how to access darknet market darknet markets urls [url=[Link deleted]]asap url [/url]
darknet drugs shipping Heineken Express link [url=[Link deleted]]new darknet markets [/url]
darknet black market list best deep web markets [url=[Link deleted]]cypher market [/url]
russian darknet market alphabay market [url=[Link deleted]]market onion [/url]
mega market mega darknet
мега официальный сайт мега onion ссылка
list of darknet markets 2022 tor market [url=[Link deleted]]darknet markets reddit links [/url]
trusted darknet markets weed hidden uncensored wiki [url=[Link deleted]]black market url deep web [/url]
deep market reddit darknet market noobs bible [url=[Link deleted]]exploit market darknet [/url]
incognito link what darknet markets sell fentanyl [url=[Link deleted]]decabol pills [/url]
tor top websites florida darknet markets [url=[Link deleted]]cannazon [/url]
mega onion оффициальный сайт мега онион
dark markets macedonia darknet reddit market [url=[Link deleted]]how big is the darknet market [/url]
best darknet markets for marijuana carding deep web links [url=[Link deleted]]tor2door market darknet [/url]
buy bank accounts darknet top ten dark web sites [url=[Link deleted]]darkmarket list [/url]
new alphabay darknet market darknet market drug prices [url=[Link deleted]]deepdotweb markets [/url]
new dark web links live onion market [url=[Link deleted]]best dark web markets 2022 [/url]
tor2door market link best darknet gun market [url=[Link deleted]]darknet market security [/url]
darknet markets 2022 what is the darknet market [url=[Link deleted]]cp onion [/url]
hidden financial services deep web versus project market link [url=[Link deleted]]darknet market controlled delivery [/url]
outlaw darknet market url darknet market search [url=[Link deleted]]Heineken Express url [/url]
магазин мега mega onion оффициальный сайт
darknet market links buy ssn how to access the dark web 2022 [url=[Link deleted]]tor markets 2022 [/url]
blockchain darknet markets reddit darknet market how to [url=[Link deleted]]how to get access to darknet [/url]
мега купить соль мега мефедрон
bitcoins and darknet markets how to get on the dark web on laptop [url=[Link deleted]]how to access the dark web on pc [/url]
drug market darknet market reviews [url=[Link deleted]]monero darknet markets [/url]
cypher url cannahome market link [url=[Link deleted]]black market cryptocurrency [/url]
tor search engine link deep web search engines 2022 [url=[Link deleted]]versus project market link [/url]
reddit darknet market noobs bible versus project market link [url=[Link deleted]]deep web cc dumps [/url]
counterfeit money deep web reliable darknet markets lsd [url=[Link deleted]]reddit darknet market 2022 [/url]
даркнет магазин мега онион
dark markets belgium deep web cc dumps [url=[Link deleted]]dark markets estonia [/url]
buying things from darknet markets superman pills mg [url=[Link deleted]]darknetlive [/url]
dark markets brazil how to access the dark web safely reddit [url=[Link deleted]]gray market place [/url]
darkweb форум black market drugs guns [url=[Link deleted]]best darknet market for heroin [/url]
how to browse the dark web reddit darknet market links safe [url=[Link deleted]]darknet market steroids [/url]
сайт мега мега onion зеркало
safe list of darknet market links hitman for hire dark web [url=[Link deleted]]deep web links 2022 [/url]
alphabay darknet market dark market [url=[Link deleted]]deep net websites [/url]
dark markets greece darknet market adressen [url=[Link deleted]]dark web steroids [/url]
даркнет ссылки mega market
best dark web marketplaces 2022 darknet market vendor guide [url=[Link deleted]]black market reddit [/url]
onion tube porn what darknet markets are available [url=[Link deleted]]legit darknet markets [/url]
black market webshop market deep web 2022 [url=[Link deleted]]buy bank accounts darknet [/url]
best darknet markets reddit darknet drug prices uk [url=[Link deleted]]darknet drugs guide [/url]
darknet market list links drugs darknet vendors [url=[Link deleted]]deep web links updated [/url]
dark web engine search darknet black market [url=[Link deleted]]we amsterdam [/url]
darkmarket link darknet drug prices [url=[Link deleted]]how to buy from darknet markets [/url]
как зайти на мегу мега шишки
safe darknet markets darkmarket 2022 [url=[Link deleted]]darknet drug prices [/url]
best darknet market urs reddit where to buy drugs [url=[Link deleted]]darknet market links reddit [/url]
darknet drug market dread onion [url=[Link deleted]]darknet market prices [/url]
best darknet market 2022 reddit counterfeit money deep web [url=[Link deleted]]reddit best darknet markets [/url]
illegal black market darknet market dash [url=[Link deleted]]red ferrari pills [/url]
dark markets austria darkmarket website [url=[Link deleted]]deep web deb [/url]
reddit darknet market list bitcoin dark web [url=[Link deleted]]what darknet markets are available [/url]
darknet drug markets reddit darknet markets list 2022 [url=[Link deleted]]darknet drugs price [/url]
how big is the darknet market dark market link [url=[Link deleted]]how to get on the dark web on laptop [/url]
ьупф ьфклуе мега кокаин
dark web drugs bitcoin darknet sites url [url=[Link deleted]]darknet markets still open [/url]
drugs sold on dark web darknet drug vendors [url=[Link deleted]]current darknet markets reddit [/url]
dark markets luxembourg Kingdom url [url=[Link deleted]]onion websites for credit cards [/url]
сылка на мегу мега ссылка
darknet market adressen best darknet market reddit [url=[Link deleted]]the darknet market reddit [/url]
darknet markets financial times anadrol pills [url=[Link deleted]]darknet markets reddit 2022 [/url]
dark net market deep web drug links [url=[Link deleted]]ordering drugs on dark web [/url]
darknet drug markets darknet guns market [url=[Link deleted]]online drug market [/url]
deep dark web markets links darknet market listing [url=[Link deleted]]best onion sites 2022 [/url]
мега зеркало mega darknet
ketamine darknet market dark markets russia [url=[Link deleted]]darknet dream market reddit [/url]
fake id onion gray market place [url=[Link deleted]]dark markets monaco [/url]
versus link dark web steroids [url=[Link deleted]]darknet market ranking [/url]
bitcoin darknet markets underground market online [url=[Link deleted]]cheapest drugs on darknet [/url]
best darknet market for weed uk darknet markets dread [url=[Link deleted]]deep dot web links [/url]
darknet market links 2022 darknet marketplace [url=[Link deleted]]how to access the darknet market [/url]
сайт даркнет мега кокаин
hire an assassin dark web archetyp link [url=[Link deleted]]dark markets sweden [/url]
tor2door market darknet alphabay url [url=[Link deleted]]grey market drugs [/url]
мега магазин даркнет ссылки
darknet links markets dark web markets reddit [url=[Link deleted]]darknet black market list [/url]
best darknet markets uk nike jordan pill [url=[Link deleted]]wiki sticks drugs [/url]
darknet dream market reddit archetyp url [url=[Link deleted]]darkshades marketplace [/url]
drugs on the dark web dark web buy bitcoin [url=[Link deleted]]black market dark web links [/url]
tor market links unicorn pill [url=[Link deleted]]outlaw market darknet [/url]
best dark web marketplaces 2022 asap url [url=[Link deleted]]monkey xtc pill [/url]
darknet guns market online black market electronics [url=[Link deleted]]darkfox url [/url]
dark markets canada lsd drug wiki [url=[Link deleted]]popular darknet markets [/url]
darknet drug market list tor2door darknet market [url=[Link deleted]]darknet markets still up [/url]
darknet сайт mega онион сайт
illegal black market gbl drug wiki [url=[Link deleted]]darknet market status [/url]
deep web search engines 2022 marijuana dark web [url=[Link deleted]]live darknet markets [/url]
darknet markets japan hire an assassin dark web [url=[Link deleted]]lsd drug wiki [/url]
currently darknet markets exploit market darknet [url=[Link deleted]]how to access the dark web 2022 [/url]
darknet list darknet market avengers [url=[Link deleted]]what darknet markets are up [/url]
мега мефедрон мега onion зеркало
incognito market best darknet market for heroin [url=[Link deleted]]darknet market get pills [/url]
current best darknet market dark web drugs australia [url=[Link deleted]]darknet drug vendor that takes paypal [/url]
мега вход mega onion
darknet sites url darknet market ranking [url=[Link deleted]]darknet markets availability [/url]
how to access darknet market how to access the dark web through tor [url=[Link deleted]]cypher darknet market [/url]
dark markets slovenia adresse dark web [url=[Link deleted]]darknet guide [/url]
best darknet market links tor darknet [url=[Link deleted]]darknet dream market reddit [/url]
carding dark web market cypher [url=[Link deleted]]orange sunshine pill [/url]
darknet markets financial times the real deal market darknet [url=[Link deleted]]dark markets brazil [/url]
pof login canada
[url=”[Link deleted]sites[/url]
dating site sign up
mega onion оффициальный сайт мега шишки
dark market url 0day onion [url=[Link deleted]]can you buy drugs on darknet [/url]
dark web steroids Kingdom darknet Market [url=[Link deleted]]darknet market guide reddit [/url]
darknet markets australia bitcoin drugs market [url=[Link deleted]]fresh onions link [/url]
tor markets links tor market links [url=[Link deleted]]asap market url [/url]
darknet market links drug trading website [url=[Link deleted]]tor darknet market [/url]
black market drugs guns dark markets belarus [url=[Link deleted]]darknet markets onion addresses [/url]
darknet markets for steroids agora darknet market [url=[Link deleted]]darknet market updates 2022 [/url]
сайт мега мега мефедрон
мега онион сайт мега onion зеркала
top 10 dark websites darknet market ranking [url=[Link deleted]]tor market links 2022 [/url]
deep web weed prices darknet marketplace drugs [url=[Link deleted]]darknet onion markets reddit [/url]
live dark web the dark web url [url=[Link deleted]]dark markets lithuania [/url]
darknet market stats counterfeit money onion [url=[Link deleted]]top 10 dark web url [/url]
darknet black market list darknet market ddos [url=[Link deleted]]darkweb markets [/url]
cannazon link darknet escrow markets [url=[Link deleted]]darkfox url [/url]
официальный сайт мега мега официальный сайт
darknet dream market reddit grey market darknet link [url=[Link deleted]]dark markets greece [/url]
deep web search engine 2022 underground market place darknet [url=[Link deleted]]dark websites [/url]
pyramid pill tormarket onion [url=[Link deleted]]darknet seiten dream market [/url]
cannazon market darknet tor websites reddit [url=[Link deleted]]black market credit card dumps [/url]
blockchain darknet markets darknet list [url=[Link deleted]]deep web canada [/url]
darknet onion links drugs darknet market credit cards [url=[Link deleted]]how to get to darknet market [/url]
cvv black market darknet software market [url=[Link deleted]]darknet buy drugs [/url]
links deep web tor largest darknet market [url=[Link deleted]]darknet markets dread [/url]
мега вход новое зеркало мега
мега купить ссылка мега
working darknet market links darknet litecoin [url=[Link deleted]]darknet markets 2022 updated [/url]
underground black market website darknet market url [url=[Link deleted]]Abacus Market [/url]
cannazon url dnm xanax [url=[Link deleted]]dark markets mexico [/url]
darknet wiki link alphabay market link [url=[Link deleted]]2022 working darknet market [/url]
what darknet market to use hire an assassin dark web [url=[Link deleted]]alphabay link reddit [/url]
deep web links 2022 reddit darknet markets onion addresses [url=[Link deleted]]dark web market place links [/url]
mdm love drug deep deep web links [url=[Link deleted]]versus darknet market [/url]
legit darknet sites black market sites 2022 [url=[Link deleted]]dark web market list [/url]
dark web directory dark web drugs [url=[Link deleted]]darknet drugs guide [/url]
dark web hitman for hire darknet markets list 2022 [url=[Link deleted]]deep web drug markets [/url]
mega onion зеркала официальный сайт мега
buds express best drug darknet [url=[Link deleted]]onion marketplace drugs [/url]
darknet list market dark markets croatia [url=[Link deleted]]deep web cc dumps [/url]
what darknet markets are still up deep web cc sites [url=[Link deleted]]best darknet market links [/url]
best dark web search engine link best australian darknet market [url=[Link deleted]]drugs dark web [/url]
good dark web search engines darknet marketplace drugs [url=[Link deleted]]best dark web links [/url]
best darknet markets uk list of darknet markets 2022 [url=[Link deleted]]how to anonymously use darknet markets [/url]
tor link list 2022 darknet markets fake id [url=[Link deleted]]darknet markets lsd-25 2022 [/url]
магазины даркнета даркнет ссылки
reddit darknet market guide vice city market url [url=[Link deleted]]versus project market [/url]
buying drugs online on openbazaar darknet market buying mdma usa [url=[Link deleted]]dark markets singapore [/url]
biggest darknet markets darknet market wikia [url=[Link deleted]]darkfox link [/url]
dark web market the best onion sites [url=[Link deleted]]dark markets ireland [/url]
darknet market google darknet drugs safe [url=[Link deleted]]duckduckgo onion site [/url]
red ferrari pills carding dark web [url=[Link deleted]]drugs on the darknet [/url]
мега ссылка mega darknet
dark markets australia what darknet markets are still open [url=[Link deleted]]list of online darknet market [/url]
current darknet markets darknet market links [url=[Link deleted]]what is darknet markets [/url]
buying from darknet market with electrum new darknet markets 2022 [url=[Link deleted]]reliable darknet markets reddit [/url]
underground dumps shop how to access the dark web reddit [url=[Link deleted]]how to get on the dark web on laptop [/url]
best darknet market for steroids adresse onion [url=[Link deleted]]dark markets albania [/url]
current darknet market list cvv black market [url=[Link deleted]]dark web live [/url]
darknet markets list dark web site list [url=[Link deleted]]best darknet market links [/url]
dumps shop how to search the dark web reddit [url=[Link deleted]]dark markets belarus [/url]
darknet сайт ссылка на мегу
crypto darknet drug shop darknet drug vendor that takes paypal [url=[Link deleted]]redit safe darknet markets [/url]
alphabay solutions reviews archetyp market link [url=[Link deleted]]onion domain and kingdom [/url]
dark markets lithuania ethereum darknet markets [url=[Link deleted]]dark web links market [/url]
links deep web tor darknet drugs url [url=[Link deleted]]onion websites for credit cards [/url]
мега onion зайти на мегу
trusted darknet markets weed dark web website links [url=[Link deleted]]alpha market url [/url]
current darknet market list darknet drugs shipping [url=[Link deleted]]trusted darknet vendors [/url]
black market websites 2022 2022 working darknet market [url=[Link deleted]]darkfox link [/url]
dark markets thailand darkweb форум [url=[Link deleted]]escrow market darknet [/url]
dark web sites drugs deep web canada [url=[Link deleted]]darknet market ddos [/url]
back market legit grey market link [url=[Link deleted]]dark web hitman [/url]
darknet drugs grey market drugs [url=[Link deleted]]versus market link [/url]
dark markets malaysia dark web link [url=[Link deleted]]dark web markets [/url]
darknet drug store darknet prices [url=[Link deleted]]what darknet markets are available [/url]
ссылка на мегу mega магазин
best darknet market for heroin most popular darknet markets 2022 [url=[Link deleted]]how to access dark net [/url]
магазин мега мега onion магазин
darknet market redit how to access dark net [url=[Link deleted]]best black market websites [/url]
darknet drug prices tor darknet markets [url=[Link deleted]]hire an assassin dark web [/url]
adresse onion darknet market wikia [url=[Link deleted]]dark web search engine 2022 [/url]
мега скорость darknet магазин зелья
versus project darknet market drug trading website [url=[Link deleted]]good dark web search engines [/url]
how to get to the black market online buying credit cards on dark web [url=[Link deleted]]how to access the dark web safely reddit [/url]
escrow market darknet trusted darknet markets weed [url=[Link deleted]]what darknet markets are live [/url]
darknet market adressen darknet markets ranked 2022 [url=[Link deleted]]buying drugs off darknet [/url]
cannazon market darknet tor markets 2022 [url=[Link deleted]]how to buy from the darknet markets lsd [/url]
list of dark net markets xanax darknet reddit [url=[Link deleted]]cypher market url [/url]
даркнет магазин mega магазин
mega onion ссылка ьупф ьфклуе
the dark web shop darknet market adressen [url=[Link deleted]]the darknet market reddit [/url]
best darknet drug market 2022 darknet drugs sites [url=[Link deleted]]darknet market litecoin [/url]
xanax on darknet dark web onion markets [url=[Link deleted]]phenazepam pills [/url]
grey market darknet legit darknet markets [url=[Link deleted]]black market sites 2022 [/url]
darknet market iphone safe darknet markets [url=[Link deleted]]dark markets uruguay [/url]
darknet black market url vice city market link [url=[Link deleted]]dark markets peru [/url]
ссылка мега mega магазин
tor darknet sites dark markets belgium [url=[Link deleted]]carding deep web links [/url]
current list of darknet markets guide to using darknet markets [url=[Link deleted]]australian dark web vendors [/url]
deep onion links the dark web links 2022 [url=[Link deleted]]dark markets latvia [/url]
archetyp market cannazone [url=[Link deleted]]access the dark web reddit [/url]
dark web engine search Cocorico url [url=[Link deleted]]best dark net markets [/url]
counterfeit money onion darknet market adderall prices [url=[Link deleted]]dark web electronics [/url]
darknet market litecoin black market prices for drugs [url=[Link deleted]]accessing darknet market [/url]
alphabay market url darknet adresse dark markets usa [url=[Link deleted]]dark markets china [/url]
mega onion зеркало ссылки на даркнет
cypher url best dark web counterfeit money [url=[Link deleted]]darknet market redit [/url]
list of dark net markets dark markets china [url=[Link deleted]]darknet telegram group [/url]
darknet guide where to find darknet market links redit [url=[Link deleted]]underground dumps shop [/url]
мега сайт ссылка мега онион сайт
darknet market 2022 reddit new darknet markets 2022 [url=[Link deleted]]shop online without cvv code [/url]
best dark web markets 2022 dark markets norway [url=[Link deleted]]darkweb форум [/url]
drugs dark web price buying drugs off darknet [url=[Link deleted]]darknet dream market reddit [/url]
florida darknet markets darknet new market link [url=[Link deleted]]dark markets spain [/url]
good dark web search engines dark markets austria [url=[Link deleted]]exploit market darknet [/url]
best darknet market for counterfeit alphabay darknet market [url=[Link deleted]]darknet market bust [/url]
we amsterdam darknet steroid markets [url=[Link deleted]]dark market onion [/url]
mega магазин mega зеркало
phenethylamine drugs dark markets estonia [url=[Link deleted]]darknet market list 2022 [/url]
dark websites reddit dark markets poland [url=[Link deleted]]darknet market search engine [/url]
the best onion sites darkweb market [url=[Link deleted]]reliable darknet markets [/url]
how to access darknet market darknet adressen [url=[Link deleted]]onionhub [/url]
russian darknet market onion links for deep web [url=[Link deleted]]best darknet market for steroids [/url]
onion darknet market new alphabay darknet market [url=[Link deleted]]deep web links reddit 2022 [/url]
мега нарко mega онион сайт
darknet serious market how to use deep web on pc [url=[Link deleted]]darknet markets may 2022 [/url]
orange sunshine lsd darknet market url [url=[Link deleted]]asap market url [/url]
ссылки на даркнет сылка на мегу
tor darknet market address how to access dark web markets [url=[Link deleted]]trusted darknet vendors [/url]
market links darknet deep web search engines 2022 [url=[Link deleted]]darknet markets ranked 2022 [/url]
reddit best darknet market vice city market url [url=[Link deleted]]best darknet market urs [/url]
hacking tools darknet markets versus link [url=[Link deleted]]how to install deep web [/url]
dream market darknet darknet market search engine [url=[Link deleted]]hidden uncensored wiki [/url]
grey market darknet link links da deep web 2022 [url=[Link deleted]]dark web market links [/url]
working darknet markets 2022 bitcoins and darknet markets [url=[Link deleted]]most reliable darknet markets [/url]
мега купить соль магазин даркнет
darknet market links buy ssn duckduckgo dark web search [url=[Link deleted]]darkmarket link [/url]
legit onion sites wired darknet markets [url=[Link deleted]]dark market list [/url]
buy bank accounts darknet the darknet markets [url=[Link deleted]]deep dark web markets links [/url]
dark web site list Abacus darknet Market [url=[Link deleted]]best working darknet market 2022 [/url]
deep web drug url darknet drugs shipping [url=[Link deleted]]dark markets korea [/url]
darknet market litecoin drug markets dark web [url=[Link deleted]]darknet drug markets 2022 [/url]
core market darknet how big is the darknet market [url=[Link deleted]]online black marketplace [/url]
официальный сайт мега mega onion оффициальный сайт
reddit darknet markets noobs reddit darknet market noobs [url=[Link deleted]]darknet market pills vendor [/url]
мега наркотики мега кокаин
dark web hitman for hire the dark web links 2022 [url=[Link deleted]]dark markets malaysia [/url]
shop ccs carding onion directory 2022 [url=[Link deleted]]buy real money [/url]
dark markets ireland dot onion websites [url=[Link deleted]]reddit darknet market list [/url]
dark web steroids blacknet drugs [url=[Link deleted]]onion directory list [/url]
what is a darknet drug market like biggest darknet market [url=[Link deleted]]Cocorico darknet Market [/url]
dbol steroid pills site darknet market [url=[Link deleted]]buying drugs on darknet [/url]
best tor marketplaces xanax darknet markets reddit [url=[Link deleted]]dark markets usa [/url]
best website to buy cc how to get on the dark web on laptop [url=[Link deleted]]dark web onion markets [/url]
мега onion оффициальный сайт mega онион
black market website names darknet markets onion addresses [url=[Link deleted]]dark web step by step [/url]
reddit darknet markets noobs dark markets liechtenstein [url=[Link deleted]]dark web links adult [/url]
reddit darknet market how to active darknet markets [url=[Link deleted]]best darknet market for steroids [/url]
pill with crown on it how to browse the dark web reddit [url=[Link deleted]]darknet gun market [/url]
new onion darknet market the onion directory [url=[Link deleted]]drugs darknet vendors [/url]
dark net market list darknet market links [url=[Link deleted]]back market legit [/url]
dark web login guide best dark web counterfeit money [url=[Link deleted]]the darknet market reddit [/url]
darknet market sites and how to access darknet market url list [url=[Link deleted]]alphabay darknet market [/url]
dark web live dark markets new zealand [url=[Link deleted]]drug market [/url]
darknet market noobs guide top ten deep web [url=[Link deleted]]cannazon market darknet [/url]
darknet website for drugs buying drugs on darknet reddit [url=[Link deleted]]buds express [/url]
darknet market drug prices darknet markets 2022 reddit [url=[Link deleted]]drug trading website [/url]
мега онион сайт ссылки на даркнет
dark markets thailand shop ccs carding [url=[Link deleted]]darknet websites list 2022 [/url]
darkmarket 2022 best darknet market reddit 2022 [url=[Link deleted]]which darknet markets are up [/url]
dark markets brazil darknet market fake id [url=[Link deleted]]how to access deep web safely reddit [/url]
versus project market darknet deep web marketplaces reddit [url=[Link deleted]]dark web hitman for hire [/url]
dark web drugs ireland weed only darknet market [url=[Link deleted]]darknet search engine url [/url]
ссылки на даркнет mega market
what is a darknet drug market like dark markets netherlands [url=[Link deleted]]darknet market forum [/url]
buying from darknet market with electrum darknet live stream [url=[Link deleted]]fake id onion [/url]
tor onion search darknet market noobs guide [url=[Link deleted]]darknet search engine url [/url]
reddit darknet markets links dark markets hungary [url=[Link deleted]]darknet drug delivery [/url]
reddit onion list alpha market url [url=[Link deleted]]unicorn pill [/url]
black market alternative tor websites reddit [url=[Link deleted]]best website to buy cc [/url]
dark markets croatia dnm xanax [url=[Link deleted]]darknet drugs url [/url]
how to buy drugs dark web deep net websites [url=[Link deleted]]darknet market vendor guide [/url]
mega onion оффициальный сайт mega onion зеркало
crypto market darknet dn market [url=[Link deleted]]dark markets india [/url]
guide to darknet markets how to access darknet markets reddit [url=[Link deleted]]archetyp market [/url]
мега онион мега onion зеркало
the dark web url darknet market wikia [url=[Link deleted]]cp onion [/url]
best dark web marketplaces 2022 2022 working darknet market [url=[Link deleted]]darknet drug prices [/url]
black market net what darknet markets still work [url=[Link deleted]]buying drugs online [/url]
darknet new market link dark markets macedonia [url=[Link deleted]]darknet online drugs [/url]
verified dark web links versus project market url [url=[Link deleted]]drugs dark web [/url]
мега onion оффициальный сайт мэги сайт
top darknet markets 2022 dark web marketplace [url=[Link deleted]]dark web links 2022 [/url]
buying drugs on darknet reddit reddit darknet market australia [url=[Link deleted]]bitcoins and darknet markets [/url]
updated darknet market links 2022 updated darknet market list [url=[Link deleted]]black market websites 2022 [/url]
buds express black market drugs [url=[Link deleted]]dark markets uruguay [/url]
current darknet markets cypher darknet market [url=[Link deleted]]darknet market script [/url]
мега кокаин мега мефедрон
darknet onion markets best darknet market now [url=[Link deleted]]onion live [/url]
mega onion оффициальный сайт мега сайт ссылка
darknet market stats bitcoin dark website [url=[Link deleted]]ordering drugs on dark web [/url]
dark markets guyana dark markets macedonia [url=[Link deleted]]guide to darknet markets [/url]
darknet search engine reddit darknet market noobs bible [url=[Link deleted]]blockchain darknet markets [/url]
darknet market how to buy drugs on the darknet [url=[Link deleted]]url hidden wiki [/url]
darknet market security monero darknet markets [url=[Link deleted]]cannahome url [/url]
live darknet markets grey market darknet link [url=[Link deleted]]darknet credit card market [/url]
deep dot web replacement dark web store [url=[Link deleted]]how to buy bitcoin and use on dark web [/url]
top ten dark web darknet market reddit [url=[Link deleted]]darknet onion markets [/url]
tor drugs darknet market xanax [url=[Link deleted]]dark markets luxembourg [/url]
0day onion darknet black market [url=[Link deleted]]how to get access to darknet [/url]
мега купить соль магазин мега
the armory tor url best darknet markets reddit [url=[Link deleted]]deep dot web markets [/url]
reddit darknet markets uk reddit darknetmarket [url=[Link deleted]]darknet market 2022 reddit [/url]
asap market link deep cp links [url=[Link deleted]]buy real money [/url]
how to browse the dark web reddit dark web links reddit [url=[Link deleted]]darknet drug market [/url]
dark markets croatia new darknet markets [url=[Link deleted]]the dark web shop [/url]
darknet black market dark markets bulgaria [url=[Link deleted]]black market buy online [/url]
darknet markets deepdotweb darknet market bust [url=[Link deleted]]darknet market directory [/url]
pax marketplace what darknet markets sell fentanyl [url=[Link deleted]]darknet guns drugs [/url]
drugs dark web price deep web link 2022 [url=[Link deleted]]bitcoin dark website [/url]
monero darknet markets archetyp link [url=[Link deleted]]versus link [/url]
darknet link drugs gray market place [url=[Link deleted]]best darknet drug sites [/url]
ссылка мега мега сайт
darknet market list reddit dark web counterfeit money [url=[Link deleted]]Kingdom Market link [/url]
deep web trading 0day onion [url=[Link deleted]]darknet drugs safe [/url]
darknet markets up darknet drugs sites [url=[Link deleted]]deep web addresses onion [/url]
what darknet markets are open dark markets ukraine [url=[Link deleted]]darknet dream market [/url]
darknet list market shop on the dark web [url=[Link deleted]]french deep web link [/url]
nike jordan pill crypto darknet drug shop [url=[Link deleted]]dark markets slovakia [/url]
link darknet market dark web buy credit cards [url=[Link deleted]]dark markets canada [/url]
buying drugs online dark web markets 2022 australia [url=[Link deleted]]darknet markets without login [/url]
shop ccs carding guide to darknet markets [url=[Link deleted]]market onion [/url]
dark web prostitution cannazon url [url=[Link deleted]]how to access darknet markets reddit [/url]
dark web markets 2022 australia darknet markets deepdotweb [url=[Link deleted]]best darknet market for guns [/url]
market onion how big is the darknet market [url=[Link deleted]]dark web payment methods [/url]
darknet markets onion addresses versus link [url=[Link deleted]]underground market online [/url]
мега зеркало mega магазин
darkmarket 2022 market onion [url=[Link deleted]]best darknet market 2022 reddit [/url]
accessing darknet market dark web sites name list [url=[Link deleted]]tor market links [/url]
buy ssn dob with bitcoin deep web trading [url=[Link deleted]]dark markets estonia [/url]
reddit darknet markets list dark market 2022 [url=[Link deleted]]deep net links [/url]
naked lady ecstasy pill darknet markets financial times [url=[Link deleted]]what darknet markets are up [/url]
top onion links australian dark web vendors [url=[Link deleted]]link darknet market [/url]
reddit darknet markets links what darknet markets are live [url=[Link deleted]]underground market place darknet [/url]
darknet in person drug sales dark market [url=[Link deleted]]back market legit [/url]
alphabay link reddit how to use onion sites [url=[Link deleted]]drugs from darknet markets [/url]
mega onion оффициальный сайт как зайти на мегу
dark markets uruguay darknet escrow markets [url=[Link deleted]]list of darknet markets 2022 [/url]
darknet markets ranked 2022 how to order from dark web [url=[Link deleted]]reddit onion list [/url]
dark web sites links link darknet market [url=[Link deleted]]dark web step by step [/url]
сайты даркнет ссылки официальный сайт мега
deep market Kingdom link [url=[Link deleted]]dark markets italy [/url]
versus market url tor2door market link [url=[Link deleted]]the darknet market reddit [/url]
safe darknet markets open darknet markets [url=[Link deleted]]tor2door darknet market [/url]
darkweb marketplace darknet markets financial times [url=[Link deleted]]the dark web links 2022 [/url]
asap market dark net market links 2022 [url=[Link deleted]]versus project market darknet [/url]
darknet markets ranked 2022 dark web drugs bitcoin [url=[Link deleted]]darknet markets urls [/url]
darknet market bust drugs dark web price [url=[Link deleted]]reddit darknet market noobs bible [/url]
darknet in person drug sales Heineken Express link [url=[Link deleted]]dark net market list [/url]
how to buy from darknet darknet drugs sites [url=[Link deleted]]versus project market darknet [/url]
best dark web search engine link online black market uk [url=[Link deleted]]darknet best drugs [/url]
dark web buy bitcoin credit card dark web links [url=[Link deleted]]adresse onion [/url]
the onion directory darknet search engine url [url=[Link deleted]]darknet market search [/url]
reddit darknet market noobs current darknet markets reddit [url=[Link deleted]]darknet steroid markets [/url]
what darknet markets still work darknet search [url=[Link deleted]]deep web drugs reddit [/url]
Abacus Market how to buy from darknet [url=[Link deleted]]best black market websites [/url]
duckduckgo onion site dark web step by step [url=[Link deleted]]dark web sites for drugs [/url]
mega onion оффициальный сайт mega darknet
incognito market cp onion [url=[Link deleted]]dark net market links 2022 [/url]
duckduckgo onion site Kingdom link [url=[Link deleted]]best darknet market for psychedelics [/url]
Cocorico Market darknet asap market url [url=[Link deleted]]black market access [/url]
dark markets spain working dark web links [url=[Link deleted]]the onion directory [/url]
mega onion зеркало мега даркнет
what darknet market to use black market buy online [url=[Link deleted]]best darknet market may 2022 reddit [/url]
drug market nike jordan pill [url=[Link deleted]]active darknetmarkets [/url]
ruonion darknet guns market [url=[Link deleted]]top ten dark web [/url]
deep web drug links dark markets luxembourg [url=[Link deleted]]darknet bank accounts [/url]
best dark web search engine link dark markets switzerland [url=[Link deleted]]top 10 dark web url [/url]
dark markets poland biggest darknet market 2022 [url=[Link deleted]]trusted darknet vendors [/url]
darknet onion links drugs Kingdom Market url [url=[Link deleted]]black market alternative [/url]
darknet illicit drugs onion dark web list [url=[Link deleted]]vice city market link [/url]
dark web address list underground card shop [url=[Link deleted]]darknet market guide reddit [/url]
the dark market dark net markets [url=[Link deleted]]underground hackers black market [/url]
darknet markets fake id escrow market darknet [url=[Link deleted]]canazon [/url]
darknet магазин зелья mega onion зеркала
darknet serious market how to search the dark web reddit [url=[Link deleted]]carding dark web [/url]
onion seiten 2022 darknet markets [url=[Link deleted]]dark markets venezuela [/url]
mega darknet сайты даркнет
online black marketplace decentralized darknet market [url=[Link deleted]]drugs from darknet markets [/url]
dark web cvv Cocorico Market url [url=[Link deleted]]cvv black market [/url]
gray market place onion linkek [url=[Link deleted]]tor marketplaces [/url]
black market online weed only darknet market [url=[Link deleted]]darknet list market [/url]
hidden wiki tor onion urls directories australian dark web vendors [url=[Link deleted]]tor search onion link [/url]
darknet drug vendors active darknet markets 2022 [url=[Link deleted]]onion linkek [/url]
best dark net markets versus project market darknet [url=[Link deleted]]darknet market adderall prices [/url]
darknet union dark web illegal links [url=[Link deleted]]darkmarket 2022 [/url]
darknet steroid markets dark markets new zealand [url=[Link deleted]]best darknet market for psychedelics [/url]
deep web search engine url underground market place darknet [url=[Link deleted]]versus project market link [/url]
мега кокаин мега магазин
darknet drug vendors current darknet market list [url=[Link deleted]]versus market [/url]
tor link list 2022 unicorn pill [url=[Link deleted]]verified dark web links [/url]
australian dark web vendors darknet market forum [url=[Link deleted]]decabol pills [/url]
darknet market url what is the best darknet market [url=[Link deleted]]tor markets links [/url]
dn market Heineken Express url [url=[Link deleted]]darknet market vendors search [/url]
market links darknet site onion liste [url=[Link deleted]]best dark web links [/url]
onion sex shop price of black market drugs [url=[Link deleted]]dark markets [/url]
darknet markets noob what darknet markets are live [url=[Link deleted]]exploit market darknet [/url]
dark web links reddit litecoin darknet markets [url=[Link deleted]]tor market nz [/url]
best darknet market now darknet credit card market [url=[Link deleted]]deep market [/url]
darknet seiten liste dark web buy credit cards [url=[Link deleted]]buying drugs online on openbazaar [/url]
cypher market darknet cypher url [url=[Link deleted]]drugs dark web price [/url]
dark markets denmark darknet onion markets [url=[Link deleted]]russian darknet market [/url]
deep web onion url phenylethylamine [url=[Link deleted]]cannazon market link [/url]
buying from darknet market with electrum site darknet onion [url=[Link deleted]]reddit darknet market links [/url]
darknet markets with tobacco dark markets argentina [url=[Link deleted]]darknet markets with tobacco [/url]
vice city market black market reddit [url=[Link deleted]]tor onion search [/url]
dark markets luxembourg deep onion links [url=[Link deleted]]alphabay market link [/url]
buying drugs online onion marketplace drugs [url=[Link deleted]]phenylethylamine [/url]
ссылки на даркнет mega сайт
deep deep web links deep onion links [url=[Link deleted]]dark markets uk [/url]
tor drugs archetyp link [url=[Link deleted]]darknet drugs 2022 [/url]
cannabis dark web top darknet drug sites [url=[Link deleted]]current darknet markets reddit [/url]
mega сайт даркнет сайты магазин
darknet marketplace drugs darknet market avengers [url=[Link deleted]]how to access deep web safely reddit [/url]
buy drugs from darknet darknet stock market [url=[Link deleted]]dark markets uk [/url]
most popular darknet markets 2022 dark markets france [url=[Link deleted]]darknet market noobs bible [/url]
what darknet markets still work back market trustworthy [url=[Link deleted]]dark markets netherlands [/url]
deep website search engine versus market [url=[Link deleted]]tor marketplaces [/url]
best darknet market now darknet markets australia [url=[Link deleted]]darknet markets noob [/url]
darkmarket 2022 darknet market reddit 2022 [url=[Link deleted]]escrow dark web [/url]
outlaw darknet market url dark markets slovenia [url=[Link deleted]]naked lady ecstasy pill [/url]
how to order from dark web alphabay link reddit [url=[Link deleted]]darknet market noobs guide [/url]
darknet new market link Heineken Express link [url=[Link deleted]]dark markets germany [/url]
darknet drug links florida darknet markets [url=[Link deleted]]anadrol pills [/url]
which darknet markets are up darknet markets availability [url=[Link deleted]]what darknet markets are still up [/url]
сайты даркнет mega зеркало
darknet market updates 2022 how to anonymously use darknet markets [url=[Link deleted]]dark web markets 2022 australia [/url]
мега официальный сайт мега онион
onion deep web wiki 0day onion [url=[Link deleted]]darknet market iphone [/url]
buying credit cards on dark web how to buy from the darknet markets lsd [url=[Link deleted]]darknet markets most popular [/url]
pink versace pill deep web market links reddit [url=[Link deleted]]buy drugs on darknet [/url]
onion websites for credit cards darknet onion markets reddit [url=[Link deleted]]australian darknet vendors [/url]
dark markets hungary Abacus Market link [url=[Link deleted]]darkfox link [/url]
tor2door market darknet dumps shop [url=[Link deleted]]what darknet markets are live [/url]
buying from darknet market with electrum uncensored deep web [url=[Link deleted]]dark markets slovenia [/url]
weed darknet market black market online website [url=[Link deleted]]darknet links 2022 drugs [/url]
versus project link verified darknet market [url=[Link deleted]]archetyp market url [/url]
darknet adress darknet drug markets reddit [url=[Link deleted]]archetyp market darknet [/url]
adress darknet darknet market ranking [url=[Link deleted]]darkweb sites reddit [/url]
mature dating sites free no credit card fees
[url=”[Link deleted]dating[/url]
top date sites
tor market nz dark web links [url=[Link deleted]]darknet market noobs [/url]
darknet sites url dark markets uk [url=[Link deleted]]fresh onions link [/url]
darkmarket 2022 darknet onion markets [url=[Link deleted]]darknet illegal market [/url]
dark markets sweden tor darknet [url=[Link deleted]]darknet sites url [/url]
buy drugs darknet site darknet fermГ© [url=[Link deleted]]how to buy drugs on darknet [/url]
mega сайт mega онион сайт
ссылка на мегу даркнет ссылки
cannahome market darknet dark markets poland [url=[Link deleted]]onion directory [/url]
active darknet market urls deep dark web [url=[Link deleted]]dark markets latvia [/url]
reddit darknet market how to how to buy from darknet [url=[Link deleted]]the onion directory [/url]
live onion market how to access deep web safely reddit [url=[Link deleted]]shop online without cvv code [/url]
darknet drug vendor that takes paypal Abacus Market [url=[Link deleted]]dark web legit sites [/url]
dark markets bolivia deep web links reddit 2022 [url=[Link deleted]]darknet drugs sales [/url]
underground market online link de hiden wiki [url=[Link deleted]]search deep web engine [/url]
onion links 2022 new alphabay darknet market [url=[Link deleted]]new onion darknet market [/url]
darknet market get pills best darknet markets 2022 [url=[Link deleted]]versus darknet market [/url]
what darknet markets are up onion directory 2022 [url=[Link deleted]]dark net market list reddit [/url]
dark websites darknet reinkommen [url=[Link deleted]]project versus [/url]
market onion darkfox link [url=[Link deleted]]darknet guns market [/url]
open darknet markets deep dot web replacement [url=[Link deleted]]dark web shop [/url]
dream market darknet link best darknet markets [url=[Link deleted]]which darknet markets are up [/url]
deep dot web replacement darknet steroid markets [url=[Link deleted]]Cocorico url [/url]
сайт мега мега шишки
australian darknet markets new darknet markets [url=[Link deleted]]berlin telegram group drugs [/url]
cheap darknet websites dor drugs what bitcoins are accepted by darknet markets [url=[Link deleted]]drugs on the darknet [/url]
darknet market dmt hacking tools darknet markets [url=[Link deleted]]site onion liste [/url]
darknet market avengers black market url deep web [url=[Link deleted]]alphabay link [/url]
darknet markets lsd-25 2022 best darknet market for weed [url=[Link deleted]]canazon [/url]
darknet market sites alphabay darknet market [url=[Link deleted]]deep web deb [/url]
best black market websites 2022 darknet market [url=[Link deleted]]deep web updated links [/url]
list of darknet markets 2022 credit card dark web links [url=[Link deleted]]darknet market redit [/url]
versus market versus market [url=[Link deleted]]black market online [/url]
darknet paypal accounts darknet black market sites [url=[Link deleted]]dark markets norge [/url]
french deep web link reddit darknet markets uk [url=[Link deleted]]alphabay market onion link [/url]
darknet markets up trusted darknet markets [url=[Link deleted]]euroguns deep web [/url]
dark markets usa reddit darknet markets uk [url=[Link deleted]]vice city darknet market [/url]
bitcoin drugs market reliable darknet markets reddit [url=[Link deleted]]deep cp links [/url]
mega onion ссылка mega onion shop
tor markets links dark web cvv [url=[Link deleted]]deep cp links [/url]
dark markets spain darknet markets 2022 updated [url=[Link deleted]]dot onion websites [/url]
даркнет ссылки мега onion ссылка
access the black market onion link reddit [url=[Link deleted]]duckduckgo dark web search [/url]
drugs dark web reddit alphabay link reddit [url=[Link deleted]]drug website dark web [/url]
Kingdom Market darknet darknet markets address [url=[Link deleted]]reddit darknet markets noobs [/url]
best darknet market 2022 cannazon darknet market [url=[Link deleted]]best darknet markets reddit [/url]
dark web drugs ireland how to dark web reddit [url=[Link deleted]]what darknet markets still work [/url]
deep dot web links monkey x pill [url=[Link deleted]]dark web markets 2022 australia [/url]
how to access deep web safely reddit reddit darknet markets uk [url=[Link deleted]]darknet drugs price [/url]
archetyp darknet market darknet markets that take ethereum [url=[Link deleted]]project versus [/url]
incognito url dread onion [url=[Link deleted]]dark web market reviews [/url]
Abacus Market url wiki darknet market [url=[Link deleted]]darknet onion markets [/url]
darknet market search engine darkweb sites reddit [url=[Link deleted]]dark web xanax [/url]
даркнет сайты магазин darknet магазин
darknet market stats dark markets united kingdom [url=[Link deleted]]darknet market deep dot web [/url]
online drug market active darknet market urls [url=[Link deleted]]cannazon market link [/url]
darknet market google dark markets estonia [url=[Link deleted]]marijuana dark web [/url]
versus market deep web search engine 2022 [url=[Link deleted]]oniondir deep web link directory [/url]
deep website search engine dark markets indonesia [url=[Link deleted]]buy bank accounts darknet [/url]
versus market darknet buy drugs from darknet [url=[Link deleted]]tor darknet markets [/url]
Cocorico url best dark web markets 2022 [url=[Link deleted]]underground black market website [/url]
what is escrow darknet markets dark markets canada [url=[Link deleted]]safe darknet markets [/url]
versus project market darknet dark web drugs nz [url=[Link deleted]]incognito market darknet [/url]
buds express tor2door market url [url=[Link deleted]]reddit best darknet markets [/url]
euroguns deep web dark web onion markets [url=[Link deleted]]reddit darknet market noobs [/url]
verified darknet market where to find onion links [url=[Link deleted]]site darknet market [/url]
darknet market steroids verified dark web links [url=[Link deleted]]underground dumps shop [/url]
dark websites the armory tor url [url=[Link deleted]]sichere darknet markets 2022 [/url]
biggest darknet market onion marketplace drugs [url=[Link deleted]]french dark web [/url]
links da deep web 2022 dark markets indonesia [url=[Link deleted]]dark markets greece [/url]
best darknet market for weed uk how to access dark net [url=[Link deleted]]dark chart [/url]
vice city market brucelean darknet market [url=[Link deleted]]new darknet marketplaces [/url]
мега onion ссылка mega onion зеркало
onion deep web search dark net guide [url=[Link deleted]]darkfox market darknet [/url]
darknet markets onion addresses deep net access [url=[Link deleted]]darknet cannabis markets [/url]
black market alternative darknet drug market url [url=[Link deleted]]counterfeit money dark web reddit [/url]
deep web weed prices versus market [url=[Link deleted]]dark markets paraguay [/url]
darknet drugs price bitcoin dark web [url=[Link deleted]]cannahome link [/url]
best darknet markets darkfox market [url=[Link deleted]]best australian darknet market [/url]
site darknet liste darknet markets working links [url=[Link deleted]]dark web in spanish [/url]
drug website dark web darknet market litecoin [url=[Link deleted]]black market websites tor [/url]
how to get on the dark web darknet adress [url=[Link deleted]]cvv black market [/url]
darknet market xanax dark web marketplace [url=[Link deleted]]adresse onion black market [/url]
berlin telegram group drugs orange sunshine pill [url=[Link deleted]]tor darknet [/url]
darknet market package darknet market vendors search [url=[Link deleted]]tor market url [/url]
updated darknet market links 2022 darknet market deep dot web [url=[Link deleted]]darknet drug market list [/url]
tor best websites darknet steroid markets [url=[Link deleted]]darknet seiten dream market [/url]
market street darknet darknet market noobs step by step [url=[Link deleted]]darknet seiten dream market [/url]
мега скорость мега мефедрон
new darknet markets 2022 darknet guide [url=[Link deleted]]darknet drug markets reddit [/url]
url hidden wiki cannazon market [url=[Link deleted]]asap market darknet [/url]
can you buy drugs on darknet what darknet markets are still up [url=[Link deleted]]black market drugs [/url]
legit onion sites tor2door link [url=[Link deleted]]darknet market links safe [/url]
how to access the dark web safely reddit dark web hitman [url=[Link deleted]]dark markets usa [/url]
dark markets luxembourg best darknet market 2022 reddit [url=[Link deleted]]darknet markets australia [/url]
dark markets czech republic xanax darknet reddit [url=[Link deleted]]legit onion sites [/url]
dark markets uk reddit darknet market 2022 [url=[Link deleted]]tor darknet market [/url]
drugs dark web price tor onion search [url=[Link deleted]]alphabay solutions reviews [/url]
darknet market dmt cannazon market darknet [url=[Link deleted]]deep web link 2022 [/url]
dark web sites for drugs reddit darknet market list [url=[Link deleted]]black market reddit [/url]
dark web drugs nz darknet drugs url [url=[Link deleted]]darknet drug prices reddit [/url]
drug website dark web black market alternative [url=[Link deleted]]tor market nz [/url]
duckduckgo dark web search darknet market ranking [url=[Link deleted]]how to access darknet markets [/url]
зайти на мегу mega сайт
best darknet markets darknet market features [url=[Link deleted]]blue lady e pill [/url]
how to use darknet markets darknet markets availability [url=[Link deleted]]dark markets south korea [/url]
black market net darknet market busts [url=[Link deleted]]darkfox darknet market [/url]
darknet market onions black market websites credit cards [url=[Link deleted]]the armory tor url [/url]
wiki darknet market how to buy bitcoin and use on dark web [url=[Link deleted]]top onion links [/url]
dark web adderall deep sea darknet market [url=[Link deleted]]dark markets south korea [/url]
darknet markets that take ethereum dark markets norge [url=[Link deleted]]darknet market ddos [/url]
how to get on the dark web dark markets macedonia [url=[Link deleted]]reddit best darknet market [/url]
alphabay market url fullz darknet market [url=[Link deleted]]onion websites for credit cards [/url]
phenethylamine drugs top ten dark web sites [url=[Link deleted]]darknet drugs australia [/url]
darknet drugs links how to get access to darknet [url=[Link deleted]]dark market reddit [/url]
darknet market guide reddit grey market darknet [url=[Link deleted]]deep web software market [/url]
the dark web shop darknet drugs url [url=[Link deleted]]darknet market updates 2022 [/url]
darknet in person drug sales reddit darknet market list 2022 [url=[Link deleted]]dark web market reviews [/url]
onionhub dark web markets 2022 [url=[Link deleted]]what darknet markets are live [/url]
dark web legit sites dark web electronics [url=[Link deleted]]dark web cheap electronics [/url]
ьупф ьфклуе мега наркотики
darknet illegal market dark web sites for drugs [url=[Link deleted]]dark web search engines link [/url]
legit darknet markets tor darknet sites [url=[Link deleted]]darknet market guide [/url]
buy ssn dob with bitcoin Cocorico link [url=[Link deleted]]dark markets norge [/url]
deep web search engine url drug markets onion [url=[Link deleted]]reddit darknet markets noobs [/url]
escrow market darknet darknet market fake id [url=[Link deleted]]how to install deep web [/url]
reddit darknetmarket best darknet markets [url=[Link deleted]]deep web markets [/url]
dark markets lithuania uk darknet markets [url=[Link deleted]]wiki darknet market [/url]
dark markets ecuador darknet markets 2022 reddit [url=[Link deleted]]darknet prices [/url]
dark web sites black market net [url=[Link deleted]]access darknet markets [/url]
onionhub what darknet markets still work [url=[Link deleted]]dark web poison [/url]
top ten deep web dark web markets reddit [url=[Link deleted]]grey market drugs [/url]
how to access deep web safely reddit dark markets japan [url=[Link deleted]]onion link reddit [/url]
onion marketplace drugs credit card dumps dark web [url=[Link deleted]]dark markets sweden [/url]
best darknet markets 2022 cypher market darknet [url=[Link deleted]]darknet market adderall prices [/url]
darknet markets norge black market prescription drugs [url=[Link deleted]]steroid market darknet [/url]
dark markets india market cypher [url=[Link deleted]]darknet market 2022 reddit [/url]
versus project market link deep web drugs [url=[Link deleted]]onion deep web wiki [/url]
mega darkmarket mega onion зеркала
darknet market wikia best working darknet market 2022 [url=[Link deleted]]what darknet markets are live [/url]
dark web search tool onion seiten [url=[Link deleted]]black market access [/url]
darknet in person drug sales dark markets ecuador [url=[Link deleted]]dark markets korea [/url]
darknet markets onion addresses which darknet markets are still open [url=[Link deleted]]deep web software market [/url]
bitcoin drugs market how to buy from the darknet markets lsd [url=[Link deleted]]black market websites credit cards [/url]
мега ссылка mega зеркало
ссылка на мегу зеркало мега
mega сайт darknet магазин
зайти на мегу mega onion ссылка
best darknet drug market 2022 darknet market avengers [url=[Link deleted]]australian dark web vendors [/url]
urls for darknet markets back market legit [url=[Link deleted]]dn market [/url]
darknet drugs reddit deep sea darknet market [url=[Link deleted]]the best onion sites [/url]
dark web search engines 2022 deep web search engine 2022 [url=[Link deleted]]alphabay market darknet [/url]
vice city link tor market nz [url=[Link deleted]]dark web marketplace [/url]
мега даркнет мега ссылка
deep web canada Heineken Express url [url=[Link deleted]]dark market links [/url]
Kingdom Market buying drugs off darknet [url=[Link deleted]]deep dot web markets [/url]
asap market Kingdom Market darknet [url=[Link deleted]]what are darknet drug markets [/url]
2016; 11 e0165492. <a href=[Link deleted]doxycycline cover mrsa If you leave EluRyng in your vagina longer than 4 weeks 28 days, remove the ring and check to make sure you are not pregnant.
darknet list market cp onion [url=[Link deleted]]darknet market links 2022 [/url]
top darknet drug sites market cypher [url=[Link deleted]]cp onion [/url]
darknet market redit darknet market 2022 reddit [url=[Link deleted]]darknet marketplace drugs [/url]
dark web sites for drugs tor darknet markets [url=[Link deleted]]darknet drug store [/url]
darknet market noobs darkfox link [url=[Link deleted]]darknet market place search [/url]
buying drugs online versus project link [url=[Link deleted]]cannabis dark web [/url]
dark market list dma drug [url=[Link deleted]]how to pay with bitcoin on dark web [/url]
darknet market status tfmpp pills [url=[Link deleted]]tor darknet markets [/url]
drug trading website list of online darknet market [url=[Link deleted]]tor search onion link [/url]
darknet links markets darknet market vendors [url=[Link deleted]]buying things from darknet markets [/url]
deep sea darknet market darknet websites [url=[Link deleted]]what darknet market to use now [/url]
ссылки на даркнет мега ссылка
dark markets turkey best darknet market for guns [url=[Link deleted]]dream market darknet url [/url]
buy ssn dob with bitcoin wired darknet markets [url=[Link deleted]]asap market link [/url]
black market drugs guns alphabay market net [url=[Link deleted]]cannazon market url [/url]
dark web drugs ireland darknet website for drugs [url=[Link deleted]]darknet market drug prices [/url]
dark markets ukraine grey market drugs [url=[Link deleted]]url hidden wiki [/url]
dark web sites for drugs darknet drugs 2022 [url=[Link deleted]]reddit darknet markets 2022 [/url]
guide to darknet markets buy ssn dob with bitcoin [url=[Link deleted]]darknet markets may 2022 [/url]
darknet online drugs alphabay market darknet [url=[Link deleted]]dark market link [/url]
alphabay market url Heineken Express darknet Market [url=[Link deleted]]site darknet market [/url]
dark web drugs ireland buy drugs darknet [url=[Link deleted]]dark web markets [/url]
onionhub darknet drugs india [url=[Link deleted]]darknet seiten liste [/url]
black market website hidden financial services deep web [url=[Link deleted]]counterfeit money deep web [/url]
dark markets malta safe list of darknet market links [url=[Link deleted]]darknet telegram group [/url]
reddit darknetmarket verified darknet market [url=[Link deleted]]darknet black market sites [/url]
Kingdom Market what is the best darknet market [url=[Link deleted]]onionhub [/url]
reliable darknet markets lsd darknet reddit market pills [url=[Link deleted]]dnm xanax [/url]
darknet markets list reddit grey market darknet [url=[Link deleted]]darknet cannabis markets [/url]
the dark market darknet market superlist [url=[Link deleted]]links deep web tor [/url]
lsd drug wiki adresse dark web [url=[Link deleted]]dark markets czech republic [/url]
мега шишки ьупф ьфклуе
best market darknet drugs darknet markets reddit 2022 [url=[Link deleted]]darknet market busts [/url]
darknet drugs dublin versus market link [url=[Link deleted]]active darknetmarkets [/url]
mega onion ссылка mega onion оффициальный сайт
darknet магазин зайти на мегу
мэги сайт мега нарко
мега наркотики mega market
darkweb форум dark markets paraguay [url=[Link deleted]]adresse dark web [/url]
darknet websites wiki tor marketplace [url=[Link deleted]]best dark web search engine link [/url]
credit card dumps dark web reddit darknet markets links [url=[Link deleted]]darknet drug store [/url]
darknet database market black market net [url=[Link deleted]]onion deep web wiki [/url]
darknet markets 2022 tor markets [url=[Link deleted]]darknet black market [/url]
bohemia market link darknet market updates 2022 [url=[Link deleted]]where to find darknet market links redit [/url]
dark markets korea deep sea darknet market [url=[Link deleted]]verified darknet market [/url]
incognito link dark markets turkey [url=[Link deleted]]crypto darknet drug shop [/url]
официальный сайт мега mega darknet
access darknet markets search darknet markets [url=[Link deleted]]pyramid pill [/url]
dark web hitmen the dark web links 2022 [url=[Link deleted]]deep web drug url [/url]
darknet markets working links dark web search tool [url=[Link deleted]]dark markets slovakia [/url]
darknet onion markets reddit live onion [url=[Link deleted]]incognito darknet market [/url]
best darknet drug sites tor darknet markets [url=[Link deleted]]darknet marketplace drugs [/url]
darknet credit card market dark web drugs australia [url=[Link deleted]]buying drugs on darknet reddit [/url]
darknet prices darknet market bible [url=[Link deleted]]how to buy bitcoin and use on dark web [/url]
2022 working darknet market most reliable darknet markets [url=[Link deleted]]asap market [/url]
site onion liste current best darknet market [url=[Link deleted]]dark web shopping [/url]
current darknet markets reddit darknet link drugs [url=[Link deleted]]best darknet markets uk [/url]
buying from darknet market with electrum top dumps shop [url=[Link deleted]]best tor marketplaces [/url]
darknet market links buy ssn deep web updated links [url=[Link deleted]]reddit darknet market guide [/url]
cp onion which darknet markets are up [url=[Link deleted]]what is escrow darknet markets [/url]
fresh onions link darknet drug market list [url=[Link deleted]]link darknet market [/url]
french deep web link onion directory list [url=[Link deleted]]what darknet markets are live [/url]
counterfeit money onion redit safe darknet markets [url=[Link deleted]]crypto market darknet [/url]
как зайти на мегу магазин мега
the dark web links 2022 current darknet market list [url=[Link deleted]]black market deep [/url]
versus project market dark web electronics [url=[Link deleted]]red ferrari pills [/url]
reddit best darknet markets dark web payment methods [url=[Link deleted]]how to search the dark web reddit [/url]
ruonion onion linkek [url=[Link deleted]]deep deep web links [/url]
vice city market link best mdma vendor darknet market reddit [url=[Link deleted]]dark market reddit [/url]
underground hackers black market darknet market links reddit [url=[Link deleted]]best onion sites 2022 [/url]
darknet markets dread deep onion links [url=[Link deleted]]how to access darknet market [/url]
darknet market reddit 2022 grey market darknet [url=[Link deleted]]wiki darknet market [/url]
darknet markets fake id darknet market ddos [url=[Link deleted]]black market url deep web [/url]
black market cryptocurrency how to get access to darknet [url=[Link deleted]]darknet markets still open [/url]
dark web electronics how to get to the black market online [url=[Link deleted]]tma drug [/url]
popular dark websites tor markets [url=[Link deleted]]wired darknet markets [/url]
wikipedia darknet market tormarket onion [url=[Link deleted]]darkweb marketplace [/url]
darknet market wikia darknet market list reddit [url=[Link deleted]]russian anonymous marketplace [/url]
history of darknet markets deep web updated links [url=[Link deleted]]cannazon market darknet [/url]
mega market мега кокаин
mega onion shop ссылки на даркнет
мега мефедрон мега onion зеркала
pink versace pill canazon [url=[Link deleted]]ruonion [/url]
darknet market 2022 reddit darknet market oxycontin [url=[Link deleted]]dark websites [/url]
darknet market onion links dark web markets reddit 2022 [url=[Link deleted]]darknet drug dealer [/url]
how to access the darknet market deep web deb [url=[Link deleted]]darknet markets for steroids [/url]
Abacus darknet Market best darknet market links [url=[Link deleted]]darkfox link [/url]
list of darknet markets reddit underground card shop [url=[Link deleted]]best black market websites [/url]
best darknet markets for marijuana darkweb форум [url=[Link deleted]]darknet selling drugs [/url]
dma drug alpha market url [url=[Link deleted]]new alphabay darknet market [/url]
darknet black market list asap market url [url=[Link deleted]]tor darknet [/url]
darknet market arrests darkfox market [url=[Link deleted]]crypto market darknet [/url]
top darknet market now r darknet market [url=[Link deleted]]bohemia url [/url]
onion marketplace drugs darknet market guide reddit [url=[Link deleted]]darknet market script [/url]
crypto market darknet active darknet markets [url=[Link deleted]]how to darknet market [/url]
darknet market comparison how to access the dark web 2022 [url=[Link deleted]]dark markets singapore [/url]
мега шишки мега вход
dark web link reddit where to buy drugs [url=[Link deleted]]darknet market links buy ssn [/url]
darkshades marketplace cannazone [url=[Link deleted]]darknet market list url [/url]
black market reddit darknet link drugs [url=[Link deleted]]dark markets paraguay [/url]
мега ссылка даркнет сайты магазин
darknet markets ranked 2022 biggest darknet markets 2022 [url=[Link deleted]]dark web adderall [/url]
best websites dark web darknet market noobs guide [url=[Link deleted]]the real deal market darknet [/url]
dark markets argentina back market trustworthy [url=[Link deleted]]deep web shopping site [/url]
verified dark web links deep web marketplaces reddit [url=[Link deleted]]dark web drug marketplace [/url]
wiki sticks drugs reddit darknet market links [url=[Link deleted]]dark web prepaid cards reddit [/url]
underground market place darknet cp links dark web [url=[Link deleted]]cp links dark web [/url]
most popular darknet market best darknet market uk [url=[Link deleted]]access darknet markets [/url]
darknet markets australia Abacus Market darknet [url=[Link deleted]]bohemia url [/url]
canazon deep dark web [url=[Link deleted]]darknet in person drug sales [/url]
alphabay market link dark market url [url=[Link deleted]]Kingdom Market [/url]
underground dumps shop darknet market security [url=[Link deleted]]darknet market dmt [/url]
wiki sticks drugs dark web marketplace [url=[Link deleted]]darknetlive [/url]
dark web uk darknet market listing [url=[Link deleted]]dark markets germany [/url]
darkmarket list dark markets indonesia [url=[Link deleted]]black market drugs [/url]
мега onion оффициальный сайт мега onion ссылка
most popular darknet markets 2022 reddit working darknet markets [url=[Link deleted]]versus project market [/url]
darknet market onions darkmarket 2022 [url=[Link deleted]]incognito link [/url]
darknet market bible new darknet markets [url=[Link deleted]]darknet drugs dublin [/url]
darknet black market sites back market legit [url=[Link deleted]]new darknet marketplaces [/url]
top ten dark web darknet markets list reddit [url=[Link deleted]]working darknet market links [/url]
online black market electronics darknet links markets [url=[Link deleted]]drugs from darknet markets [/url]
darkfox market illegal black market [url=[Link deleted]]live darknet markets [/url]
dark web fake money dnm market [url=[Link deleted]]darknet market alphabay [/url]
vice city market dark net market list reddit [url=[Link deleted]]dark markets venezuela [/url]
reddit biggest darknet market place online black market electronics [url=[Link deleted]]darknet market listing [/url]
dark markets usa redit safe darknet markets [url=[Link deleted]]darknet escrow markets [/url]
dark markets italy buying drugs on darknet [url=[Link deleted]]credit card black market websites [/url]
superlist darknet markets dark web market place links [url=[Link deleted]]tor link search engine [/url]
deep deep web links deep dark web [url=[Link deleted]]dark web address list [/url]
accessing darknet market tor link search engine [url=[Link deleted]]darknet adress [/url]
darknet steroid markets dark market url [url=[Link deleted]]darknet links 2022 drugs [/url]
мега онион mega onion shop
мега кокаин официальный сайт мега
мега онион мега наркотики
vice city market darknet darknet reddit market pills [url=[Link deleted]]deep net links [/url]
мега официальный сайт mega ссылка
darknet market links darknet seiten [url=[Link deleted]]dark web drugs nz [/url]
мега купить соль mega onion зеркала
darknet market links reddit how to enter the black market online [url=[Link deleted]]darknet drug delivery [/url]
мега купить mega зеркало
cp onion dark web drug marketplace [url=[Link deleted]]alphabay market darknet [/url]
pill with crown on it google black market [url=[Link deleted]]darknet markets 2022 reddit [/url]
darknet market package working darknet market links [url=[Link deleted]]alphabay market url [/url]
reddit biggest darknet market place best dark web markets 2022 [url=[Link deleted]]french deep web link [/url]
list of darknet markets 2022 access the dark web reddit [url=[Link deleted]]bitcoin darknet markets [/url]
buy bitcoin for dark web incognito link [url=[Link deleted]]dark web counterfeit money [/url]
tor onion search reddit biggest darknet market place [url=[Link deleted]]dark market links [/url]
darknet market buying mdma usa legit darknet sites [url=[Link deleted]]the best onion sites [/url]
online onion market archetyp link [url=[Link deleted]]versus project darknet market [/url]
alphabay market onion link reddit darknet market uk [url=[Link deleted]]dark web prepaid cards reddit [/url]
cannahome market darknet market redit [url=[Link deleted]]the dark web shop [/url]
the real deal market darknet darknet market dmt [url=[Link deleted]]tfmpp pills [/url]
tor2door market url onion directory 2022 [url=[Link deleted]]shop online without cvv code [/url]
мега onion зеркало mega даркнет
darknet сайт мега онион сайт
deep web canada deep market [url=[Link deleted]]tor search onion link [/url]
australian darknet markets incognito market url [url=[Link deleted]]darknet market superlist [/url]
reliable darknet markets reddit hire an assassin dark web [url=[Link deleted]]accessing darknet market [/url]
onion tube porn the darknet markets [url=[Link deleted]]best market darknet drugs [/url]
what darknet markets still work dark markets new zealand [url=[Link deleted]]darknet market wikia [/url]
deep web drugs reddit versus market [url=[Link deleted]]darknet market place search [/url]
adresse dark web darknet market links reddit [url=[Link deleted]]best dark web markets [/url]
dark markets germany tor top websites [url=[Link deleted]]onion websites for credit cards [/url]
darknet drugs darknet escrow [url=[Link deleted]]dark web shopping [/url]
dark markets albania reddit where to buy drugs [url=[Link deleted]]tor market nz [/url]
cypher url dark markets latvia [url=[Link deleted]]dark web adderall [/url]
dark web shopping dark markets ecuador [url=[Link deleted]]access the black market [/url]
Kingdom Market link how to access dark web markets [url=[Link deleted]]incognito market [/url]
darknet market vendors search best darknet markets reddit [url=[Link deleted]]cannazone [/url]
dark markets ireland largest darknet market [url=[Link deleted]]versus market url [/url]
darknet магазин зелья mega onion зеркало
updated darknet market list darknet seiten liste [url=[Link deleted]]darknet escrow [/url]
deep web updated links dark web links reddit [url=[Link deleted]]dark net market links 2022 [/url]
dark web buy bitcoin darknet black market list [url=[Link deleted]]darknet market pills vendor [/url]
site onion liste black market website [url=[Link deleted]]dumps shop [/url]
how to order from dark web deep onion links [url=[Link deleted]]dark web sales [/url]
darknet adress access the black market [url=[Link deleted]]how to dark web reddit [/url]
магазин мега мега onion зеркала
accessing darknet market how to buy from darknet [url=[Link deleted]]reddit working darknet markets [/url]
mega onion shop mega сайт
мэги сайт мега купить соль
massianic singles free dating sites
[url=”[Link deleted]dating services[/url]
best dating site online
dnm market tfmpp pills [url=[Link deleted]]market cypher [/url]
dynabolts pills which darknet markets accept zcash [url=[Link deleted]]vice city darknet market [/url]
bitcoins and darknet markets best darknet market 2022 reddit [url=[Link deleted]]tfmpp pills [/url]
darknet сайт ьупф ьфклуе
deep dark web markets links how big is the darknet market [url=[Link deleted]]versus link [/url]
most reliable darknet markets how to create a darknet market [url=[Link deleted]]assassination market darknet [/url]
mega onion даркнет магазин
access the dark web reddit darknet drugs australia [url=[Link deleted]]dark web sites drugs [/url]
can you buy drugs on darknet black market sites 2022 [url=[Link deleted]]dark web market links [/url]
darknet markets with tobacco current darknet market list [url=[Link deleted]]most popular darknet market [/url]
dark markets slovakia counterfeit money deep web [url=[Link deleted]]deep dot web links [/url]
darknet drug market list darknet links 2022 drugs [url=[Link deleted]]access the black market [/url]
мега вход сайт даркнет
dark web links 2022 site darknet fermГ© [url=[Link deleted]]darknet gun market [/url]
dark markets romania darknet market comparison chart [url=[Link deleted]]australian darknet markets [/url]
top 10 dark websites darknet market that has ssn database [url=[Link deleted]]drugs onion [/url]
how to get on the dark web on laptop best darknet markets uk [url=[Link deleted]]vice city market url [/url]
good dark web search engines adress darknet [url=[Link deleted]]history of darknet markets [/url]
dark markets thailand darknet market listing [url=[Link deleted]]best dark web counterfeit money [/url]
buds express tor markets [url=[Link deleted]]google black market [/url]
black market bank account archetyp market link [url=[Link deleted]]reddit darknet market noobs [/url]
darknet paypal accounts onion live links [url=[Link deleted]]hidden uncensored wiki [/url]
dark markets new zealand reddit working darknet markets [url=[Link deleted]]darknet prices [/url]
Heineken Express url darknet onion links drugs [url=[Link deleted]]darknet drug vendor that takes paypal [/url]
dark web prostitution adresse onion black market [url=[Link deleted]]how to find the black market online [/url]
darknet магазин даркнет ссылки
archetyp market deep web links 2022 [url=[Link deleted]]best darknet market for psychedelics [/url]
asap market url deep web onion url [url=[Link deleted]]dark markets bosnia [/url]
магазин даркнет официальный сайт мега
black market websites tor bohemia market url [url=[Link deleted]]black market deep [/url]
how to get to the black market online darknet markets norway 2022 [url=[Link deleted]]dark markets usa [/url]
tor darknet sites deep web directory onion [url=[Link deleted]]darknet markets fake id [/url]
dark markets moldova dark market onion [url=[Link deleted]]search darknet markets [/url]
incognito market onion linkek [url=[Link deleted]]Kingdom url [/url]
dark web drug markets dark web payment methods [url=[Link deleted]]what is the best darknet market [/url]
deep cp links dark markets albania [url=[Link deleted]]reliable darknet markets reddit [/url]
underground dumps shop darknet market listing [url=[Link deleted]]credit card black market websites [/url]
darknet links markets cannahome market url [url=[Link deleted]]dark web links reddit [/url]
onion directory carding dark web [url=[Link deleted]]darknet market get pills [/url]
vice city market darknet wired darknet markets [url=[Link deleted]]darkfox market link [/url]
the darknet markets asap url [url=[Link deleted]]weed only darknet market [/url]
deep web cc sites dark web markets [url=[Link deleted]]darknet xanax [/url]
mega market мега купить соль
buying credit cards on dark web deep onion links [url=[Link deleted]]darknet litecoin [/url]
darknet магазин зелья как зайти на мегу
мега onion мега скорость
asap market link darknet markets onion addresses [url=[Link deleted]]site onion liste [/url]
tor best websites monkey x pill [url=[Link deleted]]list of online darknet market [/url]
black market url deep web blackweb darknet market [url=[Link deleted]]darknet markets working links [/url]
darknet telegram group dark markets lithuania [url=[Link deleted]]what darknet markets are still open [/url]
how to access darknet market darknet prices [url=[Link deleted]]darknet market bible [/url]
buying things from darknet markets adresse dark web [url=[Link deleted]]darknet market credit cards [/url]
мега зеркало mega зеркало
i2p darknet markets dark web in spanish [url=[Link deleted]]online black market uk [/url]
verified dark web links darknet markets deepdotweb [url=[Link deleted]]dark web illegal links [/url]
black market websites 2022 best darknet market may 2022 reddit [url=[Link deleted]]top darknet market now [/url]
deep dark web markets links dark web links 2022 [url=[Link deleted]]darknet markets 2022 [/url]
darknet selling drugs darknet drugs shipping [url=[Link deleted]]cannahome [/url]
best australian darknet market darknet sites [url=[Link deleted]]tor search engine link [/url]
how to buy drugs dark web darknet markets japan [url=[Link deleted]]darknet market alternatives [/url]
onion deep web search history of darknet markets [url=[Link deleted]]reliable darknet markets reddit [/url]
archetyp market url darknet market ranking [url=[Link deleted]]deep web search engine 2022 [/url]
anadrol pills darknet market busts [url=[Link deleted]]dream market darknet url [/url]
buy drugs on darknet top darknet market now [url=[Link deleted]]orange sunshine pill [/url]
the darknet drugs blue lady e pill [url=[Link deleted]]dark markets brazil [/url]
darknet market forum dark markets monaco [url=[Link deleted]]market links darknet [/url]
underground market online Heineken Express url [url=[Link deleted]]where to find darknet market links [/url]
мега онион сайт мега наркотики
lsd drug wiki project versus [url=[Link deleted]]underground website to buy drugs [/url]
darknet market script darknet market url list [url=[Link deleted]]best darknet market links [/url]
deep web addresses onion dark markets france [url=[Link deleted]]tor markets [/url]
links tor 2022 dark markets macedonia [url=[Link deleted]]deep web cc dumps [/url]
dark markets lithuania darknet best drugs [url=[Link deleted]]darknet market links reddit [/url]
darknet drugs links archetyp market darknet [url=[Link deleted]]dark web fake money [/url]
underground black market website dark web drug markets [url=[Link deleted]]the best onion sites [/url]
best darknet market for counterfeit darknet markets japan [url=[Link deleted]]deep dark web [/url]
buy drugs darknet cannazon link [url=[Link deleted]]reddit darknet market list [/url]
darkweb markets popular darknet markets [url=[Link deleted]]darknet onion markets reddit [/url]
darknet market noobs step by step counterfeit money onion [url=[Link deleted]]top ten deep web [/url]
2022 darknet markets darknet adressen [url=[Link deleted]]dark web weed [/url]
мега онион сайт мега ссылка
alphabay link deep web canada [url=[Link deleted]]dma drug [/url]
Pearson s Chi- square test showed significant difference in the prevalence of A. <a href=[Link deleted]for skin infection Monitor Closely 2 calcium carbonate decreases effects of celiprolol by unspecified interaction mechanism.
darknet guns drugs darknet market noobs [url=[Link deleted]]dark web markets [/url]
darknet market adderall prices duckduckgo dark web search [url=[Link deleted]]reddit darknet market noobs [/url]
магазины даркнета мега наркотики
darkfox link most popular darknet market [url=[Link deleted]]deep web addresses onion [/url]
archetyp darknet market darknet markets up [url=[Link deleted]]deep web markets [/url]
darknet stock market dark web markets [url=[Link deleted]]what is escrow darknet markets [/url]
tor market links 2022 darknet market guide reddit [url=[Link deleted]]how to get on the dark web [/url]
deep web trading black market websites 2022 [url=[Link deleted]]the best onion sites [/url]
brick market how to access the black market [url=[Link deleted]]how to anonymously use darknet markets [/url]
dark web login guide darknet reddit market pills [url=[Link deleted]]onion sex shop [/url]
darknet seiten underground black market website [url=[Link deleted]]darknet drug vendors [/url]
berlin telegram group drugs darknet drugs safe [url=[Link deleted]]dark web search engines 2022 [/url]
best darknet market now alphabay solutions reviews [url=[Link deleted]]black market buy online [/url]
dark markets estonia reliable darknet markets [url=[Link deleted]]cp links dark web [/url]
new darknet markets most popular darknet market [url=[Link deleted]]underground black market website [/url]
darknet paypal accounts darknet market oxycontin [url=[Link deleted]]darknet market comparison chart [/url]
They are even capable of learning advanced tricks. <a href=[Link deleted]dosage for uti
darknet markets norge what is a darknet drug market like [url=[Link deleted]]wikipedia darknet market [/url]
мега ссылка mega онион сайт
сайты даркнет mega онион
onion domain and kingdom biggest darknet markets 2022 [url=[Link deleted]]dark net markets [/url]
black market buy online Abacus darknet Market [url=[Link deleted]]cannazon market darknet [/url]
даркнет магазин ссылки на даркнет
как зайти на мегу ссылка на мегу
darknet market news back market trustworthy [url=[Link deleted]]dark markets colombia [/url]
darknet drugs australia top 10 dark websites [url=[Link deleted]]new darknet market reddit [/url]
how to use deep web on pc darknet drugs [url=[Link deleted]]dark web sites name list [/url]
сайт мега мега зеркало
dark markets new zealand incognito link [url=[Link deleted]]buy real money [/url]
ruonion active darknet markets 2022 [url=[Link deleted]]deep web software market [/url]
outlaw market darknet dark web markets reddit [url=[Link deleted]]darkmarket url [/url]
Cocorico Market darknet Heineken Express darknet Market [url=[Link deleted]]drug website dark web [/url]
reddit darknet market noobs bible darknet drugs sales [url=[Link deleted]]dark market list [/url]
bitcoin black market deep web markets [url=[Link deleted]]dark web market list [/url]
Cocorico Market darknet markets 2022 [url=[Link deleted]]darknet market adressen [/url]
superman pills mg credit card black market websites [url=[Link deleted]]cannazon url [/url]
darknet market reddits french dark web [url=[Link deleted]]buy bitcoin for dark web [/url]
litecoin darknet markets underground market place darknet [url=[Link deleted]]reddit working darknet markets [/url]
darknet drugs price Heineken Express Market [url=[Link deleted]]the real deal market darknet [/url]
как зайти на мегу сайт даркнет
darknet market place search steroid market darknet [url=[Link deleted]]deep web links 2022 reddit [/url]
darknet markets norge darknet markets dread [url=[Link deleted]]onionhub [/url]
darknet buy drugs buying drugs online on openbazaar [url=[Link deleted]]how to buy bitcoin and use on dark web [/url]
deep web links 2022 darknet сайты список [url=[Link deleted]]cypher market url [/url]
the armory tor url best onion sites 2022 [url=[Link deleted]]darknet union [/url]
wikipedia darknet market darknet guide [url=[Link deleted]]versus market [/url]
dark market which darknet markets are still open [url=[Link deleted]]active darknet market urls [/url]
which darknet market are still up dark web hitman for hire [url=[Link deleted]]links the hidden wiki [/url]
darknet search dark web adderall [url=[Link deleted]]onion live [/url]
online drug market buying things from darknet markets [url=[Link deleted]]darkshades marketplace [/url]
dark web steroids assassination market darknet [url=[Link deleted]]drugs dark web reddit [/url]
what is escrow darknet markets oniondir deep web link directory [url=[Link deleted]]blockchain darknet markets [/url]
deep sea darknet market darknet online drugs [url=[Link deleted]]darknet market credit cards [/url]
darknet market comparison dark web in spanish [url=[Link deleted]]current best darknet market [/url]
mega сайт мега мефедрон
dark web sites deep web market links reddit [url=[Link deleted]]darknet vendor reviews [/url]
versus project link best darknet market links [url=[Link deleted]]how to access dark web markets [/url]
tor2door darknet market darknet drug market url [url=[Link deleted]]drug trading website [/url]
onion links credit card darknet market credit cards [url=[Link deleted]]dark markets ecuador [/url]
darknet drugs market pink versace pill [url=[Link deleted]]dark markets peru [/url]
dark websites reddit uncensored hidden wiki link [url=[Link deleted]]onion marketplace drugs [/url]
darknetlive drugs onion [url=[Link deleted]]darknet market noobs guide [/url]
deep web search engine url how to buy drugs on the darknet [url=[Link deleted]]lsd drug wiki [/url]
best darknet market 2022 reddit australian dark web markets [url=[Link deleted]]russian darknet market [/url]
Cocorico link darknet websites drugs [url=[Link deleted]]weed darknet market [/url]
best market darknet drugs buy drugs darknet [url=[Link deleted]]onion directory [/url]
black market reddit how to get on the dark web android [url=[Link deleted]]how to access dark web markets [/url]
mega зеркало мега магазин
best card shops bohemia link [url=[Link deleted]]dark market 2022 [/url]
мега вход мега вход
mega зеркало darknet магазин
mega onion ссылка магазины даркнета
darknet marketplace drugs asap link [url=[Link deleted]]incognito market darknet [/url]
darknet union darknet marketplace drugs [url=[Link deleted]]dark web search engine 2022 [/url]
dark markets malaysia darknet market avengers [url=[Link deleted]]black market online [/url]
mega даркнет mega onion ссылка
dark net markets versus project market link [url=[Link deleted]]deep web url links [/url]
french deep web link what darknet markets still work [url=[Link deleted]]darknet reddit market pills [/url]
магазин мега как зайти на мегу
how to shop on dark web darknet markets lsd-25 2022 [url=[Link deleted]]darknet black market sites [/url]
best darknet market for steroids how to buy bitcoin and use on dark web [url=[Link deleted]]reddit darknet reviews [/url]
monero darknet market darknetlive [url=[Link deleted]]how to use darknet markets [/url]
darknet wiki link darknet markets best [url=[Link deleted]]project versus [/url]
darknet markets lsd-25 2022 dark websites [url=[Link deleted]]dma drug [/url]
shop on the dark web dark net markets [url=[Link deleted]]market onion [/url]
dark web poison red ferrari pills [url=[Link deleted]]deep web weed prices [/url]
deep web drug markets cannahome darknet market [url=[Link deleted]]deep market [/url]
black market buy online dark markets estonia [url=[Link deleted]]darknet market guide [/url]
darknet market controlled delivery darknet markets availability [url=[Link deleted]]biggest darknet markets 2022 [/url]
dark net markets black market prescription drugs for sale [url=[Link deleted]]dark markets ecuador [/url]
tor marketplaces darknet markets for steroids [url=[Link deleted]]onion seiten 2022 [/url]
fullz darknet market fake id onion [url=[Link deleted]]access the dark web reddit [/url]
drugs from darknet markets mdm love drug [url=[Link deleted]]darknet drug markets [/url]
counterfeit money deep web darknet market adderall prices [url=[Link deleted]]dark markets china [/url]
onion deep web wiki dark markets macedonia [url=[Link deleted]]darkfox url [/url]
dark web escrow service most reliable darknet markets [url=[Link deleted]]cypher link [/url]
hidden financial services deep web dark market 2022 [url=[Link deleted]]dark markets india [/url]
мега onion ссылка mega onion
cannazon market darknet darknet guns drugs [url=[Link deleted]]Abacus Market [/url]
darknet drug trafficking versus project market [url=[Link deleted]]darknet drugs germany [/url]
dark markets uk ordering drugs on dark web [url=[Link deleted]]access the black market [/url]
best darknet market for weed 2022 drug trading website [url=[Link deleted]]bohemia darknet market [/url]
darknet drug markets 2022 onion directory list [url=[Link deleted]]darknet guns market [/url]
darknet websites list 2022 reddit darknet market links [url=[Link deleted]]alphabay solutions reviews [/url]
canazon dark markets uruguay [url=[Link deleted]]dark markets indonesia [/url]
agora darknet market archetyp market [url=[Link deleted]]dark markets ukraine [/url]
cannahome market link best darknet market now [url=[Link deleted]]alphabay market [/url]
orange sunshine lsd darknet markets best [url=[Link deleted]]how to buy bitcoin for the dark web [/url]
mega магазин мега onion зеркало
dark markets austria darknet market links reddit [url=[Link deleted]]drug website dark web [/url]
darknet guns market darknet online drugs [url=[Link deleted]]hidden wiki tor onion urls directories [/url]
anadrol pills drugs on deep web [url=[Link deleted]]Kingdom Market darknet [/url]
buy darknet market email address darknet market stats [url=[Link deleted]]how to use deep web on pc [/url]
how to access darknet markets reddit best darknet market uk [url=[Link deleted]]dark markets switzerland [/url]
how to order from dark web deep web market links reddit [url=[Link deleted]]darknet markets [/url]
darknet illicit drugs dark markets finland [url=[Link deleted]]illegal black market [/url]
how to buy bitcoin for the dark web fake id dark web 2022 [url=[Link deleted]]pill with crown on it [/url]
darknet market alternatives top dark net markets [url=[Link deleted]]dark web marketplace [/url]
dark web counterfeit money how to use darknet markets [url=[Link deleted]]orange sunshine pill [/url]
buds express alphabay solutions reviews [url=[Link deleted]]dark markets poland [/url]
ссылка мега mega market
mega онион мега onion зеркало
dark web hitmen deep web search engine 2022 [url=[Link deleted]]tor2door market darknet [/url]
мега купить соль mega онион сайт
darkweb форум best darknet market links [url=[Link deleted]]top darknet market 2022 [/url]
darknet магазин магазин даркнет
reddit darknet markets noobs phenylethylamine [url=[Link deleted]]black market websites tor [/url]
darknet market superlist top darknet market now [url=[Link deleted]]tramadol dark web [/url]
mega onion shop mega darkmarket
darknet market lists darknet bitcoin market [url=[Link deleted]]the armory tor url [/url]
how to buy things off the black market darknet union [url=[Link deleted]]asap market link [/url]
darkmarket url dark markets malta [url=[Link deleted]]dark markets uruguay [/url]
black market website black market drugs guns [url=[Link deleted]]dark market link [/url]
ссылки на даркнет официальный сайт мега
incognito darknet market darknet websites [url=[Link deleted]]best dark web search engine link [/url]
market onion versus project market [url=[Link deleted]]darknet market place search [/url]
dark markets ukraine dark web electronics [url=[Link deleted]]how to buy from the darknet markets lsd [/url]
best darknet market for heroin darknet market get pills [url=[Link deleted]]dark web cheap electronics [/url]
darknet buy drugs deep deep web links [url=[Link deleted]]deep web drug links [/url]
dark markets romania tor market links [url=[Link deleted]]darknet markets guide [/url]
darknet market url list dark web links adult [url=[Link deleted]]dark markets norway [/url]
dark markets latvia orange sunshine pill [url=[Link deleted]]deep web drug prices [/url]
underground card shop dark web address list [url=[Link deleted]]russian darknet market [/url]
onion dark web list darkweb форум [url=[Link deleted]]how to access darknet markets reddit [/url]
Kingdom Market dark web marketplace [url=[Link deleted]]dark market url [/url]
and Mireault, G. <a href=[Link deleted]treatment doxycycline
мега кокаин mega онион сайт
access the black market dark markets bolivia [url=[Link deleted]]market street darknet [/url]
alphabay market url black market net [url=[Link deleted]]how to enter the black market online [/url]
darknet markets address darknet site [url=[Link deleted]]tor onion search [/url]
мега onion зеркало mega onion shop
darknet markets for steroids darknet websites [url=[Link deleted]]dark web steroids [/url]
deep web hitmen url berlin telegram group drugs [url=[Link deleted]]drugs darknet vendors [/url]
verified darknet market black market prescription drugs for sale [url=[Link deleted]]darknet market vendors search [/url]
darknet drugs 2022 dark web market links [url=[Link deleted]]onion deep web wiki [/url]
darknet stock market versus market link [url=[Link deleted]]list of darknet drug markets [/url]
how to browse the dark web reddit darknet markets may 2022 [url=[Link deleted]]adresse dark web [/url]
tor drugs bohemia market link [url=[Link deleted]]dark markets denmark [/url]
darknet market listing drugs on the darknet [url=[Link deleted]]drug trading website [/url]
darknet market comparison brick market [url=[Link deleted]]best darknet market for psychedelics [/url]
cannazon url onion deep web wiki [url=[Link deleted]]how to buy bitcoin and use on dark web [/url]
alphabay market url darknet adresse how to pay with bitcoin on dark web [url=[Link deleted]]darknet market list [/url]
0day onion deep deep web links [url=[Link deleted]]dark markets czech republic [/url]
darkfox market where to find darknet market links [url=[Link deleted]]drug market [/url]
мега onion ссылка ссылка на мегу
deep web weed prices dark web steroids [url=[Link deleted]]dark web market [/url]
mdm love drug darknet drug market url [url=[Link deleted]]most popular darknet markets 2022 [/url]
darknet market controlled delivery what darknet markets still work [url=[Link deleted]]the armory tor url [/url]
buy bitcoin for dark web dark web markets 2022 [url=[Link deleted]]darknet market oz [/url]
darknet escrow markets how to access the dark web 2022 [url=[Link deleted]]darknet market comparison [/url]
active darknetmarkets darknet adressen [url=[Link deleted]]darkmarket [/url]
dark markets andorra reddit darknet reviews [url=[Link deleted]]cannahome market link [/url]
agora darknet market dark markets macedonia [url=[Link deleted]]reliable darknet markets reddit [/url]
list of darknet markets 2022 bitcoin cash darknet markets [url=[Link deleted]]orange sunshine pill [/url]
cypher market credit card dumps dark web [url=[Link deleted]]darknet best drugs [/url]
мега магазин мега онион
Cocorico link deep web markets [url=[Link deleted]]darknet markets still up [/url]
core market darknet darknet sites [url=[Link deleted]]xanax darknet reddit [/url]
магазин мега даркнет ссылки
alphabay darknet market australian dark web markets [url=[Link deleted]]darknet market canada [/url]
how to access dark web markets best dark web links [url=[Link deleted]]currently darknet markets [/url]
dark web cheap electronics cannazon market url [url=[Link deleted]]dark net market list reddit [/url]
mega магазин магазины даркнета
active darknetmarkets link darknet market [url=[Link deleted]]darknet market url [/url]
cannazone how to enter the black market online [url=[Link deleted]]the dark web shop [/url]
how to order from dark web best darknet market 2022 reddit [url=[Link deleted]]darknet market 2022 reddit [/url]
deep dark web markets links darknet websites [url=[Link deleted]]darknet drugs india [/url]
Cocorico Market darknet dark markets moldova [url=[Link deleted]]dark markets paraguay [/url]
grey market link site darknet fermГ© [url=[Link deleted]]darknet market buying mdma usa [/url]
pyramid pill dark web drugs [url=[Link deleted]]bohemia darknet market [/url]
cannahome market darknet onion linkek [url=[Link deleted]]darknet live stream [/url]
dark web market place links bohemia market url [url=[Link deleted]]darknet wiki link [/url]
best onion sites 2022 best market darknet drugs [url=[Link deleted]]dark web market place links [/url]
how to buy bitcoin and use on dark web darknet market deep dot web [url=[Link deleted]]best darknet market 2022 reddit [/url]
мега onion зеркала магазин мега
dark markets macedonia darknet markets japan [url=[Link deleted]]best darknet markets [/url]
cypher market url cannahome market url [url=[Link deleted]]asap market link [/url]
мега нарко мега onion зеркало
dark markets iceland black market website names [url=[Link deleted]]reddit darknet reviews [/url]
dark markets australia darknet seiten [url=[Link deleted]]dark markets hungary [/url]
darknet market forum dark markets bolivia [url=[Link deleted]]archetyp url [/url]
best drug darknet r darknet market [url=[Link deleted]]cannabis dark web [/url]
Abacus link darknet market vendors [url=[Link deleted]]price of black market drugs [/url]
fake id onion best card shops [url=[Link deleted]]darknet steroid markets [/url]
darknet bitcoin market xanax darknet reddit [url=[Link deleted]]how to use deep web on pc [/url]
best darknet market now dark web hitman [url=[Link deleted]]darknet software market [/url]
darknet paypal accounts active darknet market urls [url=[Link deleted]]dark market onion [/url]
buy bitcoin for dark web deep web search engine url [url=[Link deleted]]how to buy drugs dark web [/url]
biggest darknet markets 2022 cypher url [url=[Link deleted]]darknet market pills vendor [/url]
dark web sales darknet market comparison chart [url=[Link deleted]]marijuana dark web [/url]
best darknet markets dark web sites [url=[Link deleted]]cypher market url [/url]
versus market url dark web drug marketplace [url=[Link deleted]]dark markets italy [/url]
urls for darknet markets drugs sold on dark web [url=[Link deleted]]most reliable darknet markets [/url]
мега сайт новое зеркало мега
black market alternative deep web onion url [url=[Link deleted]]working darknet markets [/url]
counterfeit money deep web what is the best darknet market [url=[Link deleted]]dark market [/url]
versus project market link cannazon market url [url=[Link deleted]]dark markets norway [/url]
black market net darknet market oxycontin [url=[Link deleted]]best onion sites 2022 [/url]
dark web store versus market [url=[Link deleted]]anadrol pills [/url]
bohemia darknet market links tor 2022 [url=[Link deleted]]Abacus link [/url]
bohemia market carding deep web links [url=[Link deleted]]darknet websites [/url]
links tor 2022 darknet reinkommen [url=[Link deleted]]dma drug [/url]
current darknet markets buying drugs on darknet reddit [url=[Link deleted]]darknet market list reddit [/url]
darkfox market darknet black market alternative [url=[Link deleted]]darkmarket url [/url]
how to buy bitcoin and use on dark web deep web cc sites [url=[Link deleted]]top ten dark web [/url]
mega сайт ьупф ьфклуе
мега зеркало mega market
what is the darknet market reddit darknet market links [url=[Link deleted]]alphabay url [/url]
darknet market oz asap market [url=[Link deleted]]cheapest drugs on darknet [/url]
dark web hitman for hire deep web drug url [url=[Link deleted]]biggest darknet markets [/url]
сайт мега darknet магазин зелья
how to install deep web archetyp market darknet [url=[Link deleted]]tor drugs [/url]
free deep web links best dark web markets 2022 [url=[Link deleted]]dark net markets [/url]
cypher darknet market black market cryptocurrency [url=[Link deleted]]archetyp market link [/url]
the darknet market reddit Kingdom darknet Market [url=[Link deleted]]drug markets dark web [/url]
deep dot web markets tor search onion link [url=[Link deleted]]cannahome market url [/url]
магазины даркнета мега сайт ссылка
mega darkmarket сайт даркнет
carding deep web links black market illegal drugs [url=[Link deleted]]deep web search engine url [/url]
cannazon darknet market darknet market oz [url=[Link deleted]]escrow dark web [/url]
tramadol dark web what is a darknet drug market like [url=[Link deleted]]deep net access [/url]
darknet websites grey market link [url=[Link deleted]]reddit darknetmarket [/url]
darknet market place search darknet market features [url=[Link deleted]]dark markets austria [/url]
deep web updated links nike jordan pill [url=[Link deleted]]legit darknet markets 2022 [/url]
darknet market drug prices darknet drugs sales [url=[Link deleted]]links deep web tor [/url]
marijuana dark web dark web drugs [url=[Link deleted]]best darknet market may 2022 reddit [/url]
darknet onion links drugs darkmarket 2022 [url=[Link deleted]]darknet drug links [/url]
incognito market url dumps shop [url=[Link deleted]]which darknet market are still up [/url]
darknet markets reddit 2022 black market online [url=[Link deleted]]back market trustworthy [/url]
darknet market news black market drugs guns [url=[Link deleted]]tor2door market [/url]
сайты даркнет ссылки mega онион сайт
deep net websites working dark web links [url=[Link deleted]]counterfeit money deep web [/url]
мега онион mega onion зеркало
how to get access to darknet dark web search engines link [url=[Link deleted]]list of darknet drug markets [/url]
dark markets luxembourg darknet market vendors search [url=[Link deleted]]darknet drugs sites [/url]
drugs on the deep web best current darknet market [url=[Link deleted]]darknet market ranking [/url]
darknet drugs shipping reddit darknet markets noobs [url=[Link deleted]]darknet market avengers [/url]
black market website names darknet список сайтов [url=[Link deleted]]live dark web [/url]
gbl drug wiki dark markets peru [url=[Link deleted]]darknet market links 2022 [/url]
reddit biggest darknet market place uncensored deep web [url=[Link deleted]]drugs on darknet [/url]
best darknet gun market how to get access to darknet [url=[Link deleted]]darknet market list url [/url]
tor markets links dynabolts pills [url=[Link deleted]]the darknet drugs [/url]
tinder login
[url=”[Link deleted]text dating services[/url]
dating online free
tor2door market darknet darknet market adressen [url=[Link deleted]]best darknet drug sites [/url]
what darknet markets are up best darknet market for steroids [url=[Link deleted]]safe list of darknet market links [/url]
Abacus Market darknet buds express [url=[Link deleted]]step by step dark web [/url]
dark markets germany reddit darknet markets links [url=[Link deleted]]darknet market adderall [/url]
deep web updated links top onion links [url=[Link deleted]]dark markets denmark [/url]
darknet drug prices reddit dark markets philippines [url=[Link deleted]]reddit darknetmarket [/url]
mega ссылка mega онион сайт
shop on the dark web list of darknet markets reddit [url=[Link deleted]]deep web shopping site [/url]
dark web sites name list how to browse the dark web reddit [url=[Link deleted]]reddit darknet market noobs bible [/url]
best darknet market for guns uk darknet markets [url=[Link deleted]]how to get on the dark web [/url]
darknet market url list the darknet drugs [url=[Link deleted]]phenethylamine drugs [/url]
medunitsa.ru Medunitsa.ru
alphabay market Heineken Express darknet Market [url=[Link deleted]]top darknet markets 2022 [/url]
shop valid cvv reddit darknetmarket [url=[Link deleted]]darknet markets 2022 [/url]
monkey xtc pill darknet cannabis markets [url=[Link deleted]]current darknet markets [/url]
darknet market that has ssn database largest darknet market [url=[Link deleted]]dark markets korea [/url]
зайти на мегу зайти на мегу
xanax on darknet where to find onion links [url=[Link deleted]]darknet market reddit 2022 [/url]
darknet websites wiki dark markets belgium [url=[Link deleted]]darknet market and monero [/url]
mega ссылка мега onion ссылка
мега onion ссылка мега ссылка
Abacus darknet Market drug trading website [url=[Link deleted]]how to access dark net [/url]
bitcoin darknet markets most popular darknet markets 2022 [url=[Link deleted]]darknet drug market list [/url]
магазины даркнета магазин мега
darknet market francais darknet market reddit [url=[Link deleted]]online drug market [/url]
how to find the black market online the dark web url [url=[Link deleted]]darknet market credit cards [/url]
current best darknet market darknet drug markets [url=[Link deleted]]new dark web links [/url]
reddit darknet market how to deep web updated links [url=[Link deleted]]archetyp market [/url]
cypher link buy drugs from darknet [url=[Link deleted]]cannahome url [/url]
trusted darknet markets dark markets serbia [url=[Link deleted]]darknet markets may 2022 [/url]
мега скорость магазин мега
top 10 dark websites cannahome url [url=[Link deleted]]what darknet markets still work [/url]
how to access the dark web on pc how to get to the black market online [url=[Link deleted]]dark web trading [/url]
ьупф ьфклуе сайты даркнет
blacknet drugs tma drug [url=[Link deleted]]darknet market comparison [/url]
мега сайт ссылка мега onion
mega онион сайт мега кокаин
darknet drug market url currently darknet markets [url=[Link deleted]]new darknet marketplaces [/url]
ethereum darknet markets popular dark websites [url=[Link deleted]]credit card dark web links [/url]
darknet market dark markets france [url=[Link deleted]]tor darknet market address [/url]
dread onion deep dot web markets [url=[Link deleted]]buy ssn and dob [/url]
deep market what is escrow darknet markets [url=[Link deleted]]tormarket onion [/url]
how to order from dark web dark markets bosnia [url=[Link deleted]]darknet market news [/url]
tor darknet markets black market websites tor [url=[Link deleted]]underground website to buy drugs [/url]
darknet software market currently darknet markets [url=[Link deleted]]darknet drug market list [/url]
tor link list 2022 dark markets argentina [url=[Link deleted]]dark markets canada [/url]
2022 working darknet market what darknet market to use [url=[Link deleted]]tor2door darknet market [/url]
the dark web shop dark web hitman for hire [url=[Link deleted]]links da deep web 2022 [/url]
darkfox market best website to buy cc [url=[Link deleted]]reddit darknet reviews [/url]
deep net links darknet markets availability [url=[Link deleted]]dark web drug markets [/url]
bohemia market best websites dark web [url=[Link deleted]]deep web links reddit 2022 [/url]
top onion links dark web directory [url=[Link deleted]]darknet markets still up [/url]
reddit darknet markets list darknet market reviews [url=[Link deleted]]best darknet market for weed uk [/url]
dark markets russia black market illegal drugs [url=[Link deleted]]dn market [/url]
мега магазин зайти на мегу
darknet markets most popular onion websites for credit cards [url=[Link deleted]]unicorn pill [/url]
tor darknet market deep web search engines 2022 [url=[Link deleted]]what is escrow darknet markets [/url]
dark web sites xxx reddit darknet markets list [url=[Link deleted]]dark web engine search [/url]
how to access darknet markets reddit darknet marketplace drugs [url=[Link deleted]]2022 working darknet market [/url]
darknet market guide incognito darknet market [url=[Link deleted]]drugs from darknet markets [/url]
versus project market darknet darknet links 2022 drugs [url=[Link deleted]]how to get on the dark web android [/url]
what darknet markets still work onion darknet market [url=[Link deleted]]darknet market security [/url]
largest darknet market darknet market superlist [url=[Link deleted]]dark markets argentina [/url]
darknet market oxycontin tor darknet [url=[Link deleted]]top 10 dark websites [/url]
deep dot web replacement illegal black market [url=[Link deleted]]lsd drug wiki [/url]
mega онион сайт ьупф ьфклуе
мега магазин как зайти на мегу
Kingdom link Heineken Express darknet [url=[Link deleted]]how to get to darknet market [/url]
deep web drugs reddit how to access deep web safely reddit [url=[Link deleted]]dark markets singapore [/url]
mega onion зеркала мега нарко
зайти на мегу зеркало мега
grey market drugs the onion directory [url=[Link deleted]]how to buy from darknet [/url]
reddit darknet market guide darknet сайты список [url=[Link deleted]]best darknet market 2022 [/url]
darknet in person drug sales new darknet markets [url=[Link deleted]]cypher market [/url]
mega онион сайт ссылка мега
free deep web links reddit onion list [url=[Link deleted]]dark web legit sites [/url]
deep web marketplaces reddit wiki sticks drugs [url=[Link deleted]]dark web adderall [/url]
dark web links 2022 reddit dark markets turkey [url=[Link deleted]]drug website dark web [/url]
darknet drugs sites active darknet markets [url=[Link deleted]]how to access dark net [/url]
dark web sales dark web links [url=[Link deleted]]wiki darknet market [/url]
магазины даркнета mega onion оффициальный сайт
darknet market links 2022 reddit darknet reddit market pills [url=[Link deleted]]weed only darknet market [/url]
darknet markets japan brucelean darknet market [url=[Link deleted]]darknet market drug [/url]
shop ccs carding darknet live stream [url=[Link deleted]]dot onion websites [/url]
мега onion оффициальный сайт mega darknet
cannahome link cypher market url [url=[Link deleted]]top darknet markets 2022 [/url]
darknet seiten dream market onion market url [url=[Link deleted]]russian anonymous marketplace [/url]
мега шишки зеркало мега
darkshades marketplace tor dark web [url=[Link deleted]]darknet website for drugs [/url]
dark web poison darknet dream market [url=[Link deleted]]new onion darknet market [/url]
incognito link darknet websites list 2022 [url=[Link deleted]]darknet drug prices reddit [/url]
darkfox link darknet market search engine [url=[Link deleted]]darknet markets most popular [/url]
berlin telegram group drugs xanax on darknet [url=[Link deleted]]darkmarket [/url]
what darknet market to use now dark web legit sites [url=[Link deleted]]drugs dark web price [/url]
dark web website links darknet market superlist [url=[Link deleted]]darknet market place search [/url]
best dark web search engine link good dark web search engines [url=[Link deleted]]darknet market dmt [/url]
blue lady e pill darknet markets that take ethereum [url=[Link deleted]]tor2door market link [/url]
incognito market link darknet market adderall [url=[Link deleted]]top ten dark web [/url]
vice city market darknet tor market url [url=[Link deleted]]new onion darknet market [/url]
australian darknet markets redit safe darknet markets [url=[Link deleted]]deep web onion url [/url]
market links darknet darknet market guide reddit [url=[Link deleted]]drug markets dark web [/url]
best darknet market for lsd unicorn pill [url=[Link deleted]]xanax darknet markets reddit [/url]
darknet market pills vendor current darknet market list [url=[Link deleted]]how to access darknet markets [/url]
adresse onion black market alphabay market darknet [url=[Link deleted]]dark markets korea [/url]
dark markets slovenia online black market uk [url=[Link deleted]]dark markets estonia [/url]
most popular darknet market site darknet onion [url=[Link deleted]]new alphabay darknet market [/url]
ruonion versus project market url [url=[Link deleted]]gbl drug wiki [/url]
dark web weed darknet litecoin [url=[Link deleted]]links deep web tor [/url]
tfmpp pills dark web sites [url=[Link deleted]]darknet adress [/url]
darknet cannabis markets the darknet drugs [url=[Link deleted]]darknet market place search [/url]
мега онион сайт мега наркотики
we amsterdam darkshades marketplace [url=[Link deleted]]best darknet market for lsd [/url]
site darknet liste active darknet markets 2022 [url=[Link deleted]]darknet market alternatives [/url]
free deep web links tor markets links [url=[Link deleted]]alphabay url [/url]
мега купить мега onion ссылка
versus market marijuana dark web [url=[Link deleted]]deep dot web links [/url]
tor websites reddit darknet list [url=[Link deleted]]dark markets sweden [/url]
мега сайт ссылка mega darkmarket
mega onion mega onion зеркала
dark web sites drugs currently darknet markets [url=[Link deleted]]dbol steroid pills [/url]
deep web trading darknet market francais [url=[Link deleted]]archetyp url [/url]
deep web weed prices how to install deep web [url=[Link deleted]]free deep web links [/url]
drugs on the dark web versus project market link [url=[Link deleted]]darknet market wikia [/url]
darknet drug market darknet adress [url=[Link deleted]]deep web updated links [/url]
darknet market reddits deep sea darknet market [url=[Link deleted]]escrow dark web [/url]
сайт мега мега onion ссылка
litecoin darknet markets onion live links [url=[Link deleted]]tma drug [/url]
мега onion ссылка ссылка на мегу
reddit darknet reviews how to buy bitcoin for the dark web [url=[Link deleted]]dark markets norge [/url]
best lsd darknet market how to install deep web [url=[Link deleted]]black market deep [/url]
phenethylamine drugs dream market darknet url [url=[Link deleted]]Kingdom Market url [/url]
bohemia market darknet how to access dark net [url=[Link deleted]]the real deal market darknet [/url]
darknet links market bitcoins and darknet markets [url=[Link deleted]]site darknet liste [/url]
mega магазин ссылка на мегу
mega онион сайт даркнет
best tor marketplaces dark net market [url=[Link deleted]]deep web links updated [/url]
versus darknet market pill with crown on it [url=[Link deleted]]best darknet market for lsd [/url]
darknet reddit market pills Cocorico darknet Market [url=[Link deleted]]how to buy drugs dark web [/url]
dark web links top ten dark web sites [url=[Link deleted]]open darknet markets [/url]
dark web escrow service darknet market pills vendor [url=[Link deleted]]redit safe darknet markets [/url]
how to buy from the darknet markets the real deal market darknet [url=[Link deleted]]site darknet market [/url]
decentralized darknet market russian darknet market [url=[Link deleted]]onion tube porn [/url]
reddit darknet market superlist reddit darknet markets uk [url=[Link deleted]]reddit darknet market list [/url]
how to enter the black market online darknet sites url [url=[Link deleted]]dark markets south korea [/url]
archetyp market url the dark market [url=[Link deleted]]dark net markets [/url]
darknet market list 2022 blockchain darknet markets [url=[Link deleted]]darknetlive [/url]
darknet drugs market drugs from darknet markets [url=[Link deleted]]cannazon market [/url]
market street darknet dark markets slovenia [url=[Link deleted]]crypto market darknet [/url]
online black market uk dark markets moldova [url=[Link deleted]]buying drugs on darknet reddit [/url]
мега магазин зеркало мега
which darknet markets are still open alphabay market darknet [url=[Link deleted]]buying darknet drugs [/url]
darknet adress bohemia url [url=[Link deleted]]darknet marketplace drugs [/url]
darknet cannabis markets onion live links [url=[Link deleted]]Heineken Express link [/url]
list of darknet drug markets dark markets macedonia [url=[Link deleted]]xanax on darknet [/url]
darknet market reddits active darknet markets 2022 [url=[Link deleted]]best darknet market reddit [/url]
onion link reddit dark web sites xxx [url=[Link deleted]]dark web adderall [/url]
darknet gun market Kingdom Market darknet [url=[Link deleted]]best australian darknet market [/url]
buy ssn and dob fresh onions link [url=[Link deleted]]tor search engine link [/url]
best dark web markets 2022 darknet websites list 2022 [url=[Link deleted]]canazon [/url]
how to access the black market what is a darknet drug market like [url=[Link deleted]]orange sunshine lsd [/url]
даркнет сайты магазин мега онион сайт
dark web shopping tfmpp pills [url=[Link deleted]]drugs dark web [/url]
dark web login guide tor darknet markets [url=[Link deleted]]Abacus Market link [/url]
мега onion магазин зеркало мега
alphabay market darknet new onion darknet market [url=[Link deleted]]mdm love drug [/url]
darknet markets 2022 updated onion links 2022 [url=[Link deleted]]cypher darknet market [/url]
active darknet market urls dark markets thailand [url=[Link deleted]]open darknet markets [/url]
мега ссылка сайты даркнет ссылки
dark markets sweden buying drugs on the darknet [url=[Link deleted]]vice city link [/url]
onion domain and kingdom dark markets mexico [url=[Link deleted]]darknet markets urls [/url]
buy bitcoin for dark web buy drugs online darknet [url=[Link deleted]]brucelean darknet market [/url]
how to access the darknet market wiki darknet market [url=[Link deleted]]dark websites [/url]
зеркало мега мега купить соль
dark markets czech republic deep web addresses onion [url=[Link deleted]]current darknet markets reddit [/url]
как зайти на мегу мега onion зеркало
drugs dark web price top darknet markets list [url=[Link deleted]]darknet best drugs [/url]
deep web addresses onion underground website to buy drugs [url=[Link deleted]]black market website legit [/url]
darknet markets 2022 reddit buying things from darknet markets [url=[Link deleted]]deep web drug markets [/url]
best mdma vendor darknet market reddit fake id onion [url=[Link deleted]]tor2door market darknet [/url]
мега onion оффициальный сайт официальный сайт мега
tor dark web counterfeit money dark web reddit [url=[Link deleted]]top ten dark web [/url]
darknet market guide darknet new market link [url=[Link deleted]]buy darknet market email address [/url]
darknet buy drugs exploit market darknet [url=[Link deleted]]what darknet markets are live [/url]
мега вход мега мефедрон
darknet websites list 2022 dark web illegal links [url=[Link deleted]]darknet onion markets reddit [/url]
reddit darknet markets uk deep cp links [url=[Link deleted]]tor2door market url [/url]
top darknet market 2022 alphabay market link [url=[Link deleted]]dark web vendors [/url]
darknet markets wax weed the dark market [url=[Link deleted]]drug markets onion [/url]
hidden wiki tor onion urls directories underground market place darknet [url=[Link deleted]]onion deep web wiki [/url]
versus project market mdm love drug [url=[Link deleted]]black market online website [/url]
cannazon dark web live [url=[Link deleted]]dark web market place links [/url]
buying drugs on darknet reddit darknet drug prices [url=[Link deleted]]darknet market comparison chart [/url]
darkfox market darknet how to buy drugs dark web [url=[Link deleted]]tor2door market url [/url]
darknet markets lsd-25 2022 australian darknet markets [url=[Link deleted]]tor markets 2022 [/url]
buds express underground market online [url=[Link deleted]]darknet markets 2022 [/url]
archetyp market dark web drugs [url=[Link deleted]]darknet market script [/url]
cvv black market darknet список сайтов [url=[Link deleted]]dark web escrow service [/url]
darknet illicit drugs alphabay market url darknet adresse [url=[Link deleted]]current list of darknet markets [/url]
мега онион мега скорость
buy bank accounts darknet darknet bitcoin market [url=[Link deleted]]tor darknet market [/url]
dark markets japan darknet market iphone [url=[Link deleted]]dark markets finland [/url]
reddit darknet market how to what darknet market to use now [url=[Link deleted]]best darknet markets uk [/url]
dark markets france deep web drug links [url=[Link deleted]]dark markets czech republic [/url]
как зайти на мегу mega онион сайт
dark markets philippines price of black market drugs [url=[Link deleted]]versus project market darknet [/url]
onion links 2022 dark web drugs nz [url=[Link deleted]]Cocorico Market link [/url]
buds express dark markets india [url=[Link deleted]]buying on dark web [/url]
buy drugs online darknet the armory tor url [url=[Link deleted]]darknet markets lsd-25 2022 [/url]
мега даркнет darknet сайт
мега купить соль магазин мега
alphabay market tor drugs [url=[Link deleted]]access darknet markets [/url]
top darknet market now deep dark web [url=[Link deleted]]darknet market guide [/url]
monero darknet market how to order from dark web [url=[Link deleted]]darknet adress [/url]
darknet магазин даркнет ссылки
Kingdom Market darknet Cocorico Market [url=[Link deleted]]tormarket onion [/url]
dnm xanax darknet markets with tobacco [url=[Link deleted]]darknet drugs india [/url]
how big is the darknet market drugs sold on dark web [url=[Link deleted]]onion darknet market [/url]
alphabay darknet market black market websites 2022 [url=[Link deleted]]deep onion links [/url]
мега мефедрон ссылки на даркнет
cannahome darknet market darknet drugs sites [url=[Link deleted]]darknet drugs dublin [/url]
mega onion ссылка darknet магазин зелья
darkmarket list deep web weed prices [url=[Link deleted]]superlist darknet markets [/url]
xanax on darknet dark markets slovenia [url=[Link deleted]]darknet drugs links [/url]
dark web drugs ireland how to access the dark web through tor [url=[Link deleted]]darknet market deep dot web [/url]
dark markets guyana the best onion sites [url=[Link deleted]]darknet markets still up [/url]
legit darknet markets 2022 reddit darknet market links [url=[Link deleted]]bitcoins and darknet markets [/url]
мега онион сайт мега onion
darknet websites drugs darknet market script [url=[Link deleted]]vice city market darknet [/url]
ьупф ьфклуе мега ссылка
darkweb marketplace the darknet drugs [url=[Link deleted]]ketamine darknet market [/url]
reddit darknet market noobs bible asap url [url=[Link deleted]]darknet market links 2022 reddit [/url]
darknet market list deep dark web [url=[Link deleted]]darknet market reddit 2022 [/url]
trusted darknet markets best black market websites [url=[Link deleted]]cannahome market link [/url]
tor2door market darknet deep web search engines 2022 [url=[Link deleted]]dark web links market [/url]
the real deal market darknet decentralized darknet market [url=[Link deleted]]reddit darknet market links [/url]
darknet market onion links deep net links [url=[Link deleted]]darknet market dash [/url]
darknet drug markets reddit versus market url [url=[Link deleted]]dark web hitmen [/url]
archetyp url decentralized darknet market [url=[Link deleted]]tor darknet markets [/url]
popular dark websites black market websites 2022 [url=[Link deleted]]deep dark web [/url]
legit darknet sites how to access dark web markets [url=[Link deleted]]onion websites for credit cards [/url]
dark markets bolivia best darknet market drugs [url=[Link deleted]]back market trustworthy [/url]
best working darknet market 2022 what darknet markets are still open [url=[Link deleted]]dark markets estonia [/url]
ссылка на мегу мега зеркало
darknet market list links most popular darknet markets 2022 [url=[Link deleted]]tor market [/url]
i2p darknet markets biggest darknet market [url=[Link deleted]]darknet vendor reviews [/url]
cp links dark web darknet guide [url=[Link deleted]]darknet drugs market [/url]
darknet сайт магазин даркнет
dark markets ukraine alphabay market net [url=[Link deleted]]alphabay market link [/url]
steroid market darknet versus market darknet [url=[Link deleted]]black market alternative [/url]
asap darknet market drug markets onion [url=[Link deleted]]deep web drug markets [/url]
dark web markets reddit 2022 onion deep web search [url=[Link deleted]]darknet drugs 2022 [/url]
deep web links 2022 reddit reddit biggest darknet market place [url=[Link deleted]]onion link search engine [/url]
darknet магазин зелья ссылка мега
dark markets russia the darknet market reddit [url=[Link deleted]]live dark web [/url]
darknet markets reddit darknet market updates 2022 [url=[Link deleted]]tor markets links [/url]
ссылка мега мега скорость
black market drugs trusted darknet markets [url=[Link deleted]]bohemia market darknet [/url]
best black market websites brucelean darknet market [url=[Link deleted]]what bitcoins are accepted by darknet markets [/url]
deep web onion url trusted darknet markets weed [url=[Link deleted]]darknet onion markets reddit [/url]
darknet market busts Abacus link [url=[Link deleted]]darknet gun market [/url]
mega магазин официальный сайт мега
Abacus link how to get on the dark web android [url=[Link deleted]]dark web links market [/url]
versus project market darkfox link [url=[Link deleted]]current best darknet market [/url]
how to access the dark web reddit dark markets south korea [url=[Link deleted]]ketamine darknet market [/url]
сайт мега mega магазин
wiki darknet market darknet markets up [url=[Link deleted]]unicorn pill [/url]
mega onion зеркала darknet магазин
best onion sites 2022 dark markets uk [url=[Link deleted]]live dark web [/url]
darknet drugs reddit drugs on the darknet [url=[Link deleted]]darknet market dash [/url]
darknet markets norge buying drugs on darknet [url=[Link deleted]]darknet drugs url [/url]
accessing darknet market dark markets uk [url=[Link deleted]]dark web engine search [/url]
xanax on darknet naked lady ecstasy pill [url=[Link deleted]]darknet xanax [/url]
мега вход mega даркнет
black market net darknet websites drugs [url=[Link deleted]]dark web market [/url]
mega onion оффициальный сайт ссылка мега
best darknet market for weed 2022 dark web illegal links [url=[Link deleted]]dark markets estonia [/url]
best darknet market for weed uk Abacus Market darknet [url=[Link deleted]]bitcoin darknet markets [/url]
agora darknet market best dark net markets [url=[Link deleted]]darknet markets noob [/url]
top ten dark web sites wikipedia darknet market [url=[Link deleted]]dark web drug marketplace [/url]
darknet drug prices uk market onion [url=[Link deleted]]current darknet markets [/url]
dark markets romania what darknet markets still work [url=[Link deleted]]cannazon [/url]
tor websites reddit darknet site [url=[Link deleted]]buy drugs darknet [/url]
uncensored hidden wiki link new darknet markets 2022 [url=[Link deleted]]dark markets indonesia [/url]
onion directory sichere darknet markets 2022 [url=[Link deleted]]dxm pills [/url]
cannazon url how to buy drugs on darknet [url=[Link deleted]]darknet list market [/url]
Cocorico url versus project market link [url=[Link deleted]]underground dumps shop [/url]
marijuana dark web darknet markets dread [url=[Link deleted]]deep web drug store [/url]
ьупф ьфклуе мега магазин
how to order from dark web darknet market reddit 2022 [url=[Link deleted]]phenethylamine drugs [/url]
black market alternative dark web market reviews [url=[Link deleted]]best darknet drug sites [/url]
darknet credit card market dream market darknet link [url=[Link deleted]]dnm market [/url]
darknet markets guide darknet market google [url=[Link deleted]]black market prescription drugs [/url]
сайт даркнет зайти на мегу
darknet onion markets reddit how to use darknet markets [url=[Link deleted]]deep web trading [/url]
darknet markets list how to buy drugs on darknet [url=[Link deleted]]dark web vendors [/url]
black market net darknet market lists [url=[Link deleted]]what is escrow darknet markets [/url]
best website to buy cc darknet market noobs step by step [url=[Link deleted]]darknet market package [/url]
Cocorico url darknet drug vendor that takes paypal [url=[Link deleted]]bohemia link [/url]
video dating
[url=”[Link deleted]free dating sites near nelson[/url]
top date sites
phenylethylamine french deep web link [url=[Link deleted]]darknet drugs market [/url]
даркнет сайты магазин mega onion зеркала
reddit darknet market list 2022 deep dark web markets links [url=[Link deleted]]dark market links [/url]
dark markets lithuania url hidden wiki [url=[Link deleted]]reddit onion list [/url]
versus market darknet reddit working darknet markets [url=[Link deleted]]reddit darknet market noobs [/url]
мега onion оффициальный сайт сылка на мегу
tor darknet market address black market webshop [url=[Link deleted]]how to buy from the darknet markets [/url]
how to access the dark web on pc onion deep web search [url=[Link deleted]]deep web cc dumps [/url]
exploit market darknet darknet market adderall [url=[Link deleted]]darknet market xanax [/url]
darknet markets list black market sites 2022 [url=[Link deleted]]dark markets belarus [/url]
best drug darknet verified dark web links [url=[Link deleted]]asap darknet market [/url]
darknet markets australia asap market darknet [url=[Link deleted]]vice city darknet market [/url]
darknet market link updates bohemia darknet market [url=[Link deleted]]alpha market url [/url]
darknet drugs india black market buy online [url=[Link deleted]]superman pills mg [/url]
fake id dark web 2022 darknet drug market list [url=[Link deleted]]hire an assassin dark web [/url]
мега зеркало мега onion зеркало
best tor marketplaces r darknet market [url=[Link deleted]]how to browse the dark web reddit [/url]
step by step dark web what is the best darknet market [url=[Link deleted]]best darknet drug sites [/url]
how to access dark web markets darknet markets guide [url=[Link deleted]]darknet search engine [/url]
vice city market url active darknet markets 2022 [url=[Link deleted]]darknet online drugs [/url]
dark markets canada currently darknet markets [url=[Link deleted]]cannazon link [/url]
best darknet market for lsd r darknet market [url=[Link deleted]]how to buy bitcoin for the dark web [/url]
trusted darknet vendors darknet adress [url=[Link deleted]]current best darknet market [/url]
onion dark web list reliable darknet markets [url=[Link deleted]]darknet drugs malayisa [/url]
мега скорость мега сайт ссылка
what darknet markets are open best website to buy cc [url=[Link deleted]]tor darknet markets [/url]
asap market dark markets south korea [url=[Link deleted]]monkey x pill [/url]
tor market url dark web links reddit [url=[Link deleted]]link de hiden wiki [/url]
сылка на мегу магазины даркнета
dark markets best dark web markets 2022 [url=[Link deleted]]dark markets hungary [/url]
darkmarket link darknet seiten [url=[Link deleted]]deep dot web replacement [/url]
dark web store darknet markets list 2022 [url=[Link deleted]]monero darknet market [/url]
darknet markets fake id black market access [url=[Link deleted]]Abacus Market url [/url]
darknet litecoin adresse onion black market [url=[Link deleted]]deep web weed prices [/url]
ссылка мега магазин мега
how to enter the black market online best darknet market urs [url=[Link deleted]]how to search the dark web reddit [/url]
mega магазин mega onion зеркало
мега кокаин mega onion ссылка
tramadol dark web darknet market updates 2022 [url=[Link deleted]]red ferrari pills [/url]
tor market links shop online without cvv code [url=[Link deleted]]dark markets macedonia [/url]
darknet reddit market monkey xtc pill [url=[Link deleted]]darknet market security [/url]
darknet markets financial times best darknet market for weed 2022 [url=[Link deleted]]what darknet markets still work [/url]
Cocorico link deep dark web markets links [url=[Link deleted]]darknet websites [/url]
tor markets links darknet drugs australia [url=[Link deleted]]how to get to darknet market safe [/url]
deep web onion url darkfox market [url=[Link deleted]]blackweb darknet market [/url]
Cocorico Market url black market drugs [url=[Link deleted]]dark markets macedonia [/url]
мега даркнет darknet магазин
top dark net markets dark web market [url=[Link deleted]]archetyp link [/url]
tor darknet market address dark markets colombia [url=[Link deleted]]darknet guns market [/url]
мега наркотики мега онион сайт
darknet markets norway 2022 how to buy drugs on darknet [url=[Link deleted]]dark markets korea [/url]
best deep web markets deep web search engines 2022 [url=[Link deleted]]dark web sites [/url]
darknet drugs price darknet gun market [url=[Link deleted]]dark web xanax [/url]
duckduckgo onion site deep web cc sites [url=[Link deleted]]darknet live markets [/url]
access the dark web reddit darknet market guide [url=[Link deleted]]price of black market drugs [/url]
Heineken Express Market dark market list [url=[Link deleted]]what is the darknet market [/url]
buy ssn dob with bitcoin credit card black market websites [url=[Link deleted]]darknet illicit drugs [/url]
Woah! I’m really loving the template/theme of this blog.
It’s simple, yet effective. A lot of times it’s very hard
to get that “perfect balance” between user friendliness and appearance.
I must say you have done a awesome job with this. In addition, the blog
loads extremely fast for me on Chrome. Exceptional Blog! [Link deleted]
monero darknet market reddit best darknet market [url=[Link deleted]]vice city market [/url]
dark markets japan darknet drugs price [url=[Link deleted]]how to get to darknet market [/url]
reddit darknet market deals dark markets 2022 [url=[Link deleted]]archetyp market link [/url]
Cocorico darknet Market darknet market adderall prices [url=[Link deleted]]darknet guns market [/url]
даркнет ссылки mega market
fullz darknet market best darknet market for psychedelics [url=[Link deleted]]darknet markets up [/url]
darknet market guide reddit darknet market place search [url=[Link deleted]]alpha market url [/url]
ketamine darknet market darknet markets may 2022 [url=[Link deleted]]what darknet markets are still open [/url]
darknet market noobs bible dark markets uk [url=[Link deleted]]dark markets poland [/url]
сайты даркнет ссылки mega зеркало
how to buy drugs dark web pax marketplace [url=[Link deleted]]dark web counterfeit money [/url]
florida darknet markets current best darknet market [url=[Link deleted]]most popular darknet market [/url]
dark web hitman darknet guide [url=[Link deleted]]darknet market reddits [/url]
onion websites for credit cards reliable darknet markets [url=[Link deleted]]darknet drugs reddit [/url]
market street darknet bohemia market [url=[Link deleted]]best darknet markets reddit [/url]
best market darknet drugs dark markets andorra [url=[Link deleted]]weed darknet market [/url]
decabol pills darknet telegram group [url=[Link deleted]]most reliable darknet markets [/url]
what are darknet drug markets darknet drugs germany [url=[Link deleted]]darknet new market link [/url]
online black marketplace reddit where to buy drugs [url=[Link deleted]]black market bank account [/url]
top darknet markets 2022 darknet websites drugs [url=[Link deleted]]how to buy things off the black market [/url]
мега onion зеркала mega ссылка
darknet drugs market versus project link [url=[Link deleted]]onion directory list [/url]
официальный сайт мега сайты даркнет ссылки
tor2door darknet market onion marketplace drugs [url=[Link deleted]]dbol steroid pills [/url]
darknet market oxycontin best darknet gun market [url=[Link deleted]]dark markets korea [/url]
mega onion ссылка мега наркотики
Abacus Market darknet market noobs reddit [url=[Link deleted]]darknet market links buy ssn [/url]
what is the darknet market best darknet markets reddit [url=[Link deleted]]the darknet drugs [/url]
новое зеркало мега мега купить
how to buy from the darknet markets lsd dark web drugs australia [url=[Link deleted]]how to access the dark web on pc [/url]
Kingdom Market link darknet markets financial times [url=[Link deleted]]dark web drugs [/url]
мега онион сайт сайты даркнет
dark web buy credit cards dark web shopping [url=[Link deleted]]dark markets italy [/url]
buying on dark web grey market drugs [url=[Link deleted]]dark markets albania [/url]
onion websites for credit cards cannazon link [url=[Link deleted]]russian anonymous marketplace [/url]
fake id onion asap link [url=[Link deleted]]darknet market reviews [/url]
dark web poison darknet adressen [url=[Link deleted]]dream market darknet url [/url]
fake id dark web 2022 uncensored deep web [url=[Link deleted]]credit card black market websites [/url]
mega onion зеркала mega магазин
black market access darknet market link updates [url=[Link deleted]]vice city market [/url]
мэги сайт мега даркнет
black market illegal drugs best darknet market for weed [url=[Link deleted]]tor marketplaces [/url]
tor best websites links tor 2022 [url=[Link deleted]]darknet market bust [/url]
where can i buy an essay
[url=”[Link deleted]college essay editing service[/url]
custom writing essays services
darknet markets deepdotweb which darknet market are still up [url=[Link deleted]]current darknet market [/url]
updated darknet market list buy darknet market email address [url=[Link deleted]]russian anonymous marketplace [/url]
how to pay with bitcoin on dark web links deep web tor [url=[Link deleted]]dark markets argentina [/url]
darknet escrow markets dark markets serbia [url=[Link deleted]]how to get on the dark web on laptop [/url]
darknet market noobs bible darknet search [url=[Link deleted]]best fraud market darknet [/url]
popular darknet markets onionhub [url=[Link deleted]]tor marketplace [/url]
cannazon market dark markets guyana [url=[Link deleted]]tor market nz [/url]
decabol pills current list of darknet markets [url=[Link deleted]]darknet drugs market [/url]
exploit market darknet gray market place [url=[Link deleted]]dark web drugs [/url]
мега нарко магазин даркнет
buying from darknet market with electrum asap darknet market [url=[Link deleted]]bohemia market link [/url]
how to buy from darknet markets dark markets luxembourg [url=[Link deleted]]ordering drugs on dark web [/url]
mega onion shop сайты даркнет ссылки
what darknet markets are available darknet markets deepdotweb [url=[Link deleted]]darknet market vendors search [/url]
darknet market thc oil darknet onion markets [url=[Link deleted]]dread onion [/url]
versus market link market onion [url=[Link deleted]]darknet market updates 2022 [/url]
market street darknet australian darknet markets [url=[Link deleted]]dark markets croatia [/url]
deep web search engine 2022 versus darknet market [url=[Link deleted]]best darknet market 2022 [/url]
deep web cc shop hitman for hire dark web [url=[Link deleted]]trusted darknet vendors [/url]
darkmarket darknet markets list [url=[Link deleted]]dark markets bolivia [/url]
darknet links market australian darknet vendors [url=[Link deleted]]dark web drug markets [/url]
dark web website links dark markets ecuador [url=[Link deleted]]darknet market pills vendor [/url]
onion darknet market top 10 dark websites [url=[Link deleted]]best lsd darknet market [/url]
live onion market dark web prepaid cards reddit [url=[Link deleted]]darknet dream market reddit [/url]
darknet new market link darknet search engine url [url=[Link deleted]]xanax darknet markets reddit [/url]
мэги сайт мега официальный сайт
i2p darknet markets drug market darknet [url=[Link deleted]]deep web software market [/url]
australian darknet markets incognito market darknet [url=[Link deleted]]black market websites credit cards [/url]
what darknet markets are still up onion market url [url=[Link deleted]]deep web url links [/url]
active darknet market urls underground market online [url=[Link deleted]]naked lady ecstasy pill [/url]
мега onion зеркало мега кокаин
This piece of writing offers clear idea in favor of the new users of blogging, that
really how to do running a blog.
where to find darknet market links dbol steroid pills [url=[Link deleted]]buying drugs on darknet [/url]
мега вход mega магазин
how to shop on dark web Kingdom Market url [url=[Link deleted]]deep web deb [/url]
darknet seiten archetyp market [url=[Link deleted]]best darknet market uk [/url]
darknet market wiki dark markets chile [url=[Link deleted]]how to get to darknet market safe [/url]
мега наркотики сайт мега
black market dark web links darknet markets lsd-25 2022 [url=[Link deleted]]weed darknet market [/url]
dream market darknet link best darknet markets for marijuana [url=[Link deleted]]reliable darknet markets reddit [/url]
black market websites credit cards dn market [url=[Link deleted]]Kingdom Market link [/url]
shop on the dark web darknet сайты список [url=[Link deleted]]darknet drugs malayisa [/url]
dark markets venezuela vice city market url [url=[Link deleted]]darknet markets 2022 [/url]
mega даркнет мега онион
deep web weed prices search darknet markets [url=[Link deleted]]vice city market [/url]
It’s not my first time to go to see this website, i
am browsing this web page dailly and get pleasant facts from
here every day. [Link deleted]
how to get to darknet market safe asap url [url=[Link deleted]]dark markets united kingdom [/url]
I needed to thank you for this very good read!!
I certainly enjoyed every bit of it. I have got you bookmarked to check out new things you post… [Link deleted]
Thanks for finally writing about >How To Easily Create a Staging Site In WordPress
– PGResource | Web Designer <Loved it! [Link deleted]
best dark web marketplaces 2022 the darknet market reddit [url=[Link deleted]]reddit working darknet markets [/url]
I read this paragraph fully on the topic of the comparison of hottest and previous technologies,
it’s amazing article. [Link deleted]
Keep on writing, great job! [Link deleted]
reddit best darknet market dark web sites for drugs [url=[Link deleted]]drug market darknet [/url]
Wow that was odd. I just wrote an very long
comment but after I clicked submit my comment didn’t show
up. Grrrr… well I’m not writing all that over
again. Anyways, just wanted to say excellent blog! [Link deleted]
Pretty! This was a really wonderful post. Thanks for supplying this information. [Link deleted]
darknet site darknet market links buy ssn [url=[Link deleted]]exploit market darknet [/url]
how to use darknet markets where to find onion links [url=[Link deleted]]how to shop on dark web [/url]
darknet dream market reddit top darknet drug sites [url=[Link deleted]]dark web payment methods [/url]
hacking tools darknet markets reddit darknetmarket [url=[Link deleted]]alphabay market url [/url]
best dark web links phenazepam pills [url=[Link deleted]]underground dumps shop [/url]
florida darknet markets deep web weed prices [url=[Link deleted]]drug website dark web [/url]
cypher url red ferrari pills [url=[Link deleted]]darknet drugs sales [/url]
Cocorico Market url top ten deep web [url=[Link deleted]]alphabay link reddit [/url]
darknet drug markets 2022 dark markets romania [url=[Link deleted]]Cocorico Market darknet [/url]
dark web step by step tor2door market link [url=[Link deleted]]drug market darknet [/url]
I wanted to thank you for this wonderful read!! I definitely
enjoyed every little bit of it. I have you book-marked to check out new things you post… [Link deleted]
This is a great tip particularly to those fresh to the blogosphere.
Simple but very precise information… Many thanks for sharing this
one. A must read article! [Link deleted]
mega onion ссылка mega onion shop
the real deal market darknet deep web markets [url=[Link deleted]]hire an assassin dark web [/url]
which darknet markets accept zcash alpha market url [url=[Link deleted]]onion websites for credit cards [/url]
dark web drugs australia versus market url [url=[Link deleted]]best darknet market now [/url]
link darknet market dark web sites for drugs [url=[Link deleted]]darknet link drugs [/url]
asap market url darknet markets florida [url=[Link deleted]]tor market links [/url]
dark web drugs ireland darknet markets list 2022 [url=[Link deleted]]working dark web links [/url]
tor link list 2022 drugs from darknet markets [url=[Link deleted]]how to access the black market [/url]
dark web hitman for hire darknet market alphabay [url=[Link deleted]]best darknet market for weed uk [/url]
cp onion best website to buy cc [url=[Link deleted]]hire an assassin dark web [/url]
mega onion зеркала мега магазин
darknet markets 2022 updated darknet market list [url=[Link deleted]]xanax darknet markets reddit [/url]
black market website review brick market [url=[Link deleted]]deep web updated links [/url]
best darknet market for heroin popular dark websites [url=[Link deleted]]best working darknet market 2022 [/url]
dark markets poland deep web software market [url=[Link deleted]]best dark web links [/url]
brucelean darknet market how to buy drugs dark web [url=[Link deleted]]darknet market get pills [/url]
dark web market best dark net markets [url=[Link deleted]]buds express [/url]
мега даркнет mega onion shop
buying drugs online dark web sites for drugs [url=[Link deleted]]deep web search engines 2022 [/url]
buy drugs on darknet top darknet market 2022 [url=[Link deleted]]top 10 dark websites [/url]
dark web electronics deep onion links [url=[Link deleted]]black market access [/url]
how to buy bitcoin for the dark web dark web store [url=[Link deleted]]reddit darknet market 2022 [/url]
darknet markets dread darknet xanax [url=[Link deleted]]crypto market darknet [/url]
mega market mega онион
best australian darknet market darknet markets deepdotweb [url=[Link deleted]]best darknet market reddit [/url]
This blog was… how do you say it? Relevant!! Finally Ihave found something which helped me.
Many thanks!
how to search the dark web reddit the darknet market reddit [url=[Link deleted]]live darknet markets [/url]
мега onion ссылка даркнет ссылки
dark web drug marketplace guide to using darknet markets [url=[Link deleted]]black market deep [/url]
price of black market drugs darknet market pills vendor [url=[Link deleted]]best website to buy cc [/url]
incognito market link darknet markets list [url=[Link deleted]]darknet market adderall prices [/url]
tor marketplaces site darknet liste [url=[Link deleted]]darknet market dmt [/url]
buy drugs from darknet onion linkek [url=[Link deleted]]google black market [/url]
kremlin-team.ru Kremlin-team.ru
dark markets uk deep web marketplaces reddit [url=[Link deleted]]most reliable darknet markets [/url]
dream market darknet url drugs on the deep web [url=[Link deleted]]how to get access to darknet [/url]
dark web hitmen dark markets malaysia [url=[Link deleted]]darknet guns market [/url]
darknet market reddit versus project market darknet [url=[Link deleted]]Cocorico Market url [/url]
the real deal market darknet deep cp links [url=[Link deleted]]popular darknet markets [/url]
weed darknet market darkweb marketplace [url=[Link deleted]]best market darknet drugs [/url]
dark markets greece bitcoin market on darknet tor [url=[Link deleted]]gbl drug wiki [/url]
darknet black market list safe darknet markets [url=[Link deleted]]darknet market ranking [/url]
bohemia url darknet market prices [url=[Link deleted]]dark net guide [/url]
Heineken Express darknet Market deep web drugs [url=[Link deleted]]tramadol dark web [/url]
mega darkmarket мега онион сайт
reddit darknet markets list the dark web shop [url=[Link deleted]]i2p darknet markets [/url]
buds express active darknet market urls [url=[Link deleted]]darknet in person drug sales [/url]
dark web drugs ireland biggest darknet markets 2022 [url=[Link deleted]]adress darknet [/url]
darknet market links underground market place darknet [url=[Link deleted]]tor link search engine [/url]
dynabolts pills darknet market adderall prices [url=[Link deleted]]darknet markets that take ethereum [/url]
best darknet market now darknet market lists [url=[Link deleted]]darknet market francais [/url]
reddit biggest darknet market place market onion [url=[Link deleted]]darknet drugs url [/url]
dark web site list how to buy things off the black market [url=[Link deleted]]dark markets australia [/url]
darknet market for noobs dark web xanax [url=[Link deleted]]dark markets netherlands [/url]
dark markets italy best market darknet drugs [url=[Link deleted]]can you buy drugs on darknet [/url]
brick market darknet market canada [url=[Link deleted]]darknet black market [/url]
what is a darknet drug market like darknet drugs reddit [url=[Link deleted]]darknet best drugs [/url]
mega onion мега нарко
dark market reddit reddit onion list [url=[Link deleted]]Kingdom Market url [/url]
darknetlive onion directory 2022 [url=[Link deleted]]naked lady ecstasy pill [/url]
dark markets denmark darknet link drugs [url=[Link deleted]]buy darknet market email address [/url]
mega сайт mega onion зеркало
darknet market list back market legit [url=[Link deleted]]darknet onion markets reddit [/url]
black market reddit search deep web engine [url=[Link deleted]]the dark market [/url]
how to enter the black market online darknet market thc oil [url=[Link deleted]]darknet drugs germany [/url]
darknet telegram group darkfox market url [url=[Link deleted]]bohemia url [/url]
darkweb форум drugs from darknet markets [url=[Link deleted]]darknet drug market [/url]
versus market url cannahome url [url=[Link deleted]]alphabay solutions reviews [/url]
darknet market that has ssn database darknet black market url [url=[Link deleted]]market onion [/url]
darknet markets may 2022 darknet market iphone [url=[Link deleted]]onion seiten [/url]
darknet markets reddit 2022 black market website legit [url=[Link deleted]]darknet new market link [/url]
deep dot web markets top ten deep web [url=[Link deleted]]Abacus Market url [/url]
Cocorico Market url dark web xanax [url=[Link deleted]]dark markets slovakia [/url]
how to buy drugs dark web how to dark web reddit [url=[Link deleted]]dark markets south korea [/url]
assassination market darknet how to buy drugs on darknet [url=[Link deleted]]darknet markets fake id [/url]
dark markets andorra darknet drugs market [url=[Link deleted]]step by step dark web [/url]
best darknet market for steroids asap link [url=[Link deleted]]dark web links market [/url]
buy drugs from darknet monero darknet markets [url=[Link deleted]]cannahome market darknet [/url]
how to order from dark web darknet market list [url=[Link deleted]]reddit darknet market guide [/url]
dark markets switzerland darknet cannabis markets [url=[Link deleted]]dark market 2022 [/url]
Cocorico Market onion live [url=[Link deleted]]fresh onions link [/url]
superlist darknet markets best dark net markets [url=[Link deleted]]biggest darknet market 2022 [/url]
dark markets chile how to use deep web on pc [url=[Link deleted]]dark web login guide [/url]
dark web sites drug market [url=[Link deleted]]darknet market alphabay [/url]
darknet drug vendors verified dark web links [url=[Link deleted]]darknet drug market list [/url]
vice city market url darknet market comparison [url=[Link deleted]]trusted darknet vendors [/url]
dark markets bolivia reddit darknet market noobs bible [url=[Link deleted]]darknet market black [/url]
black market drugs drug market darknet [url=[Link deleted]]how to access darknet markets [/url]
darknet market reddit 2022 darknet market reviews [url=[Link deleted]]dark market sites [/url]
сылка на мегу мега даркнет
dark web search engine 2022 best australian darknet market [url=[Link deleted]]tor search onion link [/url]
crypto darknet drug shop darknet markets lsd-25 2022 [url=[Link deleted]]dark web markets reddit [/url]
darknet telegram group biggest darknet market 2022 [url=[Link deleted]]darknet markets with tobacco [/url]
dark markets south korea links the hidden wiki [url=[Link deleted]]dark web search engine 2022 [/url]
black market credit card dumps black market net [url=[Link deleted]]market onion [/url]
trusted darknet markets darkfox darknet market [url=[Link deleted]]deep web drugs reddit [/url]
darknet market links safe dark markets venezuela [url=[Link deleted]]bohemia market darknet [/url]
best deep web markets darknet reinkommen [url=[Link deleted]]bitcoin black market [/url]
the darknet markets darkmarket website [url=[Link deleted]]dark markets netherlands [/url]
deep market dark markets spain [url=[Link deleted]]fake id dark web 2022 [/url]
darknet market search darknet market [url=[Link deleted]]darknet market for noobs [/url]
dark web fake money best darknet market drugs [url=[Link deleted]]darknet market url [/url]
мега onion магазины даркнета
the dark web links 2022 fullz darknet market [url=[Link deleted]]how big is the darknet market [/url]
best darknet markets reddit drugs dark web [url=[Link deleted]]deep web markets [/url]
ordering drugs on dark web largest darknet market [url=[Link deleted]]dark web website links [/url]
мега даркнет даркнет магазин
dark markets portugal how to buy things off the black market [url=[Link deleted]]dark web shop [/url]
darknet escrow dark markets moldova [url=[Link deleted]]new dark web links [/url]
famous essay writers
[url=”[Link deleted]essay help[/url]
essay writing services recommendations
naked lady ecstasy pill darknet markets best [url=[Link deleted]]live onion market [/url]
darknet database market bitcoin darknet drugs [url=[Link deleted]]dark web onion markets [/url]
tor darknet search darknet markets [url=[Link deleted]]red ferrari pills [/url]
новое зеркало мега mega магазин
onion links for deep web Cocorico Market [url=[Link deleted]]drug market [/url]
darknet магазин зелья мега onion зеркало
darknet link drugs the dark web shop [url=[Link deleted]]how big is the darknet market [/url]
dark markets china how to use onion sites [url=[Link deleted]]drug markets dark web [/url]
deep web shopping site how to access dark net [url=[Link deleted]]french dark web [/url]
мега купить сайты даркнет
dark markets thailand darknet market onion links
darknet dream market link darknet market forum
darknet market thc oil darknet market superlist
darknet stock market deep web websites reddit
best working darknet market 2022 tor market
how to access the dark web 2022 alphabay url
сайт мега сайт даркнет
darknet guns market top darknet markets list
more Site
archetyp darknet market darknet market vendor guide
where to find onion links deep web cc dumps
darknet market francais dark markets austria
darknet dream market reddit dark web onion markets
deep sea darknet market dark markets macedonia
black market online best darknet market for weed 2022
gray market place reliable darknet markets reddit
link More
online black marketplace dark web directory
mega ссылка мега onion магазин
darknet market vendors search bohemia darknet market
counterfeit money onion current darknet market list
deep web url links black market online website
darknet drug prices uk drug markets onion
tor darknet markets dark markets latvia
more Url
deep web markets darknet market deep dot web
reddit darknet markets noobs live dark web
dark web login guide darknet market black
darknet drugs malayisa darknet market comparison chart
dark web market place links darknet market links safe
cannahome market dark markets greece
ьупф ьфклуе мега наркотики
versus project darknet market dark web adderall
buying credit cards on dark web darknet dream market link
credit card black market websites wiki darknet market
mega darknet мега onion оффициальный сайт
mega onion ссылка мега onion зеркало
dark markets estonia currently darknet markets
how to get to the black market online darknet sites url
best dark net markets tor2door market link
french deep web link dark web markets
darknet markets for steroids dark web sites name list
darknet drug links darknet market lists
Cocorico link reddit darknet market noobs
darknet website for drugs tfmpp pills
мега сайт mega онион сайт
darknet black market list darknet gun market
drugs on darknet darknet market stats
black market website review cannazon link
black market cryptocurrency darknet xanax
illegal black market best onion sites 2022
pill with crown on it dark web search tool
lsd drug wiki darknet market vendors
how to anonymously use darknet markets darknet market carding
мега onion мега купить соль
darknet market alaska deep web shopping site
deep sea darknet market reddit darknet markets list
blockchain darknet markets wikipedia darknet market
dark markets albania what darknet market to use now
deep web marketplaces reddit dark web live
dark markets colombia darknet markets without login
onion deep web search illegal black market
mega сайт мега onion ссылка
versus project market link best dark web marketplaces 2022
the dark market safe list of darknet market links
darknet markets deepdotweb how to order from dark web
dark web sites name list black market access
darknet market listing best darknet market links
мега onion магазин mega darkmarket
darknet website for drugs how to access darknet market
deep net access tor link search engine
reddit darknet markets noobs onion darknet market
darknet market oz superman pills mg
australian dark web vendors darknet steroid markets
marijuana dark web darknet market comparison
how to access the dark web through tor darknet market dmt
free deep web links site darknet onion
urls for darknet markets reddit darknetmarket
which darknet markets are still open Abacus Market url
mega онион сайт мега ссылка
darknet drugs sites darknet сайты список
how to access the dark web on pc darknet market list reddit
r darknet market the dark web shop
darknet market reddit 2022 how to get on the dark web
darknet market place search cypher market darknet
new darknet marketplaces reddit darknet markets list
мега зеркало мега наркотики
credit card dumps dark web dark markets colombia
Cocorico Market url deep web links 2022
darknet markets most popular decentralized darknet market
buy darknet market email address darknet links market
dark web site list black market reddit
underground black market website buy ssn dob with bitcoin
updated darknet market list dark web hitmen
dark web market list access the dark web reddit
dark markets liechtenstein dark markets netherlands
dark web markets reddit blackweb darknet market
mega onion shop mega onion оффициальный сайт
urls for darknet markets deep web market links reddit
darknet drugs market reddit darknet market list
buying drugs on darknet how to get access to darknet
mega онион сайт даркнет сайты магазин
ruonion Kingdom Market darknet
ьупф ьфклуе mega onion
darknet market links safe new darknet market reddit
mega darknet mega onion оффициальный сайт
bohemia market archetyp market
guide to darknet markets dark web links 2022
2022 working darknet market 2022 darknet markets
best darknet market urs best working darknet market 2022
drugs on the darknet cannazone
mega магазин мега наркотики
reddit darknet markets list darknet drugs malayisa
darknet market for noobs darknet market carding
mega onion оффициальный сайт мега onion
how to get to darknet market safe 2022 darknet markets
how to buy from the darknet markets lsd how to darknet market
cannazon darknet market online onion market
best working darknet market 2022 tor dark web
darknet market bible bohemia market link
darknet market steroids orange sunshine lsd
asap market link onion deep web search
darknet drugs 2022 drug markets dark web
dark markets serbia darknet drug market url
dark markets uk bohemia market url
dark market url what darknet markets still work
даркнет магазин darknet сайт
reddit darknet markets uk darknet markets onion addresses
canazon gbl drug wiki
darknet market alternatives monero darknet market
darknet market buying mdma usa deep website search engine
darknet market iphone reddit darknet market deals
darknet drug markets dream market darknet link
darknet xanax best darknet market for psychedelics
dark markets bosnia counterfeit money dark web reddit
best working darknet market 2022 Cocorico darknet Market
darknet market canada darknet market listing
list of dark net markets carding dark web
anadrol pills darknet market adderall prices
deep web hitmen url dark web prostitution
сайты даркнет ссылки мега мефедрон
мега onion ссылка магазины даркнета
Heineken Express darknet ordering drugs on dark web
price of black market drugs tramadol dark web
reddit darknet market guide darknet guns market
mega даркнет ьупф ьфклуе
darknet drugs market darknet drug prices
That is really attention-grabbing, You are a very professional blogger.
I’ve joined your rss feed and stay up for in the hunt for
extra of your magnificent post. Additionally, I have shared your web site in my social networks [Link deleted]
We stumbled over here different page and thought I may
as well check things out. I like what I see so now i am following you.
Look forward to exploring your web page for a second
time. [Link deleted]
dark markets norge best darknet market for weed
cypher market link asap market link
магазин мега мега наркотики
dark markets ecuador dark web escrow service
мега onion ссылка мега официальный сайт
Thanks for the marvelous posting! I really enjoyed
reading it, you happen to be a great author. I will make
certain to bookmark your blog and will often come back later on. I want to
encourage you to definitely continue your great job, have a nice weekend! [Link deleted]
I’m really enjoying the theme/design of your website.
Do you ever run into any internet browser compatibility problems?
A few of my blog visitors have complained about my
website not operating correctly in Explorer but looks great in Opera.
Do you have any recommendations to help fix this issue? [Link deleted]
alphabay market link nike jordan pill
darknet in person drug sales how to buy from the darknet markets lsd
Having read this I thought it was extremely enlightening.
I appreciate you taking the time and energy to put this
article together. I once again find myself spending a significant amount of time both reading
and leaving comments. But so what, it was still worth it! [Link deleted]
tor websites reddit darknet paypal accounts
dark markets croatia trusted darknet markets
best darknet market for weed uk r darknet market
credit card dark web links best mdma vendor darknet market reddit
Hi there every one, here every one is sharing these kinds of experience, so it’s nice to read this website, and I used to visit this
web site every day. [Link deleted]
Hello! This is my first visit to your blog! We are a collection of volunteers and starting a new project in a community in the same niche.
Your blog provided us beneficial information to work on. You have done a extraordinary job! [Link deleted]
I just like the helpful info you provide for your articles.
I will bookmark your weblog and test again right here frequently.
I’m quite sure I will be told many new stuff proper here!
Best of luck for the next! [Link deleted]
mega онион сайт мега наркотики
deep dot web links cannazon market url
darknet steroid markets darknet websites
dark web markets 2022 australia darknet market links safe
versus darknet market darknet market onions
dark web drugs australia darknet market drug
uk darknet markets trusted darknet markets
wiki darknet market buying drugs online on openbazaar
Oh my goodness! Incredible article dude! Thanks, However I am having
problems with your RSS. I don’t know why I can’t join it.
Is there anybody else getting similar RSS issues? Anyone
who knows the answer will you kindly respond? Thanks!! [Link deleted]
мега мефедрон mega зеркало
darknet market url how to get to the black market online
cannazone project versus
crypto market darknet black market sites 2022
You made some decent points there. I checked on the internet for more information about the issue and found most
individuals will go along with your views on this website. [Link deleted]
Thanks for sharing such a pleasant idea,
piece of writing is fastidious, thats why i have read it
completely [Link deleted]
dark web market list deep web shopping site
darknet markets that take ethereum google black market
deep web markets dark markets venezuela
darknet paypal accounts best australian darknet market
dark web cheap electronics best dark web markets 2022
how to browse the dark web reddit darknet drug prices uk
deep web search engines 2022 dark web market place links
black market websites credit cards tor darknet market
black market reddit darknet market adressen
mega онион mega onion
dark web website links tor top websites
darknet market bible access the dark web reddit
dark markets ecuador reddit darknet market 2022
links da deep web 2022 darknet market vendor guide
archetyp link dark web legit sites
lsd drug wiki dark web sales
tor search engine link dark markets romania
мега onion магазин mega ссылка
asap url Kingdom darknet Market
best darknet market for psychedelics grey market drugs
french deep web link fullz darknet market
dark web market reviews underground website to buy drugs
reliable darknet markets lsd darknet market wiki
даркнет магазин mega onion ссылка
anadrol pills bitcoin darknet drugs
darknet markets for steroids dark web drugs bitcoin
naked lady ecstasy pill australian dark web markets
darknet markets dread darknet market place search
darknetlive phenylethylamine
best darknet drug market 2022 reddit darknet markets uk
the armory tor url the dark web shop
darknet магазин новое зеркало мега
мега ссылка mega darkmarket
darkmarket 2022 deep web market links reddit
do my essay for me cheap
[url=”[Link deleted]essay writing services[/url]
how to be a better essay writer
outlaw market darknet archetyp market url
мега официальный сайт ьупф ьфклуе
cannazon dark web shopping
site onion liste deep web drugs
darknet market litecoin dark web sites for drugs
how to buy drugs on the darknet how to dark web reddit
зайти на мегу магазины даркнета
deep web link 2022 darknet selling drugs
darknet drugs market hire an assassin dark web
counterfeit euro deep web dark web market links
buy real money darknet buy drugs
darkmarket darknet market drug
darknet market list 2022 buy real money
mega зеркало зеркало мега
darknet market francais dark markets bosnia
dark markets united kingdom deep web trading
darknet drugs 2022 dark net market list reddit
darknet market fake id drug website dark web
darknet market carding cannazon darknet market
darknet drug markets reddit best tor marketplaces
versus market orange sunshine lsd
darknet links market darknet markets list
магазин мега мега onion магазин
reddit best darknet markets darknet in person drug sales
darknet market xanax black market websites 2022
dark web sites xxx best card shops
incognito market link how to get on the dark web
darknet serious market dark markets slovakia
cypher market link how to access the dark web on pc
buying on dark web reddit darknet market guide
what is darknet markets darknet market vendor guide
archetyp market url how to order from dark web
url Site
darknet drug dealer reddit darknet market links
мега купить ссылки на даркнет
dark web drugs australia buying drugs online
urls for darknet markets darknet market bible
biggest darknet markets 2022 dark markets venezuela
мега даркнет ьупф ьфклуе
darknet market security darknet black market
сайты даркнет магазины даркнета
dark web steroids drugs darknet vendors
online black marketplace hitman for hire dark web
how to access the dark web 2022 alphabay market onion link
даркнет ссылки магазин мега
darknet сайт ьупф ьфклуе
darknet markets list dark web search engine 2022
how to access the dark web safely reddit darknet markets without login
tor market links which darknet markets accept zcash
mega даркнет мега онион сайт
new darknet markets 2022 dark web search engines link
darknet market drug deep dark web markets links
how to buy from darknet darknet market vendors search
phenethylamine drugs darknet guns drugs
darknet магазин зелья магазин мега
verified dark web links deep web weed prices
dark web address list carding deep web links
alphabay solutions reviews gray market place
buy drugs from darknet darknet markets list 2022
grey market link tor best websites
darknet market links buy ssn best dark web links
top darknet markets list best darknet markets for vendors
darknet sites url drug markets onion
ordering drugs on dark web active darknetmarkets
мега сайт ссылка ьупф ьфклуе
darknet markets norge which darknet markets accept zcash
counterfeit euro deep web crypto market darknet
dark markets latvia bohemia market
online drug market online black market electronics
black market webshop darknet websites
darknet union dark web search engines link
tor2door market darknet darkmarket link
darknet market links 2022 best drug darknet
mega onion зеркала ссылки на даркнет
legit onion sites darknet stock market
cannahome market link darknet onion markets
dynabolts pills dark web sites name list
darknet сайты список buy drugs darknet
darknet search buying drugs on the darknet
deep web updated links tor market links 2022
list of darknet drug markets Cocorico url
black market website versus project market url
darknet market and monero dream market darknet link
darknet list market darknet drugs url
where to find darknet market links most popular darknet markets 2022
dark markets peru dark markets denmark
mega onion зеркало официальный сайт мега
top darknet markets 2022 darknet markets reddit 2022
darknet drugs dark markets belarus
versus market Abacus Market link
biggest darknet market 2022 links the hidden wiki
mega onion ссылка mega darknet
alphabay market link the darknet drugs
мега сайт мега зеркало
cypher market link onion marketplace drugs
darknet bitcoin market versus project link
best darknet market reddit archetyp market link
dbol steroid pills dark web marketplace
current darknet markets reddit legit darknet markets 2022
darknet сайт darknet магазин зелья
vice city market darknet best australian darknet market
dark markets belgium darkmarket website
most popular darknet market monero darknet market
pink versace pill darkmarket list
darkfox market url dark markets poland
deep net links darknet adress
darknet магазин mega onion
darknet market links 2022 2022 working darknet market
dark web sites name list dark net market
мега сайт мега кокаин
darknet website for drugs dark markets singapore
black market prices for drugs how to buy drugs dark web
dark market 2022 darknet database market
dark markets serbia deep market
onion directory dream market darknet
dark web site list grey market drugs
counterfeit euro deep web Kingdom Market
hidden financial services deep web live dark web
darknet market comparison cypher market link
mega онион сайт мега скорость
dark web marketplace underground card shop
tor markets links darknet market prices
darknet market noobs darknet marketplace drugs
best australian darknet market best darknet markets uk
site darknet onion darknet drug vendors
tor2door market url dark web markets reddit
darknet guns drugs tor marketplaces
мега сайт ссылка мега onion ссылка
dark markets spain darknet market busts
best website to buy cc tor markets
onion live cannazon darknet market
deep web cc dumps reddit best darknet market
deep deep web links darknet market url
orange sunshine lsd darknet markets may 2022
bohemia url credit card dumps dark web
how to anonymously use darknet markets darknet cannabis markets
how to buy bitcoin and use on dark web good dark web search engines
darknet drugs url dark web cvv
buying drugs off darknet deep web canada
мега onion зеркало мега онион
underground hackers black market Cocorico Market link
dark markets moldova versus darknet market
darknet vendor reviews tor drugs
мега шишки сайты даркнет ссылки
dark web sites drugs redit safe darknet markets
mega зеркало сайт мега
underground dumps shop bitcoin darknet drugs
darknet bank accounts credit card dark web links
darknet drugs 2022 wired darknet markets
where to find onion links underground card shop
mega market мега onion ссылка
dark markets malta working darknet markets 2022
мега onion ссылка мега скорость
r darknet market dark markets mexico
dark web onion markets black market url deep web
darknet market alaska darknet markets list 2022
carding dark web vice city market link
dark web legit sites darknet market reddit
ьупф ьфклуе мега зеркало
darknet market links buy ssn darknet live stream
how to enter the black market online cypher market
dark web trading how to buy from darknet
мега onion зеркало мега мефедрон
onion directory 2022 counterfeit money onion
darknet escrow markets lsd drug wiki
darknet market francais onion links for deep web
dark markets montenegro dark market reddit
i2p darknet markets cannazon
berlin telegram group drugs deep web hitmen url
versus project darknet market dark market
tor top websites darknet markets japan
darknet bank accounts reddit darknet market guide
cannahome market asap market
tramadol dark web darknet link drugs
магазин даркнет мега шишки
dark web drugs bitcoin black market sites 2022
darknet black market darknet market oz
dark web vendors darknet market ranking
tor markets links darknet live markets
мега нарко мега наркотики
i2p darknet markets top 10 dark web url
phenylethylamine top onion links
darknet markets list reddit how to access dark net
the dark web url list of darknet markets reddit
darknet market adressen darknet markets list
monero darknet market darknet search
Cocorico Market darknet darknet markets norway 2022
incognito link fullz darknet market
urls for darknet markets darkmarket website
reddit darknet markets links list of darknet markets reddit
darknet new market link reddit darknet markets uk
versus darknet market how to buy bitcoin and use on dark web
sat essay writing help
[url=”[Link deleted]to be a good essay writer[/url]
essay writing website
мега ссылка mega ссылка
dream market darknet url dark markets spain
access the black market how to use onion sites
мега скорость mega onion ссылка
best darknet market reddit dark web sites name list
darknet market 2022 reddit duckduckgo onion site
russian anonymous marketplace tma drug
dark web buy credit cards hacking tools darknet markets
asap darknet market legit onion sites
redit safe darknet markets darknet drugs india
credit card dark web links best darknet market reddit
мега наркотики магазин даркнет
dark markets canada best market darknet drugs
ссылка на мегу зайти на мегу
trusted darknet vendors dark markets moldova
market onion popular dark websites
dark markets romania list of darknet markets 2022
dark markets slovenia decabol pills
how to access deep web safely reddit onion directory
даркнет сайты магазин darknet сайт
darknet markets financial times darkmarket url
versus market url darknet reinkommen
dark web sites name list darknet market noobs
buy drugs darknet darknet buy drugs
dark web prepaid cards reddit deep web url links
darknet drugs malayisa hire an assassin dark web
darknet stock market uncensored deep web
market street darknet how big is the darknet market
darknet litecoin online onion market
top darknet market now darknet seiten liste
legit darknet markets 2022 deep dot web replacement
cypher market url reddit darknet market noobs
deep web onion url reddit darknet market guide
даркнет сайты магазин ссылки на даркнет
onion link reddit online onion market
how to buy drugs on the darknet versus darknet market
dark web sites xxx dark web shop
best tor marketplaces dark markets iceland
cypher darknet market darknet market xanax
mega онион мега купить
agora darknet market black market websites 2022
darknet market google orange sunshine pill
darknet market buying mdma usa reddit darknet reviews
onion deep web wiki asap market link
archetyp market link red ferrari pills
drug markets onion drug market darknet
best darknet market drugs dark web links adult
best darknet market urs darknet market drug
how to browse the dark web reddit Kingdom Market url
reddit best darknet market dark markets portugal
сайт даркнет ссылки на даркнет
darknet seiten dream market bitcoins and darknet markets
сылка на мегу мега ссылка
dark markets shop ccs carding
site onion liste trusted darknet vendors
сайты даркнет ссылки ьупф ьфклуе
legit darknet markets 2022 how to buy bitcoin and use on dark web
links deep web tor cannahome darknet market
black market prescription drugs onion deep web wiki
мега onion магазин даркнет сайты магазин
darknet market links 2022 darknet market search
trusted darknet vendors onion links credit card
dark markets albania dark web cvv
black market cryptocurrency dark markets germany
tor link search engine deep web canada
мэги сайт мега кокаин
darknet litecoin 2022 working darknet market
darknetlive best darknet markets uk
best darknet markets for vendors bohemia market url
bitcoins and darknet markets ruonion
the best onion sites tor market url
мега магазин мега купить соль
onion directory list darknet market bust
adresse onion how to pay with bitcoin on dark web
onion deep web wiki updated darknet market links 2022
darknet markets ranked 2022 reddit darknet market noobs
site onion liste dark web drug marketplace
dot onion websites versus project darknet market
best dark net markets naked lady ecstasy pill
underground market online tor2door market darknet
Howdy! This blog post could not be written any better!
Looking through this post reminds me of my previous roommate!
He constantly kept talking about this. I will forward this article to
him. Fairly certain he will have a good read. I appreciate you for sharing!
ethereum darknet markets dark web markets 2022
buy drugs online darknet tor darknet market address
мега купить соль mega зеркало
darknet market noobs guide wiki darknet market
top ten deep web darknet drugs germany
deep sea darknet market darknet market onion links
darknet markets up darknet market vendor guide
мега вход mega onion ссылка
reddit darknet market australia deep net websites
deep web deb dark markets india
darknet selling drugs alpha market url
bohemia market best darknet markets reddit
Abacus Market link onion live
black market website names safe list of darknet market links
darknet market and monero darknet drug store
мега onion ссылка мега onion
darknet drugs malayisa tor drugs
the dark market crypto darknet drug shop
darknet market adressen darknet market reddit list
Abacus Market darknet asap darknet market
reliable darknet markets reddit dma drug
зеркало мега даркнет ссылки
top ten dark web dark web buy credit cards
red ferrari pills darknet market script
darknet market sites and how to access dot onion websites
darknet market comparison chart reddit darknet market how to
мега сайт ссылка mega онион
credit card dumps dark web exploit market darknet
drug markets onion dark web market reviews
ссылки на даркнет mega даркнет
deep web drugs onion market
how to access the darknet market best working darknet market 2022
мега ссылка мега onion
step by step dark web dream market darknet link
мега нарко зеркало мега
best darknet markets uk cannazon url
dark web vendors cypher link
dark markets united kingdom which darknet market are still up
darknet drug vendor that takes paypal darknet gun market
dark markets south korea black market website names
darknet list french dark web
dark markets ireland bohemia market url
pyramid pill cannazon darknet market
drugs on the deep web hidden marketplace
darknet drugs dark net guide
xanax darknet markets reddit agora darknet market
dark markets luxembourg darknet serious market
darknet marketplace dark markets netherlands
buy real money dark markets luxembourg
мега ссылка mega онион
asap market top ten dark web
dark markets romania darknet drug vendor that takes paypal
versus project darknet market alphabay market url darknet adresse
naked lady ecstasy pill pill with crown on it
dark markets sweden market street darknet
cannahome market darknet darknet market vendors search
reddit darknet market links darknet database market
reddit darknet market noobs darknet black market sites
how to access darknet markets reddit price of black market drugs
superlist darknet markets how to buy from the darknet markets
darknet market links buy ssn onion links for deep web
dark web link can you buy drugs on darknet
legit darknet markets best darknet market for lsd
mdm love drug tor link list 2022
wiki sticks drugs darknet market fake id
how to use deep web on pc darknet drug markets
escrow market darknet dark web counterfeit money
mega онион сайт mega онион
darkmarket url what is escrow darknet markets
новое зеркало мега мега onion зеркала
buds express dark web sites for drugs
archetyp darknet market black market sites 2022
steroid market darknet what darknet markets are up
мега купить соль mega darknet
darknet market list reddit dark markets romania
where to find darknet market links darknet market litecoin
мега официальный сайт мега нарко
мега кокаин mega onion оффициальный сайт
cheapest drugs on darknet best dark web marketplaces 2022
duckduckgo dark web search black market illegal drugs
darknet market oxycontin black market prescription drugs
мега сайт ссылка ссылка на мегу
darknet drug market url darknet markets still up
how to access the dark web 2022 darknet illicit drugs
мега магазин мега ссылка
where to find darknet market links online black market electronics
how to buy from darknet markets deep web market links reddit
best darknet markets cannazon market darknet
reddit best darknet markets carding dark web
reddit darknet market deals dark web website links
onion domain and kingdom current darknet market
darknet market francais crypto darknet drug shop
darkmarket darknet stock market
cheap darknet websites dor drugs darknet market deep dot web
what darknet markets sell fentanyl drugs from darknet markets
who can write my essay
[url=”[Link deleted]application essay help[/url]
best custom essay site
deep net websites black market illegal drugs
best darknet market may 2022 reddit how to shop on dark web
Abacus Market darknet dark net market
мега onion зеркало мега onion зеркало
dark markets finland tor2door market url
dark web poison Abacus link
how to find the black market online dark web hitmen
drugs on the dark web how to access the dark web through tor
dark web weed cypher market
как зайти на мегу мега купить соль
darknet market links 2022 reddit dark web counterfeit money
dark markets switzerland berlin telegram group drugs
site darknet market dark web drugs nz
dark web market place links best tor marketplaces
history of darknet markets phenazepam pills
darknet markets reddit dark web links
tor best websites darknet drug vendors
darknet markets with tobacco best fraud market darknet
drugs onion darknet market security
darknet market link updates deep net websites
сайт мега mega onion ссылка
cannahome market darknet dark web address list
darknet market adderall credit card black market websites
phenethylamine drugs dxm pills
даркнет магазин мэги сайт
dark web address list search darknet markets
best darknet market for counterfeit dark web sites name list
link darknet market top darknet markets
dark web sites what darknet markets are live
darknet сайт mega onion
darknet onion markets Heineken Express link
мега шишки мега даркнет
deep web deb dark markets slovenia
mega ссылка мега кокаин
darknet drug vendors buy bank accounts darknet
list of online darknet market darknet illicit drugs
dark markets turkey black market net
list of online darknet market darknet market comparison
how to darknet market alphabay url
мега официальный сайт мега onion ссылка
xanax on darknet 2022 working darknet market
asap link florida darknet markets
darknet software market duckduckgo onion site
shop online without cvv code deep market
dark markets belgium top dumps shop
buy bitcoin for dark web what bitcoins are accepted by darknet markets
black market websites credit cards how to access deep web safely reddit
tor darknet sites darknet search
mega магазин сайт мега
largest darknet market onion deep web wiki
best darknet markets darknet market list reddit
black market cryptocurrency dark markets romania
black market sites 2022 onion directory list
Abacus Market url best darknet drug market 2022
market onion Heineken Express url
how to create a darknet market darknet bitcoin market
drugs on deep web darknet drug store
what bitcoins are accepted by darknet markets best dark web counterfeit money
buy ssn and dob french dark web
back market trustworthy outlaw darknet market url
best darknet market reddit darknet cannabis markets
mega сайт мега онион
мега onion ссылка сайты даркнет
darknet search engine url r darknet market
darknet markets may 2022 Cocorico Market darknet
darknet market links buy ssn black market websites 2022
drug markets onion dark web sites links
onion dark web list asap url
Kingdom url deep web drug links
mega сайт мега ссылка
what is escrow darknet markets dark markets paraguay
dark web sites for drugs darknet black market sites
dark markets usa alphabay market link
how to buy things off the black market buy bitcoin for dark web
dark markets peru dark web cheap electronics
darknet market news biggest darknet market
active darknetmarkets dark market links
ссылка мега мега onion зеркала
darknet market controlled delivery how to install deep web
darkfox link Abacus Market
darknet market sites and how to access reddit best darknet market
core market darknet darkweb market
Heineken Express darknet Market darknet drug market list
tor best websites dark markets guyana
tor2door market url darknet market drug prices
wiki sticks drugs darknet markets 2022 updated
counterfeit money deep web best fraud market darknet
verified darknet market most popular darknet market
onion directory list darknet drugs reddit
asap market link darknet markets lsd-25 2022
dark markets macedonia dark markets czech republic
drugs dark web price darknet market url
мэги сайт mega onion shop
deep web search engine 2022 onion links for deep web
how to access the dark web on pc reddit darknet market noobs bible
darknet market links safe dream market darknet
dark web market list darknet search engine url
step by step dark web drugs on the deep web
dark markets monaco dark markets san marino
the darknet drugs tor darknet market address
darknet escrow darknet market deep dot web
best darknet market now trusted darknet vendors
dark markets china best darknet market reddit 2022
мега онион сайт mega даркнет
сайты даркнет мега onion ссылка
best darknet gun market dark markets venezuela
top ten dark web darknet market black
uncensored hidden wiki link darknet dream market
darknet steroid markets vice city market
mega ссылка магазины даркнета
top dark net markets tor markets
deep web trading reddit darknet market superlist
deep website search engine deep net access
illegal black market best darknet market may 2022 reddit
mega onion ссылка mega onion зеркала
best darknet market for steroids accessing darknet market
how to access the black market dark markets turkey
xanax on darknet onion darknet market
mega onion ссылка мега онион сайт
how to access the darknet market black market websites tor
tor market nz dark web adderall
onion links for deep web alphabay url
darknet drug links onion directory
мега сайт даркнет сайты магазин
dark web drugs bitcoin popular darknet markets
мега купить мега вход
cannahome uk darknet markets
best darknet markets archetyp link
darknet telegram group adresse onion
versus market link best darknet markets for marijuana
pill with crown on it dark web escrow service
cannazone working darknet market links
reddit darknetmarket escrow dark web
darknet drug market list litecoin darknet markets
мега онион даркнет магазин
cannahome url drugs on the dark web
alphabay market darknet market prices
ruonion darknet markets japan
мега скорость darknet магазин
how to access darknet market dark markets luxembourg
darknet links markets cannazon
dot onion websites monero darknet market
steroid market darknet deep net websites
darknet markets dread cannazone
Heineken Express darknet black market online
darknet market comparison drugs from darknet markets
best deep web markets best darknet market for guns
darknet guns drugs darknet markets noob
dark web engine search darknet market bust
what bitcoins are accepted by darknet markets dnm market
ссылки на даркнет мега нарко
darkweb marketplace onion links for deep web
darknet drugs reddit darknet market links
даркнет магазин mega даркнет
dark web hitman for hire Abacus darknet Market
darknet market dash versus project link
how to get to darknet market dark web drug marketplace
live dark web dark web markets 2022
darknet credit card market versus market link
darknet telegram group dark markets
how to access the dark web 2022 cannazon market url
can i pay someone to write my essay
[url=”[Link deleted]help writing scholarship essay[/url]
essay writing service discount
deep dot web replacement dark market reddit
best darknet market uk french dark web
магазин мега mega магазин
versus darknet market darknet link drugs
biggest darknet market 2022 darknet market lists
list of dark net markets deep web cc shop
how to get on the dark web market deep web 2022
даркнет сайты магазин сайты даркнет ссылки
darknet drug delivery dark markets norway
best darknet market for weed uk cypher link
best dark net markets onion dark web list
darknet markets for steroids darknet market lists
darknet reinkommen black market websites 2022
best black market websites deep web links reddit 2022
dma drug darknet bitcoin market
darknet магазин ьупф ьфклуе
how to get on the dark web android top darknet market now
australian darknet markets tor2door darknet market
dark market url darknet market adressen
adresse onion tor market darknet
мега onion зеркала darknet магазин зелья
darknet markets that take ethereum onion linkek
online onion market deep dot web markets
how to buy bitcoin for the dark web decabol pills
decentralized darknet market how to access deep web safely reddit
best darknet markets for marijuana bitcoin black market
the best onion sites darknet market lists
alphabay market url darknet adresse black market prices for drugs
магазин мега сылка на мегу
how to get on the dark web android versus project market darknet
the dark web shop grey market darknet
darknet market vendor guide list of dark net markets
bohemia market deepdotweb markets
tor market links darknet live markets
alphabay link open darknet markets
mega market мега магазин
dream market darknet link darknet market bust
asap market url darknet markets 2022 reddit
darknet markets still up cannazon
darknet market dmt how to enter the black market online
onion darknet market counterfeit money onion
buying darknet drugs link de hiden wiki
hitman for hire dark web how to access the dark web through tor
мега нарко mega onion зеркало
xanax darknet markets reddit best onion sites 2022
onion links for deep web dark web illegal links
access darknet markets best darknet market australia
мега магазин mega onion зеркало
dark web hitman for hire onion links for deep web
black market alternative onionhub
core market darknet versus project link
online black marketplace dark markets norway
working darknet markets cypher market
dark web markets reddit 2022 reliable darknet markets lsd
dnm xanax deep net websites
dark web prostitution dark web fake money
currently darknet markets black market website review
best dark web marketplaces 2022 deep web link 2022
Cocorico darknet Market archetyp market url
Can I just say what a comfort to discover someone that genuinely knows
what they’re talking about on the net. You definitely know
how to bring a problem to light and make it important.
More and more people really need to read this and
understand this side of the story. I was surprised that you aren’t more popular because you surely possess the gift. [Link deleted]
dark markets liechtenstein asap market
сайт мега mega сайт
drug markets dark web alphabay market onion link
dark markets guyana dark chart
cypher market darknet darknet market list reddit
I blog frequently and I truly thank you for your information. This article has really peaked my interest.
I am going to take a note of your blog and keep checking for new information about once a week.
I opted in for your Feed as well. [Link deleted]
dark markets ireland bohemia url
If some one wants expert view about blogging then i propose
him/her to pay a visit this website, Keep up the nice job. [Link deleted]
Just desire to say your article is as astounding. The clearness on your put up is just nice and i could assume you’re knowledgeable in this
subject. Fine with your permission let me to seize your RSS
feed to stay up to date with approaching post. Thanks 1,000,000 and please keep
up the enjoyable work. [Link deleted]
dnm market versus darknet market
alphabay link reddit onion links for deep web
Just wish to say your article is as astonishing. The clearness on your publish is simply excellent and i can suppose you’re
an expert in this subject. Well along with your permission allow me to seize your RSS
feed to keep up to date with imminent post. Thanks one million and please continue the
rewarding work. [Link deleted]
I love what you guys tend to be up too. Such clever work and exposure!
Keep up the superb works guys I’ve incorporated you guys to my blogroll. [Link deleted]
darknet drugs shipping best darknet markets uk
بایگانیهای مشاوره جنسی
سکس تراپیست میتواند به زوجها کمک کند تا رفتارهای اساسی که ممکن است
بر زندگی جنسی آنها تأثیر بگذارد را شناسایی کنند.
اگر شما به تازگی ازدواج کرده اید و در مورد رابطه جنسی اطلاعات کافی
ندارید و یا احساس می کنید نقصی در کارتان وجود
دارد، لازم است توسط یک متخصص، مشاور جنسی داشته باشید.
مطمئنا شما برای بالا رفتن کیفیت رابطه تان لازم است، حیا را کنار بگذارید
و برای مشاوره به کلینیک جنسی بروید.
از آنجا که رابطه جنسی می تواند موضوع بحث برانگیز باشد و ممکن است
علاوه بر دیدگاه های سیاسی و مذهبی ارزش
های شخصیتی را نیز به چالش بکشد، مراجعه به سکس تراپی
ممکن است برای برخی از افراد مشکل باشد.
how to get on the dark web onion tube porn
onion domain and kingdom darknet drug dealer
what darknet markets are live darknet market google
Very good info. Lucky me I discovered your site by accident (stumbleupon).
I’ve saved it for later! [Link deleted]
what are darknet drug markets darknet links markets
onion directory bohemia market link
step by step dark web versus project link
reddit darknet market 2022 most popular darknet markets 2022
Highly energetic blog, I loved that a lot. Will there be a part
2? [Link deleted]
Good day! This is my first visit to your blog! We are a collection of volunteers and starting a new initiative
in a community in the same niche. Your blog provided us
useful information to work on. You have done a outstanding job! [Link deleted]
dark markets malaysia darknet list market
мега вход mega market
darknet markets lsd-25 2022 biggest darknet markets 2022
Everything is very open with a clear explanation of the challenges.
It was definitely informative. Your website is useful.
Thanks for sharing! [Link deleted]
Hi! This is kind of off topic but I need some advice from an established blog.
Is it very difficult to set up your own blog? I’m not very techincal but I can figure things out
pretty fast. I’m thinking about creating my own but I’m not sure where to begin. Do you have any points
or suggestions? With thanks [Link deleted]
darknet drug store dark markets 2022
You’re so interesting! I don’t believe I’ve read through a single thing like
this before. So good to find someone with some original thoughts on this issue.
Seriously.. many thanks for starting this up.
This site is something that’s needed on the web, someone with some originality! [Link deleted]
dark web market links deep web drug markets
darknet drug market tor markets
Admiring the time and effort you put into your website and in depth
information you present. It’s good to come across a blog every once in a while that isn’t the same outdated rehashed material.
Fantastic read! I’ve bookmarked your site and I’m adding your RSS feeds to my Google account. [Link deleted]
Excellent post! We will be linking to this great article on our site.
Keep up the good writing. [Link deleted]
сайты даркнет мега даркнет
darknet links dark markets 2022
мега скорость darknet сайт
mega даркнет мега вход
dark web links darknet drug links
darknet links dark web sites links
deep web drug markets darknet drug links
Hi there! I could have sworn I’ve been to this website
before but after looking at many of the articles I realized it’s new to me.
Anyways, I’m definitely happy I came across it and I’ll be book-marking it and checking back regularly! [Link deleted]
ссылка на мегу даркнет сайты магазин
If some one wants to be updated with hottest technologies then he must be pay a
visit this web site and be up to date daily. [Link deleted]
dark web sites links dark web site
Write more, thats all I have to say. Literally, it seems as though you relied on the video to make your point.
You definitely know what youre talking about, why throw away
your intelligence on just posting videos to your weblog when you could
be giving us something enlightening to read? [Link deleted]
dark web link darknet drugs
dark web sites darknet search engine
dark market link darknet seiten
deep web sites dark internet
deep web drug markets darknet drug market
When someone writes an post he/she maintains the thought of a user in his/her brain that how a user can understand it.
So that’s why this article is outstdanding. Thanks! [Link deleted]
how to get on dark web tor markets 2022
deep web drug url dark web market links
dark website tor darknet
darknet market darknet site
мега наркотики мега onion
dark web link darknet links
black internet onion market
dark internet deep web drug markets
darkmarket tor dark web
darknet websites free dark web
мега онион даркнет сайты магазин
darknet market lists darkmarket url
free dark web bitcoin dark web
blackweb official website deep web links
deep web sites darknet markets
darknet sites darknet drug store
darknet markets deep web links
dark web search engine blackweb official website
darknet drug store dark web sites
tor market links dark markets 2022
drug markets onion dark website
tor market links dark markets
darknet market deep dark web
мега onion ссылка сылка на мегу
dark web websites deep web markets
tor marketplace dark net
dark market list dark internet
darkmarket link dark internet
blackweb tor market links
free dark web tor market
darkmarket url how to access dark web
darkmarket dark market link
darknet market lists dark internet
dark markets 2022 tor marketplace
мега официальный сайт даркнет магазин
mega darkmarket даркнет ссылки
сайт мега darknet магазин зелья
how to get on dark web darknet drug store
darkmarket list darknet drug market
tor markets links drug markets onion
tor markets darknet seiten
dark markets 2022 tor market links
dark websites darkmarket
мэги сайт мега onion магазин
мега вход мега зеркало
tor markets 2022 tor dark web
darknet markets deep web drug store
buy essays online
[url=”[Link deleted]online to buy[/url]
custom essays cheap
how to get on dark web darkmarket list
deep web drug links darkmarkets
dark market link darkmarket list
dark markets tor markets links
darknet websites dark market
darknet market list tor markets links
dark market url dark market link
dark market link tor markets 2022
tor markets 2022 darknet search engine
dark web access dark web link
dark market link deep web drug links
мега сайт ссылка официальный сайт мега
how to get on dark web blackweb official website
мега официальный сайт сайт даркнет
dark market url darknet search engine
free dark web dark markets
blackweb official website dark web site
best darknet markets darknet sites
dark market darkmarket 2022
drug markets onion dark web sites links
darknet market deep web search
dark web site dark market
darkmarkets darknet markets
how to access dark web deep web drug url
dark web sites links dark market onion
darknet search engine dark market url
tor marketplace dark web sites
darknet marketplace darknet market links
мега шишки mega onion зеркала
мега онион сайт ссылка мега
dark web link tor dark web
free dark web how to get on dark web
dark web link dark website
deep web drug store how to access dark web
darknet drug store darkmarket 2022
tor markets blackweb
mega сайт как зайти на мегу
darknet market links darknet drug links
darknet market links darkmarket list
deep dark web darknet links
darkmarkets dark market 2022
dark web market deep web drug store
mega даркнет сылка на мегу
mega darknet новое зеркало мега
deep web markets dark web markets
dark web search engine dark market link
deep dark web best darknet markets
deep web search darkmarket list
dark web market dark net
tor market dark websites
deep web search deep web search
tor market dark market url
darknet marketplace tor markets links
dark web search engines tor markets
blackweb best darknet markets
darknet links dark internet
мега onion зеркала мега вход
darkmarket blackweb
darknet search engine darknet marketplace
mega сайт новое зеркало мега
darknet links dark web websites
tor marketplace darkmarket list
drug markets onion darkmarket url
dark web link darkmarket 2022
tor marketplace deep dark web
dark web markets dark web markets
dark market darkmarket
мега даркнет зеркало мега
mega onion зеркала магазины даркнета
black internet tor marketplace
black internet drug markets dark web
how to get on dark web tor market url
best darknet markets best darknet markets
сайты даркнет ссылки мега даркнет
dark web search engines how to get on dark web
dark markets 2022 dark web site
how to access dark web free dark web
deep dark web dark web link
mega onion оффициальный сайт мега даркнет
darknet site tor marketplace
free dark web dark net
deep dark web how to get on dark web
how to access dark web darknet links
Greetings! Very useful advice within this post! It’s the little changes that produce the most significant changes.
Thanks for sharing! [Link deleted]
darknet market links deep web drug markets
Hi! I could have sworn I’ve been to this site before but after browsing through some of
the post I realized it’s new to me. Anyhow, I’m definitely glad I found
it and I’ll be book-marking and checking back often! [Link deleted]
dark market onion dark web websites
Hi, i feel that i noticed you visited my web site so i came to
return the desire?.I am attempting to to find issues to improve
my website!I guess its ok to make use of a few of your ideas!!
This article is truly a good one it assists new the web
users, who are wishing for blogging. [Link deleted]
мега онион mega onion зеркало
blackweb official website drug markets dark web
I believe that is one of the such a lot significant info for me.
And i am satisfied reading your article. But
want to commentary on few normal issues, The web site
taste is wonderful, the articles is truly great :
D. Excellent task, cheers [Link deleted]
Generally I do not read article on blogs, but I would like to say that this write-up very forced me to check out
and do so! Your writing style has been amazed me.
Thank you, quite nice article. [Link deleted]
Hello! Do you know if they make any plugins to safeguard against hackers?
I’m kinda paranoid about losing everything I’ve worked hard on. Any recommendations? [Link deleted]
Unquestionably believe that which you stated. Your favorite justification seemed to be on the net the
simplest thing to be aware of. I say to you, I certainly get irked while people consider worries that they just do not know about.
You managed to hit the nail upon the top as well as defined out
the whole thing without having side effect , people could take a signal.
Will likely be back to get more. Thanks [Link deleted]
darkmarket list dark markets 2022
drug markets onion dark market link
dark market onion tor market links
If you wish for to obtain a great deal from this article then you have to apply these strategies to your won blog. [Link deleted]
dark net dark web links
bitcoin dark web tor markets 2022
darknet markets dark web websites
tor dark web darknet site
dark internet dark web sites
May I simply just say what a comfort to find somebody who truly understands what they’re
discussing online. You certainly understand how to bring an issue to light and make
it important. More people should look at this and understand this side
of the story. I can’t believe you’re not more popular
given that you surely possess the gift. [Link deleted]
Hi there to all, how is the whole thing, I think every one is getting more
from this web page, and your views are good in support of new users. [Link deleted]
If some one wishes expert view about blogging then i suggest him/her to visit this website, Keep up the nice job. [Link deleted]
dark web search engine dark web websites
darkmarket list best darknet markets
darknet marketplace dark web market
deep dark web darknet market
мега кокаин магазин даркнет
darkweb marketplace tor markets
It’s very straightforward to find out any topic on web as compared to books, as I
found this post at this site. [Link deleted]
dark markets 2022 darknet drug links
deep web links darknet drug links
deep web search darknet search engine
blackweb tor markets
mega darkmarket ьупф ьфклуе
tor market darknet drug store
mega даркнет сайты даркнет
dark web drug marketplace dark market
drug markets dark web darknet seiten
darknet links tor dark web
drug markets dark web dark markets 2022
darknet websites dark website
deep web drug url darknet search engine
мега магазин магазин даркнет
best darknet markets darknet seiten
dark website dark web market
how to access dark web deep web drug markets
dark web websites dark net
ссылки на даркнет мега onion оффициальный сайт
dark market dark net
tor market url darknet marketplace
deep web links dark web search engine
darkmarket link darkmarket 2022
darkmarket url deep dark web
darkmarket link bitcoin dark web
ьупф ьфклуе магазины даркнета
мега скорость mega зеркало
tor markets links dark web search engine
drug markets dark web deep web links
drug markets onion darknet marketplace
deep web links deep web drug links
darknet websites darknet drug links
tor marketplace bitcoin dark web
deep web drug store tor dark web
the dark internet darknet marketplace
tor marketplace dark web link
deep dark web dark market
darknet drug links onion market
dark market darknet market
darknet markets dark market url
darkmarket list dark net
tor market url darknet market list
darknet marketplace tor markets
магазин даркнет официальный сайт мега
darknet market darknet market list
новое зеркало мега mega onion зеркала
dark web search engine dark market link
мега onion зеркало мега onion зеркало
darkmarket list dark web market
tor marketplace tor dark web
darknet marketplace dark web links
essay writing helper
[url=”[Link deleted]need help writing my essay[/url]
essay writing services reviews
darknet drug market tor dark web
deep web drug store dark web link
dark market 2022 tor darknet
deep web drug store deep web drug url
darknet markets dark markets 2022
tor market darknet drug store
tor marketplace tor markets links
мега onion магазин магазин мега
darkmarket url darkweb marketplace
darknet market deep dark web
tor darknet dark web websites
dark web access how to get on dark web
darkmarket 2022 darknet links
drug markets dark web dark web links
darknet сайт mega onion ссылка
dark market url darknet search engine
onion market darknet links
darknet market links dark web markets
blackweb official website dark internet
мега купить соль мега онион
darknet site darkmarket url
darknet drug market dark market
dark web site tor markets links
darknet markets deep web sites
best darknet markets deep web drug store
мега официальный сайт мега скорость
dark web market links dark website
dark web sites the dark internet
black internet dark market
tor market links dark web sites links
how to get on dark web darkmarket 2022
tor market links dark web market
dark market onion tor market links
dark market list dark market list
dark market link tor market
dark web drug marketplace free dark web
dark markets darknet search engine
deep web links dark web sites
мега наркотики ссылка мега
мега onion магазин как зайти на мегу
darkmarket link blackweb
магазины даркнета mega даркнет
dark web market the dark internet
сайт мега darknet сайт
dark market 2022 dark web markets
tor markets darkmarkets
dark web link drug markets onion
onion market darknet market links
dark web search engines dark websites
dark market dark web site
I know this if off topic but I’m looking into starting my
own weblog and was wondering what all is required to get setup?
I’m assuming having a blog like yours would cost a pretty penny?
I’m not very web smart so I’m not 100% sure. Any tips or advice would be greatly appreciated.
Many thanks [Link deleted]
best darknet markets dark websites
Great blog here! Also your site loads up very fast! What web host are you using?
Can I get your affiliate link to your host? I wish my web site
loaded up as fast as yours lol [Link deleted]
tor markets links bitcoin dark web
darkmarkets dark web search engines
мега onion магазин mega зеркало
tor market url deep web drug url
darkmarket link darkmarkets
darknet markets darknet seiten
dark markets darknet markets
If you would like to increase your know-how just keep visiting this web page and be updated
with the most recent news update posted here. [Link deleted]
darknet search engine tor darknet
darkmarket url tor market url
мега onion оффициальный сайт мега даркнет
tor markets 2022 dark net
darknet drug market deep web links
darknet marketplace tor market links
tor markets dark websites
mega даркнет мега onion зеркала
tor dark web best darknet markets
ьупф ьфклуе ссылка на мегу
dark internet darknet drugs
dark websites deep dark web
dark websites deep web sites
darknet site dark market
darkmarket 2022 dark markets 2022
tor markets 2022 tor marketplace
I like the helpful information you provide in your articles.
I’ll bookmark your weblog and check again here frequently.
I’m quite certain I’ll learn many new stuff right here! Good luck for the next! [Link deleted]
dark market dark markets
dark web links dark markets 2022
mega onion ссылка мега сайт
зайти на мегу mega даркнет
dark web search engines deep web sites
tor markets dark web drug marketplace
tor market url deep web markets
tor market dark market
dark web access dark websites
мега купить соль мега онион
deep web drug markets dark web links
tor market links darknet links
darkmarket list deep web markets
tor market darknet market list
tor market links deep web search
darknet seiten darkmarket
dark net darknet market links
dark web sites links darkmarket url
darknet drugs dark web search engines
мега onion зеркало mega онион
darknet site darknet market
drug markets dark web deep web drug markets
darknet drug market darkweb marketplace
tor markets links deep web drug links
dark web drug marketplace deep dark web
tor darknet tor darknet
dark web search engines darkmarket url
drug markets onion tor darknet
deep web drug markets dark web markets
mega market mega market
the dark internet darkmarket 2022
tor dark web the dark internet
dark web market dark websites
dark web search engines deep web search
mega магазин мега вход
darknet site dark net
deep web sites darknet market list
dark web link dark web access
tor markets darknet links
darkmarket tor markets
the dark internet dark market onion
darknet drug store tor darknet
магазин даркнет mega market
deep web search dark web sites
ссылка на мегу мега официальный сайт
darknet market lists darknet drug store
dark market 2022 how to access dark web
how to access dark web dark web market list
drug markets dark web darkmarkets
blackweb darknet drug store
ссылки на даркнет мега сайт
мега нарко мега даркнет
darkmarket url dark web websites
dark web links dark markets 2022
drug markets onion dark internet
deep web search deep web markets
darknet market lists deep web drug links
dark market list darkmarket url
dark web search engine darknet marketplace
darknet site dark web search engine
darknet markets darknet drug store
darknet market list dark market
darkmarkets deep web drug store
darknet market list deep web markets
darkmarket url dark internet
dark web sites links tor darknet
мега сайт даркнет ссылки
darknet market list dark markets
darknet market tor markets links
bitcoin dark web darknet websites
free dark web dark web access
dark web market tor dark web
how to get on dark web darknet websites
tor darknet dark websites
deep web markets deep web search
мега онион mega onion
dark market url drug markets onion
tor dark web dark net
blackweb blackweb
deep dark web dark web sites links
college essay writing service reviews
[url=”[Link deleted]essay[/url]
definition essay help
darknet магазин мега шишки
tor marketplace dark web search engine
darknet markets tor market links
tor markets 2022 dark web market
mega ссылка mega onion shop
dark web websites drug markets onion
darknet drugs darknet websites
dark web sites links dark web market list
mega onion зеркала мега магазин
how to get on dark web tor market url
darkmarket list onion market
black internet dark market list
dark web sites dark web market list
darknet drug store darkmarket
dark web drug marketplace deep web links
tor market tor darknet
darknet market links dark web link
как зайти на мегу darknet магазин зелья
mega ссылка мэги сайт
dark market dark internet
darknet market lists dark web market list
dark web market links how to access dark web
darkmarket url deep web sites
tor market url darknet drug store
darknet marketplace dark web link
dark web access darknet drug market
dark web drug marketplace dark web search engines
tor markets 2022 darknet search engine
мега купить соль mega ссылка
dark market 2022 darknet market lists
dark market list deep web search
tor markets darknet market links
deep web drug store dark market list
ссылка на мегу мега onion магазин
dark market list darknet market list
darknet links dark markets
tor dark web deep dark web
dark web markets deep web sites
darkmarkets dark web link
сайт мега мега купить соль
dark market url darknet links
darkmarket deep web links
darkmarket list dark web markets
мега onion мега сайт
dark web sites links darknet market links
tor dark web dark market
mega onion shop мега onion магазин
how to get on dark web dark internet
dark web sites links dark web sites
dark web drug marketplace dark web websites
darknet market blackweb official website
darknet sites darkmarket link
darknet market lists free dark web
dark web search engines deep web search
darknet магазин зелья мега мефедрон
drug markets dark web dark market link
blackweb official website dark web links
how to access dark web dark web drug marketplace
deep web drug store tor markets
dark web site dark website
dark market link dark net
tor market url dark web link
darknet market list dark web websites
deep web search black internet
darknet drug market dark web websites
darknet market lists dark web sites links
darknet drug store drug markets onion
dark web market list darknet seiten
deep web markets dark web links
dark markets dark web search engine
dark web market links darknet seiten
мега наркотики сайты даркнет ссылки
dark web links dark market
tor market darknet marketplace
darknet market lists blackweb official website
darknet market list free dark web
tor market url dark market onion
darknet markets blackweb official website
best darknet markets deep web drug url
dark web sites darknet marketplace
dark markets drug markets onion
darknet market dark net
tor darknet darknet site
mega onion зеркала mega onion shop
сайты даркнет магазин мега
сылка на мегу мега купить соль
мега ссылка мэги сайт
dark market list dark market onion
dark websites darknet markets
darkmarket 2022 dark web sites
dark net tor markets
darknet drug links dark market link
how to access dark web dark markets 2022
tor market url tor markets links
dark web drug marketplace darknet market
darknet drugs dark market link
darkmarket list dark market list
drug markets onion deep web drug url
мега onion зеркало darknet магазин
зайти на мегу даркнет сайты магазин
darknet market lists darkweb marketplace
deep web drug markets darknet market list
dark web market darkmarket list
darknet market darknet drug store
ссылки на даркнет мега onion
darknet websites darknet marketplace
deep web drug store drug markets onion
darkmarket link deep web links
darknet seiten darknet sites
dark web drug marketplace tor markets 2022
darkmarket url darknet market list
darknet links darknet websites
dark web market dark web search engines
dark net drug markets dark web
mega магазин мега онион сайт
black internet dark web access
bitcoin dark web darknet sites
tor market dark market onion
tor market darknet drug links
darkmarket list darkmarket 2022
ссылки на даркнет мега зеркало
deep web drug markets darknet market lists
мега шишки мега onion зеркало
tor market links dark web link
onion market darknet sites
dark internet dark markets 2022
mega онион мега скорость
bitcoin dark web dark markets 2022
dark web markets dark web drug marketplace
мега онион сайт мэги сайт
dark website onion market
how to get on dark web best darknet markets
black internet deep dark web
dark web market darknet websites
dark web market dark web search engines
darkweb marketplace darknet site
darkmarket link drug markets onion
blackweb official website darknet drug market
darknet market darknet websites
мега купить соль mega onion ссылка
mba essay service
[url=”[Link deleted]essay writers[/url]
persuasive essay writer
мега onion ссылка mega onion зеркало
the dark internet darkmarket 2022
free dark web blackweb official website
tor markets darknet drug links
best darknet markets the dark internet
tor dark web deep web search
dark net dark market
how to access dark web dark web sites links
мэги сайт mega darkmarket
dark market link black internet
darkmarket darknet market
dark internet darkmarket 2022
darknet sites bitcoin dark web
dark internet drug markets dark web
darknet site darknet drug store
blackweb official website dark market onion
dark websites darkmarkets
tor markets darknet market lists
tor markets blackweb official website
tor market url deep dark web
dark website darknet marketplace
Your way of telling the whole thing in this paragraph is truly nice, all can simply know it,
Thanks a lot. [Link deleted]
магазин мега mega onion shop
deep web drug markets blackweb
darkmarket list dark web markets
tor dark web dark web market links
wonderful publish, very informative. I ponder why the other experts of this sector
don’t notice this. You should proceed your writing.
I am sure, you’ve a great readers’ base already! [Link deleted]
Great blog here! Additionally your website lots up very fast!
What web host are you using? Can I am getting your affiliate hyperlink for your host?
I want my website loaded up as fast as yours lol [Link deleted]
deep web drug store tor markets 2022
Hey very nice site!! Man .. Excellent .. Amazing
.. I will bookmark your site and take the feeds also? I’m glad to find numerous useful information here within the post, we want develop extra strategies in this regard, thank you for sharing.
. . . . . [Link deleted]
black internet dark web market links
darknet магазин мега зеркало
tor dark web darknet site
Greetings, I think your website could be having browser compatibility issues.
When I look at your site in Safari, it looks fine however, if opening in I.E., it has some
overlapping issues. I simply wanted to give you a quick heads up!
Besides that, excellent site! [Link deleted]
darknet drug store dark market onion
blackweb official website tor market url
free dark web dark web sites links
darknet markets dark web sites
darknet markets how to access dark web
dark web access the dark internet
мега онион мега магазин
You actually make it appear so easy with your presentation but I to find this topic to be
really something that I think I might by no means understand.
It sort of feels too complicated and very huge for me. I’m looking ahead to your next publish, I
will try to get the grasp of it! [Link deleted]
Hi there, You have done an excellent job. I will definitely digg it and personally recommend to
my friends. I’m confident they’ll be benefited from this site. [Link deleted]
darknet drug market darkweb marketplace
Please let me know if you’re looking for a author for your weblog.
You have some really great posts and I feel I would be a good asset.
If you ever want to take some of the load off, I’d really like to write some articles for your blog in exchange for a link back to mine.
Please send me an email if interested. Cheers! [Link deleted]
dark markets 2022 dark website
Hi there, this weekend is fastidious in favor of me, for
the reason that this moment i am reading this impressive educational article
here at my house. [Link deleted]
dark net deep web sites
free dark web dark market url
You really make it seem really easy together with your
presentation but I find this matter to be actually something which I think I might never understand.
It seems too complex and very vast for me.
I am taking a look forward on your next submit,
I will try to get the hold of it! [Link deleted]
deep dark web darknet drugs
I’ve learn some excellent stuff here. Definitely value bookmarking for revisiting.
I wonder how so much attempt you place to make the sort of
fantastic informative website. [Link deleted]
Hey there would you mind sharing which blog platform you’re
using? I’m going to start my own blog soon but I’m having a tough time
making a decision between BlogEngine/Wordpress/B2evolution and Drupal.
The reason I ask is because your design and style seems different then most
blogs and I’m looking for something unique.
P.S Apologies for getting off-topic but I had to ask! [Link deleted]
мега официальный сайт darknet магазин
dark markets 2022 tor darknet
Greetings! Very useful advice in this particular post!
It is the little changes that produce the most significant changes.
Thanks a lot for sharing! [Link deleted]
Hey very nice blog! [Link deleted]
darknet drug store dark market
darknet drug store tor markets links
dark internet darknet seiten
We are a group of volunteers and opening a new scheme in our community.
Your web site provided us with valuable info to work on. You’ve
done an impressive job and our whole community will be thankful to you. [Link deleted]
dark web market list darkmarket list
drug markets dark web darknet drug store
darkmarkets darknet seiten
мега наркотики ссылка на мегу
bitcoin dark web darknet drug store
darknet markets darkmarket 2022
darknet market list free dark web
tor market url darknet market links
darkmarket 2022 darknet markets
dark web websites dark web link
blackweb onion market
darknet site dark web search engines
dark markets blackweb official website
darknet market list deep web drug url
darkmarket darknet market
darkmarket 2022 dark web links
dark market onion deep web sites
dark web sites links deep web markets
dark markets 2022 darknet drug market
blackweb official website dark web search engines
deep web search deep web drug store
darknet websites darkweb marketplace
Wеlcome – The Wrinkle Dr [Link deleted]
the dark internet dark market list
tor market darkmarket link
dark markets deep web drug links
darknet drugs drug markets onion
как зайти на мегу мега купить
darknet drug store dark web search engine
darkmarket deep web links
сылка на мегу мега onion
dark web sites darknet market list
tor market url dark web market list
dark websites how to get on dark web
darknet drugs dark web websites
dark web drug marketplace dark web search engines
mega onion ссылка mega onion shop
deep dark web darkmarket list
tor market url deep web search
deep web search darknet links
darkmarket link dark web market
darkmarkets tor market
магазины даркнета ьупф ьфклуе
Wow, that’s what I was looking for, what a information! present here at this blog, thanks admin of this web page. [Link deleted]
deep web drug url dark market url
darknet market dark market
darknet marketplace darknet search engine
dark website blackweb
darknet сайт mega ссылка
dark web sites tor dark web
deep web drug url deep web links
deep dark web dark web links
darkmarket url tor market
darknet market lists darkmarket url
dark web market links tor markets 2022
магазин даркнет ьупф ьфклуе
мега онион мега мефедрон
darknet market links dark market list
darknet drug market dark web links
deep dark web dark markets 2022
новое зеркало мега сайты даркнет ссылки
dark web drug marketplace dark market link
dark web markets dark web search engine
dark web link dark market 2022
tor darknet darknet market list
darknet drug market how to get on dark web
deep web markets drug markets onion
deep web drug store darknet websites
deep web markets darknet drug links
darknet search engine darknet drugs
mega darkmarket мега onion оффициальный сайт
сайт мега как зайти на мегу
darknet drugs darknet drug store
free dark web drug markets onion
blackweb darknet seiten
dark net dark markets
зайти на мегу даркнет сайты магазин
deep web sites darknet markets
dark website tor market
darknet sites drug markets onion
blackweb darkmarket link
I have read so many articles on the topic of the blogger lovers but this post is actually a good post, keep it up. [Link deleted]
deep web search the dark internet
My family members always say that I am killing my time here at web,
however I know I am getting experience daily by reading
thes nice articles or reviews. [Link deleted]
deep web search dark web sites links
blackweb official website tor marketplace
Spot on with this write-up, I actually believe that this website
needs a lot more attention. I’ll probably be returning to read more, thanks for the info! [Link deleted]
mega ссылка зеркало мега
darkmarket list dark market url
tor markets 2022 dark web drug marketplace
My spouse and I stumbled over here from a different web address and thought I might as well check things out.
I like what I see so now i am following you.
Look forward to going over your web page repeatedly. [Link deleted]
Appreciate the recommendation. Will try it out. [Link deleted]
darknet links dark web websites
dark market 2022 darknet marketplace
the dark internet deep web links
darknet search engine deep web drug url
новое зеркало мега официальный сайт мега
tor dark web free dark web
darknet market links dark web market list
darknet site blackweb official website
dark web sites how to access dark web
darkmarkets dark web search engine
tor markets 2022 dark web market
сайты даркнет ссылки магазин даркнет
dark web links deep web search
darknet market lists darknet sites
tor dark web darknet marketplace
dark web sites links tor market
tor market links deep web drug links
мэги сайт даркнет магазин
мэги сайт даркнет ссылки
deep web sites darknet market list
dark web access dark internet
dark web market list darkmarket list
dark market list darknet markets
dark net darknet drug store
dark websites darknet marketplace
dark web market list dark web sites
dark web drug marketplace drug markets onion
dark website dark web markets
drug markets onion darknet market
dark web drug marketplace dark markets
darknet seiten how to access dark web
tor market url darknet links
best darknet markets dark markets
dark web market links how to get on dark web
deep web drug url darknet market links
darknet drug links darknet marketplace
drug markets onion dark market url
dark web sites links dark websites
blackweb the dark internet
dark web sites dark market 2022
mega onion мега onion зеркала
darknet site dark web sites links
darknet магазин mega онион
darknet marketplace dark net
college application essay writing help
[url=”[Link deleted]about service[/url]
best essay writing service review
darkweb marketplace darkmarket url
deep web drug store blackweb
dark web site dark web market links
deep web drug links deep web drug store
мега onion оффициальный сайт сылка на мегу
dark market blackweb official website
dark web sites links dark market list
darknet websites drug markets onion
blackweb darkmarket url
dark market url blackweb
darknet site darknet market lists
сайты даркнет ссылки мега онион сайт
darkmarket darknet drugs
darknet drug store dark web market list
dark web search engine darkweb marketplace
darknet markets dark market 2022
darknet drug links dark websites
dark website dark web sites links
deep web markets deep web sites
mega онион сайт новое зеркало мега
deep web sites dark web market links
dark market darkweb marketplace
dark web links bitcoin dark web
tor market links tor markets
deep web links tor markets
dark web websites darknet market
deep web drug links deep web markets
darkmarket 2022 dark web links
dark web site deep web search
deep web markets darknet marketplace
how to access dark web dark market onion
tor market links dark market 2022
free dark web darknet sites
deep web sites darknet search engine
darkmarket list bitcoin dark web
bitcoin dark web tor markets links
dark web sites links darknet marketplace
the dark internet dark market
drug markets dark web dark websites
dark market 2022 darkmarket
blackweb dark website
darknet markets dark market 2022
мега ссылка магазин мега
dark web drug marketplace darknet site
black internet onion market
drug markets dark web darknet search engine
deep web markets dark web drug marketplace
даркнет магазин магазины даркнета
darkmarket link darknet drug store
dark web sites links deep web search
deep web markets dark web search engines
darknet drug market the dark internet
dark market onion drug markets dark web
deep dark web drug markets onion
deep web drug store darknet site
мега onion mega onion зеркало
tor marketplace drug markets dark web
tor markets 2022 darkmarkets
dark websites best darknet markets
drug markets dark web dark net
bitcoin dark web dark market link
mega onion зеркала mega даркнет
dark web search engine dark web sites links
dark web search engine tor markets
darkweb marketplace darknet market links
tor market dark market list
darknet site dark web link
darknet marketplace tor market
deep web drug store dark internet
ьупф ьфклуе mega онион
мега ссылка мега мефедрон
bitcoin dark web darknet marketplace
dark web market darkweb marketplace
darknet drug market dark web drug marketplace
darknet drug store best darknet markets
dark web market links how to access dark web
darkmarket 2022 dark net
darkweb marketplace darknet market lists
darkmarkets dark web search engines
dark market 2022 dark web search engine
dark market list tor markets
dark web search engines darknet seiten
free dark web dark market
tor markets darkmarkets
tor markets links darknet market lists
darkweb marketplace dark web search engines
tor market url darknet site
tor darknet dark net
tor dark web dark web market
black internet darknet marketplace
mega onion ссылка мега онион
darkmarket list tor market links
darknet links dark website
darkmarket list dark markets 2022
deep web markets darkmarket link
dark web links dark market url
darknet sites tor markets
ссылка мега мега onion зеркало
dark web link how to access dark web
dark web access darknet market links
darknet market links dark markets
dark market 2022 darknet market
deep web markets tor market links
mega магазин mega зеркало
dark market dark market link
darknet search engine tor markets links
darknet marketplace deep web sites
dark web sites dark web links
darkmarket link deep web drug links
мега кокаин мега нарко
drug markets dark web dark web access
dark web market dark web market links
deep web drug markets dark market 2022
darknet websites deep web drug store
darknet markets tor markets links
how to get on dark web tor marketplace
darkmarket link tor marketplace
darknet markets dark market onion
deep web drug store free dark web
mega онион мега купить соль
новое зеркало мега mega ссылка
darknet market list tor market url
blackweb tor marketplace
dark markets 2022 darknet market links
deep web drug markets dark web sites links
darknet seiten tor marketplace
onion market dark web link
how to get on dark web deep web search
darknet websites deep web links
darknet drugs dark web links
darknet drug links darknet seiten
tor marketplace dark website
darknet market list darknet market links
bitcoin dark web darknet links
tor dark web dark net
dark websites darknet websites
deep web links darknet seiten
мега сайт ссылка зайти на мегу
dark web websites tor market links
best darknet markets dark web link
darknet markets dark web market
dark markets dark website
dark websites tor markets links
mega onion shop магазин мега
dark web link darkmarket url
dark web link deep dark web
black internet tor marketplace
darknet drugs darkweb marketplace
tor markets dark market url
darkmarket list deep web drug links
darknet site dark web access
мега зеркало мега онион сайт
dark web markets deep dark web
dark web market list drug markets dark web
darknet seiten dark market onion
магазин мега мега купить
dark net dark web drug marketplace
darknet markets tor markets links
dark net dark internet
dark web site darknet market list
how to get on dark web dark market link
black internet dark market url
darknet drug links dark websites
tor markets links how to access dark web
what are the best essay writing services
[url=”[Link deleted]essay writing online[/url]
recommended essay writing service
мега onion зеркала магазины даркнета
dark web websites tor markets 2022
deep web drug store darknet marketplace
deep dark web deep web drug markets
Deerma Ρlus Aesthetics – Leading UK Medical Aesthetics Clinic [Link deleted]
darkmarket link darkmarket link
darknet seiten dark internet
dark market url darknet seiten
dark web search engines tor market links
dark market tor dark web
how to get on dark web free dark web
darkmarket dark web search engine
dark web links dark web site
dark web link dark markets 2022
dark internet how to get on dark web
dark web market links darkmarket 2022
dark market onion dark market 2022
dark web search engines bitcoin dark web
deep web markets deep dark web
мега даркнет мега onion магазин
dark market url dark market
tor market url best darknet markets
tor markets links the dark internet
dark web market links dark web websites
мега onion зеркало mega зеркало
darknet links tor dark web
deep web drug markets how to get on dark web
dark web site dark web markets
darknet market deep dark web
dark markets 2022 darkmarket 2022
darkmarket tor marketplace
mega онион сайт новое зеркало мега
darknet seiten dark websites
dark web search engines dark market url
dark web market links blackweb
tor market url deep web markets
dark market url darkmarkets
deep web search dark market link
dark web access dark market
tor market deep web drug url
mega зеркало мега официальный сайт
dark web sites links dark web sites links
darknet site dark web site
dark web websites deep web drug links
tor markets darknet market lists
how to access dark web tor markets 2022
deep web search dark web markets
даркнет ссылки сайт мега
даркнет магазин магазин мега
dark web links darknet drug market
tor dark web dark web sites
dark website dark market 2022
tor markets 2022 darknet site
dark net dark web websites
dark markets darknet drug store
UK’s No. 1 Lip Fillers London Clinic: Lip Fillers Cost Νear Me [Link deleted]
dark web websites dark market onion
deep web drug markets dark website
deep web drug markets best darknet markets
darkmarkets tor marketplace
tor marketplace darknet links
darknet search engine deep web drug store
darkmarkets tor markets
dark market dark markets 2022
dark web market list tor market links
blackweb blackweb
mega market ьупф ьфклуе
dark web drug marketplace darknet site
deep web markets darkmarket 2022
tor dark web blackweb
dark web link darknet market
мега onion зеркало мега
onion market how to access dark web
drug markets dark web dark website
deep web drug markets darknet drugs
dark internet darknet marketplace
darknet drugs bitcoin dark web
darknet links darknet drugs
darknet drug store darknet seiten
мэги сайт ссылка мега
deep web sites deep web search
deep web search darkmarket link
мега зеркало даркнет сайты магазин
tor market links best darknet markets
dark web links dark web sites
how to access dark web tor market url
how to access dark web darknet drug store
darkmarket darknet links
tor markets 2022 deep web markets
mega onion оффициальный сайт mega магазин
darkmarket dark market list
dark web site dark market list
мега шишки ссылка мега
dark web market list deep dark web
dark web markets darknet market lists
darknet sites darkmarket 2022
blackweb official website blackweb
darkmarket link drug markets onion
мега зеркало зеркало мега
мега нарко mega ссылка
darkmarket list dark web market list
darkweb marketplace darknet drug market
darknet marketplace how to access dark web
darkmarket link deep web drug url
tor market how to get on dark web
onion market dark web access
deep web markets dark web search engines
darknet drug store deep web drug markets
tor dark web darknet market links
dark web access blackweb official website
dark internet darknet drug market
tor marketplace tor darknet
deep web links darknet market lists
deep dark web deep dark web
dark web market dark web sites links
deep web drug links tor marketplace
darkmarket 2022 tor darknet
mega onion зеркало сайт даркнет
deep web sites darknet market list
darknet drug links dark web markets
dark web sites links darknet market
dark web sites links dark internet
darknet search engine darkmarket link
deep web markets darknet market links
dark markets 2022 deep web drug markets
ьупф ьфклуе мега даркнет
deep web markets dark market url
darknet drugs darknet market list
tor dark web darknet market
мега онион сайт мега купить
darknet market links deep dark web
darkmarket list darknet websites
dark web site darkmarket
tor market url blackweb
dark market darknet site
darknet seiten deep web links
darknet site dark web websites
how to get on dark web dark markets 2022
dark market tor market
dark web market links free dark web
mega onion mega даркнет
мега нарко мега скорость
darknet market darknet marketplace
deep web markets darknet drugs
мега onion зеркала сылка на мегу
магазины даркнета мега официальный сайт
the dark internet dark web websites
darknet market links deep web links
deep dark web dark market onion
мега сайт ссылка магазины даркнета
darknet links deep web drug store
What’s up, after reading this remarkable paragraph i am too cheerful to share my experience here with colleagues. [Link deleted]
With havin so much content and articles do you ever run into
any problems of plagorism or copyright infringement? My site has a lot of unique
content I’ve either authored myself or outsourced but
it looks like a lot of it is popping it up all over the web without my permission. Do you know any ways
to help reduce content from being ripped off?
I’d truly appreciate it. [Link deleted]
Amazing! Its in fact awesome post, I have got much clear idea regarding from this piece of writing. [Link deleted]
I am no longer sure where you’re getting your information, but good topic.
I needs to spend a while studying more or figuring out more.
Thanks for excellent information I was searching for this information for my mission. [Link deleted]
blackweb darknet websites
dark market link tor market
darknet market list tor market url
darknet market links deep web sites
deep dark web blackweb official website
dark web sites links the dark internet
darkmarket url darknet drug links
dark web sites tor markets
essays on service
[url=”[Link deleted]cheap essay[/url]
essay writing services
blackweb official website dark market url
darkmarket link darknet marketplace
dark market onion darkmarket
tor dark web darkmarket 2022
мега купить соль ьупф ьфклуе
tor markets 2022 the dark internet
dark web access dark market
tor marketplace dark markets
tor markets links dark websites
darknet market lists tor market url
the dark internet tor darknet
darknet marketplace tor markets 2022
dark website dark websites
deep web sites darkmarket link
tor markets links darkmarket link
dark market onion darkmarket list
tor market url tor marketplace
зеркало мега официальный сайт мега
dark markets 2022 dark web link
deep web drug url dark web search engines
dark web access dark markets 2022
darknet drug store deep web markets
darknet market links drug markets dark web
darknet markets best darknet markets
deep web drug links dark web sites
how to access dark web tor market links
darknet seiten darknet market lists
darknet магазин зелья зеркало мега
сайт даркнет mega ссылка
how to access dark web dark websites
dark web access darkmarket link
tor markets dark internet
мега onion ссылка mega магазин
ьупф ьфклуе сайт мега
darknet drugs dark market url
black internet darknet websites
dark web search engines deep web search
магазин мега магазин мега
darkweb marketplace deep web markets
deep web search dark web site
dark web drug marketplace dark markets 2022
dark internet dark web websites
the dark internet deep web links
deep web drug links deep web drug store
darknet links dark web site
dark website tor dark web
dark web market list dark market 2022
dark web site tor dark web
onion market how to access dark web
drug markets dark web darkmarket 2022
dark web websites darknet seiten
tor markets 2022 dark web site
dark web markets dark web sites
darknet магазин зелья зеркало мега
darknet seiten darkmarket list
dark web market list dark web link
darknet market list darknet drug market
mega onion зеркало мега шишки
tor marketplace darknet search engine
darknet marketplace deep web drug store
darkmarket link darkmarket list
darkweb marketplace tor marketplace
darkmarket bitcoin dark web
dark web access dark net
tor markets dark web market list
deep web drug store dark web websites
darkweb marketplace drug markets onion
мэги сайт как зайти на мегу
darknet market darknet market list
tor marketplace darknet site
dark market link dark web sites links
darknet drug market deep web markets
dark web access dark web sites
mega onion ссылка мега
dark market link deep web markets
dark web search engine dark web search engines
deep web markets how to get on dark web
dark web access dark web market
сайты даркнет mega onion ссылка
drug markets onion dark web sites
darkmarket list dark web site
deep web sites darknet drug links
ссылка на мегу ссылки на даркнет
ссылки на даркнет ссылки на даркнет
dark web sites darknet drug market
darkweb marketplace darkmarket
deep dark web how to get on dark web
deep web drug store blackweb
официальный сайт мега мега официальный сайт
dark web sites dark internet
onion market darkmarket url
dark web sites dark market list
onion market dark net
deep web drug links darkmarkets
darknet search engine darknet marketplace
dark web market deep web sites
tor marketplace dark web sites links
tor markets 2022 bitcoin dark web
darknet markets how to access dark web
dark web drug marketplace dark web market list
Just wish to say your article is as amazing. The clearness
on your publish is just spectacular and that i could suppose you
are an expert on this subject. Well together with your
permission allow me to grab your feed to stay updated with
approaching post. Thank you one million and please keep up the
enjoyable work. [Link deleted]
tor marketplace darknet drugs
Hey I know this is off topic but I was wondering if you knew of any widgets I could add to my blog that automatically tweet my newest
twitter updates. I’ve been looking for a plug-in like this for quite some time and was hoping maybe you would have some experience with something like this.
Please let me know if you run into anything.
I truly enjoy reading your blog and I look forward to your new updates. [Link deleted]
darkmarkets dark web market list
dark web link dark web sites links
Wow, incredible blog layout! How long have you been blogging for?
you made blogging look easy. The overall look of your site is excellent, as well
as the content! [Link deleted]
dark web search engines darknet sites
onion market darknet market list
mega сайт мега шишки
You ought to be a part of a contest for one of the finest sites on the web.
I am going to recommend this blog! [Link deleted]
darkmarket darknet sites
how to get on dark web dark web search engines
darknet market list dark markets
мега сайт зайти на мегу
deep web links darkmarket 2022
darknet links darknet site
dark web sites tor market links
dark market dark web search engine
darkmarket 2022 darknet market list
dark websites deep web drug url
deep web markets darkmarkets
dark web websites darkmarkets
зайти на мегу mega магазин
darkmarket 2022 tor market url
tor market url bitcoin dark web
mega onion зеркало официальный сайт мега
mega онион mega онион
darknet market list tor market url
mega зеркало мега onion магазин
dark market url dark market link
best darknet markets tor darknet
darknet site dark market list
dark internet tor market url
dark websites tor markets
darknet drugs dark market link
darknet drug market deep dark web
мега даркнет ссылка на мегу
onion market darknet links
мега сайт даркнет сайты магазин
drug markets onion dark web site
darknet market tor markets
мега даркнет мега мефедрон
tor market url dark market list
darknet market list tor market links
how to access dark web darknet drug market
drug markets onion darknet seiten
darknet marketplace free dark web
darkweb marketplace dark web access
tor market tor dark web
darknet drug links bitcoin dark web
bitcoin dark web darknet market lists
free dark web bitcoin dark web
tor markets tor markets links
blackweb dark web sites
darknet marketplace dark web sites
blackweb official website deep web drug url
how to access dark web darknet search engine
dark web link dark websites
dark market link darkmarket list
dark web market darknet site
mega onion shop мега нарко
dark market dark market list
dark website tor marketplace
tor markets links dark market
darknet drugs darknet market list
darknet drug market onion market
drug markets dark web dark web search engines
tor markets 2022 tor dark web
dark net how to access dark web
мега купить соль mega даркнет
dark web search engine dark market url
darknet market list deep dark web
darknet search engine how to get on dark web
dark web market deep web links
tor market url dark web market list
tor markets tor darknet
darknet search engine tor market
dark markets drug markets onion
help writing grad school essay
[url=”[Link deleted]custom essay[/url]
college essay editing service
mega магазин официальный сайт мега
магазины даркнета сайты даркнет
мега онион сайт официальный сайт мега
darkmarket list darknet drug store
dark web links dark internet
dark internet dark web link
darknet seiten tor market links
новое зеркало мега мега даркнет
darknet site darkmarket
deep web markets dark internet
blackweb official website darknet seiten
tor market darkmarket list
deep dark web dark web markets
dark market darknet markets
мега скорость мега зеркало
мега магазин ссылка мега
tor markets dark market
mega darknet mega даркнет
dark web sites links dark market url
deep web drug links darkmarkets
darkmarket link deep web sites
tor dark web darkmarket
darknet market links dark web market links
darknet drug links darknet drug market
drug markets onion dark web access
darknet marketplace dark market 2022
dark web market list onion market
deep web links darkmarkets
deep web search how to get on dark web
tor markets links darkmarket list
darknet market dark market url
dark web sites links bitcoin dark web
darknet sites drug markets dark web
darknet drug links bitcoin dark web
deep dark web deep dark web
deep web sites darknet market list
dark web site how to access dark web
даркнет магазин мега нарко
dark web access dark web sites links
deep web markets darkweb marketplace
darknet market lists dark web drug marketplace
сылка на мегу мега онион
darknet market list deep web drug links
dark web markets deep web drug links
darknet market links tor markets links
dark web sites dark web market list
dark web links black internet
drug markets dark web deep web drug markets
dark markets 2022 tor dark web
mega darkmarket мэги сайт
мега онион сайт мега купить
darknet site dark web markets
onion market deep web markets
мега наркотики мега нарко
free dark web dark web sites links
deep web markets bitcoin dark web
darknet seiten deep web markets
tor markets 2022 dark internet
tor markets dark web search engine
мега купить мега вход
deep web markets dark net
tor dark web dark web websites
dark web drug marketplace deep web drug url
dark web links dark websites
мега официальный сайт мега наркотики
dark web drug marketplace darkmarket link
darkweb marketplace dark web links
deep web drug links dark market url
darknet drug market darkweb marketplace
mega onion shop ссылки на даркнет
dark web links deep web drug url
dark markets darknet search engine
darknet сайт мега зеркало
darknet market list darkmarket link
darknet sites dark websites
darkmarket link tor darknet
blackweb official website dark website
darkweb marketplace dark web market links
dark web sites links dark web market links
darkweb marketplace darknet market lists
blackweb dark web search engine
dark web search engine tor markets 2022
bitcoin dark web tor darknet
tor markets links how to access dark web
dark market url black internet
dark websites tor darknet
[Link deleted]
darkmarket link dark web link
tor darknet dark web markets
free dark web dark market 2022
dark web market list dark web site
dark market list how to get on dark web
best darknet markets the dark internet
darkmarket list darknet market
dark web websites deep web sites
магазин мега мега нарко
darkweb marketplace dark web sites links
mega даркнет мега онион сайт
darkmarket dark web market
the dark internet dark web link
dark markets dark web market
deep web drug store darknet seiten
drug markets dark web dark web sites
мега скорость мега официальный сайт
darkmarket list darknet drug store
dark market onion tor market
darknet магазин зелья даркнет сайты магазин
deep web sites deep web search
free dark web the dark internet
darknet drug store tor market links
мега onion магазин мега onion магазин
dark web site darknet websites
tor markets darknet links
tor marketplace deep web drug links
dark market url darkmarket link
даркнет магазин darknet магазин зелья
darkmarket tor market url
tor markets tor market
dark web drug marketplace darknet market
deep web markets tor market url
даркнет сайты магазин mega онион сайт
I love what you guys are usually up too. Such
clever work and reporting! Keep up the terrific works guys I’ve you guys to blogroll. [Link deleted]
Hello there, just became aware of your blog through Google,
and found that it’s really informative. I’m going to watch out for brussels.
I will appreciate if you continue this in future. Numerous people will be benefited from your writing.
Cheers! [Link deleted]
dark web access darkmarket link
Great web site you’ve got here.. It’s difficult to find quality writing like yours these days.
I really appreciate individuals like you! Take care!! [Link deleted]
tor dark web dark web link
Wonderful goods from you, man. I’ve understand your stuff previous to and you are just too excellent.
I actually like what you’ve acquired here, really like what you’re saying and the
way in which you say it. You make it enjoyable and you still take care
of to keep it smart. I can’t wait to read much more from you.
This is really a tremendous website. [Link deleted]
dark markets 2022 dark market
dark markets tor market url
I think that everything posted made a lot of sense. But, what about
this? suppose you were to create a killer headline?
I ain’t suggesting your content isn’t good, but suppose
you added something to possibly get people’s attention?
I mean How To Easily Create a Staging Site In WordPress – PGResource | Web Designer is kinda plain. You could glance at Yahoo’s front page and see how they write post headlines to get people
interested. You might add a related video or a pic or two to get readers excited
about what you’ve got to say. In my opinion, it could make your
website a little livelier. [Link deleted]
deep dark web dark website
dark market dark web search engines
drug markets dark web dark web market
the dark internet darknet marketplace
dark website dark web market
darknet websites darknet seiten
darknet marketplace tor darknet
dark market list drug markets onion
An impressive share! I have just forwarded this onto a coworker who had been conducting a little research on this.
And he in fact ordered me dinner simply because I found it for him…
lol. So allow me to reword this…. Thanks for the meal!!
But yeah, thanx for spending some time to talk about this issue here on your
website. [Link deleted]
I blog frequently and I genuinely thank you for your content.
The article has really peaked my interest. I will bookmark your blog
and keep checking for new details about once per week.
I opted in for your RSS feed as well. [Link deleted]
Hi there everyone, it’s my first go to see
at this web site, and paragraph is truly fruitful in support of me, keep
up posting such articles. [Link deleted]
dark website dark web access
deep web drug url darknet drug market
darknet drugs darknet market list
мега скорость mega darknet
blackweb official website free dark web
dark website deep web drug links
darknet search engine dark web sites links
dark market dark web search engine
мега кокаин зайти на мегу
darkmarket link tor dark web
mega магазин как зайти на мегу
darknet market dark web drug marketplace
dark web market list darknet links
dark net dark market 2022
dark web drug marketplace darkweb marketplace
best darknet markets darknet market lists
bitcoin dark web blackweb official website
best darknet markets dark web market links
сайт даркнет сайты даркнет
tor markets 2022 dark market list
dark web link darknet market list
darkmarkets tor dark web
dark market onion dark web drug marketplace
darknet seiten darkmarket 2022
essay paper writing service
[url=”[Link deleted]college essay writing service[/url]
best mba essay editing service
dark web links deep web markets
tor dark web dark market link
dark market onion darkmarket url
darkweb marketplace deep dark web
mega онион ссылка мега
dark internet tor dark web
dark website dark web sites
dark market link tor market
dark websites deep web drug url
bitcoin dark web tor darknet
dark web sites black internet
мега сайт mega onion ссылка
mega онион сайт ссылка мега
dark web links dark market 2022
darkmarkets dark web sites
deep web markets dark net
deep web sites dark websites
dark market blackweb official website
dark web market list darknet drug market
darknet site darkmarkets
darknet websites dark market onion
best darknet markets darknet drug links
tor market darknet market
dark internet darknet seiten
dark web search engines how to access dark web
darknet drug store darknet links
drug markets onion dark market list
dark market dark markets
tor markets dark markets 2022
dark web access tor market
drug markets dark web darkmarket
free dark web tor market url
даркнет сайты магазин мега зеркало
мега наркотики даркнет магазин
darkmarket url dark web market list
dark web search engine dark web access
darknet marketplace dark market
darknet drug links dark web websites
мега onion магазин мега онион
darknet drugs bitcoin dark web
mega зеркало mega сайт
darknet seiten dark web link
dark market link dark market
dark market onion dark internet
официальный сайт мега мега купить
dark internet blackweb official website
deep web drug markets dark market 2022
mega onion зеркала мега вход
the dark internet tor markets 2022
tor market dark market 2022
deep web search darkmarket url
darkmarkets tor markets 2022
deep web markets dark market link
mega market мега ссылка
tor market darknet markets
dark website dark web websites
mega darknet мега даркнет
blackweb darkmarket 2022
blackweb official website dark web access
free dark web deep web links
dark web sites links dark market url
black internet dark market link
dark market dark web link
darknet marketplace darknet seiten
darknet market list deep web search
deep web markets tor dark web
dark websites dark market list
darkmarkets dark market 2022
dark web site deep web drug markets
зайти на мегу мега ссылка
darknet market lists tor market url
dark market url dark markets 2022
сайт мега мега даркнет
free dark web black internet
darknet магазин зелья ссылки на даркнет
dark web access dark web site
darkmarket list deep web links
dark website deep web drug markets
dark web market list drug markets onion
darknet marketplace tor marketplace
onion market tor markets
tor markets links dark web market
darknet drug store dark market list
darknet market lists darknet site
мега официальный сайт мега купить соль
I will right away take hold of your rss as I can’t in finding your e-mail subscription link or newsletter service.
Do you’ve any? Please permit me realize
so that I could subscribe. Thanks. [Link deleted]
When I originally commented I clicked the “Notify me when new comments are added” checkbox and now each time a comment is
added I get several e-mails with the same comment. Is there any way you can remove
people from that service? Appreciate it! [Link deleted]
blackweb official website dark web site
With havin so much written content do you ever run into any issues of plagorism
or copyright infringement? My blog has a lot of exclusive content
I’ve either created myself or outsourced but it seems
a lot of it is popping it up all over the web without my permission. Do you know any solutions to help
reduce content from being stolen? I’d truly appreciate it. [Link deleted]
What’s up friends, pleasant paragraph and pleasant arguments commented at this place, I am in fact enjoying by these. [Link deleted]
What a material of un-ambiguity and preserveness of valuable familiarity on the topic of unexpected feelings. [Link deleted]
It’s impressive that you are getting ideas from this article as well as from our argument made here. [Link deleted]
What’s up, I desire to subscribe for this web site
to take most recent updates, so where can i do it please help out. [Link deleted]
мега onion ссылка мега онион сайт
tor marketplace tor marketplace
tor markets darkmarkets
мега купить соль ссылка мега
tor markets dark web search engine
darknet search engine deep dark web
bitcoin dark web darkmarket link
darkmarkets dark market 2022
dark net deep web links
darkweb marketplace dark web search engines
blackweb darkmarket url
deep web drug markets onion market
как зайти на мегу магазин даркнет
dark markets 2022 deep web drug links
onion market dark market url
tor marketplace tor marketplace
deep web markets darknet market lists
tor market url darknet markets
dark markets 2022 darknet markets
deep web drug store deep web drug url
tor dark web dark web sites links
darkmarket darknet websites
tor darknet tor dark web
tor markets links tor darknet
darkmarket list dark web market links
deep web markets dark web drug marketplace
darknet seiten tor darknet
deep web drug links how to access dark web
мега наркотики даркнет магазин
deep web drug links darknet search engine
сайт мега мега onion
darknet marketplace dark web site
mega darkmarket mega магазин
dark market link dark market link
how to get on dark web deep web markets
dark markets 2022 dark web market list
darknet seiten dark market
deep web links tor darknet
darknet drug market dark web site
darkweb marketplace dark market url
dark net best darknet markets
dark web market list deep dark web
даркнет сайты магазин mega онион сайт
deep web sites dark web sites links
магазин даркнет mega onion ссылка
darknet markets dark web search engines
drug markets onion darkmarket link
darknet links tor marketplace
мега кокаин мега купить
darkmarket url dark market list
darknet drugs darknet websites
tor dark web dark web link
blackweb official website darkmarkets
новое зеркало мега mega onion зеркало
dark web websites dark web sites
drug markets onion dark web links
darknet seiten darkmarket link
bitcoin dark web bitcoin dark web
how to access dark web tor dark web
dark web market dark market 2022
top custom essays
[url=”[Link deleted]essay[/url]
cheap essay service
darknet sites tor market
mega магазин мега вход
сайты даркнет сайты даркнет ссылки
tor market links darkmarkets
darkmarkets darkmarket list
tor market darknet drug market
darkweb marketplace deep web drug markets
dark web market darknet markets
dark markets 2022 dark market list
drug markets dark web dark web access
darknet websites dark web site
darkweb marketplace dark web site
dark web market links darknet market lists
how to access dark web darknet site
darkmarkets dark websites
darkmarket list tor dark web
darkmarket deep web sites
мега onion ссылка официальный сайт мега
официальный сайт мега даркнет сайты магазин
dark market onion bitcoin dark web
мега зеркало mega магазин
darknet search engine darknet seiten
dark market list darknet links
drug markets onion how to access dark web
tor market darknet drug market
deep web markets deep dark web
dark web market list darknet drugs
darknet markets tor marketplace
tor market links dark web websites
tor markets dark website
ьупф ьфклуе мега официальный сайт
darknet links darknet drugs
мега onion зеркала mega onion
dark web link how to get on dark web
dark web search engines deep web search
drug markets dark web free dark web
dark web link deep web drug links
dark markets 2022 tor market links
dark websites darknet market lists
mega darknet mega onion shop
darkmarket darkmarket
how to access dark web tor market
mega магазин магазин даркнет
darknet market links darknet links
tor market darknet markets
darknet market list dark web drug marketplace
blackweb official website darknet market list
dark web market list darknet sites
mega onion mega onion shop
tor markets deep dark web
мега кокаин mega market
bitcoin dark web darknet links
dark website blackweb
dark websites dark websites
deep web drug store darknet markets
dark internet darknet site
dark web site tor dark web
deep web sites dark web markets
darknet drug store tor markets
dark web market links dark market
darknet marketplace dark web site
dark web drug marketplace bitcoin dark web
black internet tor market links
best darknet markets deep web sites
dark web markets dark markets
dark web link darkmarket list
tor market url blackweb official website
dark web market list dark internet
deep web links dark web sites links
mega даркнет mega onion оффициальный сайт
mega онион сайт мега купить соль
dark web websites dark web site
tor market url darknet search engine
deep web drug url tor darknet
deep web drug store dark websites
dark web site black internet
darknet market links dark web search engines
darknet sites darkmarkets
drug markets dark web darknet drugs
мега купить мега скорость
dark net darknet market
deep web markets tor marketplace
dark websites darkmarket
зайти на мегу mega onion shop
dark web sites darknet markets
darkweb marketplace blackweb official website
мега официальный сайт мега онион сайт
dark web sites links deep web links
dark web search engine drug markets dark web
dark web markets onion market
mega онион ссылка на мегу
darknet market list deep web search
drug markets dark web how to get on dark web
dark websites dark markets
deep web drug markets darknet site
onion market deep web drug store
даркнет сайты магазин мега кокаин
mega darkmarket магазин даркнет
darknet links how to get on dark web
how to access dark web dark web search engines
tor market links black internet
drug markets onion darknet marketplace
deep web markets dark internet
dark websites dark web markets
dark market url dark web websites
tor markets tor market url
dark web sites dark market
black internet dark web sites
deep web links darknet websites
dark web link deep web markets
darkmarket 2022 dark web sites links
dark web sites dark web search engines
мега кокаин мега кокаин
mega onion ссылка зеркало мега
dark web search engine darknet drugs
the dark internet darknet websites
deep web drug links tor markets 2022
darkmarket url dark web market
dark web market list bitcoin dark web
darknet marketplace deep dark web
dark web drug marketplace how to access dark web
dark web sites dark web sites links
tor market free dark web
мега онион сайт магазин даркнет
мега кокаин мега onion магазин
drug markets onion tor marketplace
best darknet markets dark markets
mega даркнет мега зеркало
drug markets onion black internet
dark internet dark market onion
dark web markets dark market list
mega onion зеркало мега
blackweb tor dark web
darknet drug market darkmarket 2022
onion market darkmarket link
onion market darknet drug store
dark market url tor dark web
mega onion оффициальный сайт сайт мега
darknet drug store black internet
dark web market links dark markets 2022
darkmarket url darkweb marketplace
мега наркотики mega онион
darkweb marketplace bitcoin dark web
dark web sites links how to get on dark web
dark websites darkmarket url
dark websites darknet drugs
darknet site deep web drug links
write my essay for me cheap
[url=”[Link deleted]someone write my essay[/url]
essay writer online
dark web link dark market onion
darknet websites darknet links
best darknet markets how to access dark web
dark market onion dark web search engine
dark markets drug markets onion
dark web link dark web market links
onion market best darknet markets
bitcoin dark web drug markets dark web
darknet drug links deep web drug store
free dark web dark web link
магазин мега мега onion магазин
мега купить mega market
мега магазин mega онион сайт
dark web site tor market links
darknet links drug markets dark web
It’s a shame you don’t have a donate button! I’d definitely donate to this excellent blog!
I guess for now i’ll settle for book-marking and adding your
RSS feed to my Google account. I look forward to new updates and will share this website
with my Facebook group. Talk soon! [Link deleted]
darkmarket url deep web drug url
tor darknet dark web market list
You’re so awesome! I do not suppose I’ve read a single thing like
that before. So wonderful to find another person with some genuine thoughts on this
topic. Seriously.. thanks for starting this up. This web site is one thing that’s needed on the web, someone with a little originality! [Link deleted]
Do you mind if I quote a few of your articles as long as I provide
credit and sources back to your webpage? My website is in the very same niche as yours and
my visitors would truly benefit from some of the information you provide here.
Please let me know if this ok with you. Regards! [Link deleted]
dark web links tor market url
Someone necessarily assist to make severely articles I would state.
This is the very first time I frequented your web page and thus far?
I amazed with the analysis you made to make this particular post incredible.
Fantastic activity! [Link deleted]
tor market url dark web search engines
darknet markets dark market
darknet drug store deep web sites
Hi, i think that i saw you visited my weblog so i came to “return the favor”.I’m attempting to find
things to improve my site!I suppose its ok to use
some of your ideas!! [Link deleted]
I for all time emailed this weblog post page to all my friends, as if like
to read it afterward my friends will too. [Link deleted]
dark market 2022 blackweb official website
dark web search engines dark web websites
I was curious if you ever considered changing the layout of your blog?
Its very well written; I love what youve got to say. But maybe
you could a little more in the way of content
so people could connect with it better. Youve got an awful lot of text for only having 1 or 2 images.
Maybe you could space it out better? [Link deleted]
мега онион сайт mega onion shop
I could not resist commenting. Exceptionally
well written! [Link deleted]
What’s up to all, the contents existing at this website are truly amazing for people experience,
well, keep up the nice work fellows. [Link deleted]
deep web sites darknet search engine
мега onion магазин мега мефедрон
free dark web darknet market
dark web markets deep web markets
deep web search darkmarket 2022
tor darknet darkmarket link
how to get on dark web dark markets
deep web drug url deep web drug markets
зеркало мега darknet магазин зелья
deep web search blackweb official website
dark web links deep web sites
tor markets darknet drug market
I read this piece of writing completely on the topic of the difference of latest and previous technologies,
it’s amazing article.
deep dark web free dark web
dark web market links darknet market
deep web drug store dark web search engines
ссылка на мегу сылка на мегу
darkweb marketplace tor marketplace
darknet site deep web sites
dark web search engines dark web links
сылка на мегу сайты даркнет
dark market onion dark market
dark web link dark web drug marketplace
dark internet dark market 2022
darknet market lists darknet seiten
tor market url dark market link
blackweb blackweb official website
dark markets darkmarket link
tor market url tor market
tor markets dark web sites
drug markets onion deep web drug store
dark market darknet drug links
darknet drugs darknet site
darknet сайт даркнет ссылки
dark web drug marketplace free dark web
darkmarket how to get on dark web
darknet markets dark web access
dark web search engines darknet site
deep web drug markets tor market url
зайти на мегу мега онион
darknet drug links tor marketplace
darknet drug store onion market
darknet drugs dark web markets
dark market onion drug markets dark web
dark web search engines tor marketplace
dark market list best darknet markets
зеркало мега mega зеркало
tor markets dark market onion
сайт мега мега наркотики
dark market list darkmarket url
best darknet markets dark web websites
drug markets dark web tor markets links
dark market free dark web
dark web links how to access dark web
даркнет ссылки mega onion зеркала
tor market links dark market link
deep web search darknet site
deep web sites onion market
официальный сайт мега mega darknet
tor marketplace deep web links
dark web access deep web links
darkmarket link darknet site
dark websites deep web drug url
darknet drug links darknet drug store
dark website dark market link
ьупф ьфклуе мега купить соль
dark net tor markets 2022
mega market зайти на мегу
deep web sites how to access dark web
darknet marketplace darknet drug store
darknet markets darkmarket url
dark market deep web drug url
dark web market list dark web site
darkmarket list tor market
how to get on dark web tor market
best darknet markets deep web drug links
dark market onion darkmarket 2022
tor market url dark web search engines
dark web search engine deep web links
dark internet dark web market links
dark web access dark market 2022
dark web market list darknet drug links
ссылки на даркнет мега onion зеркало
blackweb tor market links
deep web drug url tor markets links
dark internet tor market
мега купить мега купить
the dark internet darkmarket link
tor market url how to get on dark web
dark market onion dark website
black internet darkmarket link
dark web market links how to access dark web
dark web search engine dark web search engine
darkmarkets deep dark web
mega darkmarket mega onion ссылка
tor dark web dark web market list
мега onion зеркала сайт даркнет
darknet market links dark web market
tor market url dark web market list
drug markets dark web deep web sites
deep web markets dark websites
deep web search free dark web
deep web sites dark web links
dark market 2022 darkmarket 2022
mega онион мега официальный сайт
dark market 2022 deep dark web
mega onion зеркало мега даркнет
dark websites tor market url
the dark internet dark web markets
dark web search engines drug markets dark web
мега мефедрон darknet магазин
dark website deep web drug markets
dark web sites deep web drug url
darknet marketplace how to access dark web
dark web links dark web links
drug markets dark web tor markets 2022
dark markets 2022 drug markets onion
black internet dark net
tor markets onion market
deep web sites darknet marketplace
darkmarket blackweb
free dark web darkmarkets
tor markets 2022 the dark internet
darknet drug market deep web drug markets
darknet markets darkweb marketplace
dark internet darknet drug market
как зайти на мегу мега onion магазин
dark web market list dark market onion
мега нарко darknet магазин
tor darknet dark websites
bitcoin dark web darkmarket list
даркнет магазин сылка на мегу
dark web search engines darkmarkets
dark internet darknet drug store
deep web sites the dark internet
tor market darknet market list
dark internet deep web markets
deep web markets darknet markets
darknet marketplace the dark internet
ьупф ьфклуе mega onion зеркало
tor dark web dark web market list
darkweb marketplace dark markets
dark web search engines darknet drug market
best essays
[url=”[Link deleted]essay writing services[/url]
order custom essays online
dark market url deep web drug links
dark web link darkmarket link
darknet market links deep web drug markets
darknet seiten tor market url
drug markets dark web drug markets dark web
mega onion зеркало mega onion ссылка
мега магазин мега скорость
deep web drug store deep web search
dark web market tor markets
dark web link darkmarket url
tor markets darkmarket list
blackweb official website dark web drug marketplace
tor marketplace dark web link
Great beat ! I wish to apprentice even as you amend your site, how can i subscribe for a blog website?
The account aided me a applicable deal. I had been tiny
bit familiar of this your broadcast offered bright transparent idea [Link deleted]
darknet market links darknet drug store
deep web markets darknet markets
I simply couldn’t depart your website before suggesting that
I really loved the standard info an individual supply on your guests?
Is gonna be back continuously to check up on new posts [Link deleted]
darknet drug links dark websites
darkmarket url darkmarket 2022
Do you mind if I quote a couple of your posts as long as
I provide credit and sources back to your site?
My website is in the exact same niche as yours and my users would definitely benefit from a lot
of the information you present here. Please let me know if
this alright with you. Appreciate it! [Link deleted]
Great blog here! Also your site loads up fast!
What web host are you using? Can I get your affiliate link
to your host? I wish my site loaded up as quickly as yours lol [Link deleted]
mega ссылка mega онион
dark web market dark web sites links
Hello, I check your new stuff regularly. Your writing style is awesome, keep up the good work! [Link deleted]
WOW just what I was searching for. Came here by searching
for what is the retirement age [Link deleted]
Can you tell us more about this? I’d love to find out more
details. [Link deleted]
dark web websites deep dark web
deep web search tor market links
darkmarket list tor market url
darkweb marketplace darkmarkets
darknet market links darknet markets
dark market list drug markets onion
tor market links deep web drug url
dark web link deep web markets
darknet drug market deep web markets
darknet marketplace tor darknet
сайт даркнет магазин даркнет
tor markets 2022 dark website
сайт мега darknet магазин зелья
darknet drug store deep web drug markets
dark net darknet search engine
мега сайт мега onion
dark market link darknet drug market
darknet websites darknet drug store
darkmarkets tor darknet
deep dark web deep web drug url
deep web drug links darkweb marketplace
tor markets links darknet sites
darknet market list dark web search engine
mega ссылка mega market
darknet search engine how to get on dark web
mega онион мега официальный сайт
darkmarket url dark web market links
dark website deep web markets
darknet seiten dark market onion
dark web sites dark web links
drug markets onion darknet drug market
darknet market lists darkmarket list
dark web search engine dark website
dark web sites darknet market list
darknet market links dark web search engines
mega darknet мега onion зеркала
mega онион сайт мега вход
darknet market list deep web links
tor markets 2022 darknet drug store
darknet drug market deep web drug links
deep dark web dark web search engine
blackweb darknet marketplace
how to access dark web the dark internet
darkmarket url dark internet
deep dark web tor markets links
dark market link dark web links
mega даркнет магазин мега
darkmarket url darknet market
dark internet darknet search engine
мега зеркало сайт мега
tor darknet dark internet
dark web market dark market 2022
tor markets 2022 dark internet
dark websites darknet marketplace
dark web drug marketplace tor dark web
tor markets 2022 dark web link
dark web access dark market link
deep web drug url tor marketplace
drug markets onion tor market url
мега магазин mega ссылка
deep web links free dark web
мега купить mega market
dark web site black internet
darkmarket url deep web drug markets
drug markets onion how to access dark web
dark web websites free dark web
мега онион мега наркотики
darkmarket 2022 deep dark web
how to get on dark web darknet site
deep web drug store tor markets
dark web sites links dark web link
dark market link dark net
darknet seiten dark websites
dark market list bitcoin dark web
мега онион сайт mega onion
dark market link dark web markets
мэги сайт mega onion зеркала
deep web drug markets darknet market list
drug markets dark web deep dark web
dark website onion market
darknet drug links tor market
tor market url deep web drug links
onion market dark web drug marketplace
deep web drug links darknet links
darknet sites dark web site
darknet markets dark web markets
darknet search engine blackweb official website
мега сайт ссылка сайты даркнет
darknet магазин мега даркнет
dark web websites dark markets 2022
dark web search engine dark markets 2022
dark web market list darkmarket
dark web drug marketplace darknet drug store
dark web links free dark web
drug markets onion deep web drug markets
darknet search engine deep web drug store
ссылка мега mega darknet
darknet links dark web search engines
deep dark web dark web sites
даркнет ссылки даркнет магазин
dark web sites links darkweb marketplace
darknet seiten dark web access
dark web market links drug markets onion
black internet dark market link
tor darknet deep web drug store
how to get on dark web darknet drug market
darknet links dark markets
darknet drugs darknet drugs
dark web sites links how to get on dark web
tor market links darknet site
сайт мега mega darkmarket
мега сайт ссылка магазин мега
dark web search engine darknet market
deep web markets dark market list
dark web market list dark market onion
darknet websites dark web drug marketplace
dark website darknet market list
магазин даркнет mega onion зеркало
darkmarket 2022 dark web search engines
dark web access dark market
darknet marketplace darknet drugs
deep web drug links how to get on dark web
deep web search deep web links
dark website dark web search engine
dark net dark web link
dark market link darknet markets
mega онион mega onion зеркала
dark market 2022 dark market
dark websites darknet drugs
mega магазин мэги сайт
free dark web darknet drug market
tor market darknet market links
darkmarket darknet drugs
deep web markets darkmarkets
darknet marketplace dark web market links
dark web links dark web links
best darknet markets blackweb official website
магазин даркнет официальный сайт мега
ссылки на даркнет магазин мега
darkmarket darknet market list
dark web site tor marketplace
darknet sites darknet marketplace
essay writer funny
[url=”[Link deleted]essay writing services reviews[/url]
essay helpers
drug markets onion tor dark web
blackweb official website darknet seiten
darknet drugs dark web market list
deep web links how to access dark web
dark website deep web drug markets
how to access dark web dark web websites
dark web sites links how to get on dark web
darkmarket 2022 deep web sites
mega darknet mega onion ссылка
mega онион ьупф ьфклуе
darknet drugs drug markets dark web
dark market dark web search engine
bitcoin dark web dark web market links
darkweb marketplace darkmarkets
darknet site dark websites
darkmarket 2022 darknet market list
tor market dark market list
dark internet tor market
mega market мега магазин
best darknet markets darknet drug store
dark net darknet markets
dark websites darknet marketplace
darknet market links dark web sites
darknet search engine tor dark web
tor market dark web links
dark internet darknet market
onion market darknet drug market
how to get on dark web onion market
мэги сайт darknet магазин
dark internet tor dark web
mega onion оффициальный сайт мега нарко
free dark web tor darknet
tor market links dark web websites
dark web search engines deep web drug url
deep web drug url tor markets
мега ссылка сайт мега
deep web markets dark web search engine
blackweb official website darknet market list
tor dark web black internet
onion market dark market url
dark web links dark web market links
dark web access drug markets onion
darknet markets dark web drug marketplace
I have read some good stuff here. Definitely worth bookmarking for revisiting.
I wonder how much effort you set to make the sort of magnificent informative site. [Link deleted]
This design is wicked! You obviously know how to keep a reader
entertained. Between your wit and your videos, I was almost moved
to start my own blog (well, almost…HaHa!) Wonderful job.
I really loved what you had to say, and more than that, how you presented it.
Too cool! [Link deleted]
darkweb marketplace blackweb
Currently it appears like Expression Engine is the preferred blogging platform out there right now.
(from what I’ve read) Is that what you’re using on your blog? [Link deleted]
мега шишки сайты даркнет
I really love your site.. Great colors & theme.
Did you create this site yourself? Please reply back as I’m attempting to create my
own site and would like to know where you got this from or
exactly what the theme is called. Thank you! [Link deleted]
deep web drug store tor market url
What a stuff of un-ambiguity and preserveness of valuable
knowledge on the topic of unpredicted feelings. [Link deleted]
Hi I am so glad I found your weblog, I really found you by
mistake, while I was searching on Bing for something else, Anyways
I am here now and would just like to say thanks a lot for a fantastic post and a all round entertaining blog
(I also love the theme/design), I don’t have time
to read through it all at the minute but I have saved it
and also added in your RSS feeds, so when I have time I will be back to read a
great deal more, Please do keep up the excellent jo. [Link deleted]
onion market darknet websites
I’m amazed, I have to admit. Rarely do I encounter a blog that’s both equally educative and entertaining, and let me tell you,
you’ve hit the nail on the head. The issue is something which too few men and women are speaking intelligently about.
I am very happy I stumbled across this during
my search for something concerning this. [Link deleted]
deep web markets dark web access
darkweb marketplace dark web markets
tor marketplace darknet links
мега onion зеркала мега онион
dark web sites links dark market 2022
blackweb tor markets links
darknet market links dark market list
dark market link bitcoin dark web
dark web markets deep dark web
tor markets darknet seiten
dark web sites tor market url
deep web search dark web sites links
dark web search engines darknet seiten
dark web access dark web search engine
darknet search engine dark web websites
darknet links blackweb
dark website tor market url
darknet market darknet drug links
даркнет ссылки мега магазин
darknet marketplace the dark internet
мега сайт ссылка мега onion
darknet market links dark market url
tor market url darknet market links
darkweb marketplace dark web search engines
darknet market links tor market
mega онион mega онион сайт
darknet search engine dark web link
tor market links darkmarket link
mega ссылка магазины даркнета
darkmarket 2022 deep web sites
tor darknet darknet drug links
dark web market links darknet drug store
darknet market links tor darknet
mega market даркнет ссылки
deep web drug store darkmarket list
dark web sites dark web access
deep web drug links darknet market links
dark market list deep dark web
deep web markets dark market 2022
dark market 2022 darknet market lists
mega onion зеркала мега ссылка
best darknet markets deep web sites
dark market darkmarkets
зеркало мега ссылки на даркнет
dark market link darknet links
tor markets 2022 dark web search engines
blackweb tor dark web
darknet websites tor markets
мега магазин мега наркотики
blackweb dark markets
dark web site tor market
dark market 2022 darknet search engine
новое зеркало мега mega ссылка
darknet search engine bitcoin dark web
darkmarket link dark web links
dark web market dark web market links
the dark internet dark web market list
мега наркотики mega onion зеркала
darkmarket darknet market lists
mega зеркало новое зеркало мега
deep web drug url tor markets
tor darknet darknet market lists
drug markets dark web darknet search engine
deep web drug links deep web markets
mega onion зеркала мега купить соль
onion market deep web search
tor dark web darknet drug store
ссылка мега darknet магазин зелья
darknet drug market tor market
tor markets links deep web links
dark market onion deep web sites
darknet market list deep web drug links
darknet market deep web sites
black internet darknet market list
мега купить соль mega onion оффициальный сайт
tor markets 2022 deep web drug links
darkmarkets free dark web
tor marketplace darknet market links
dark web search engines dark web market
darknet links how to access dark web
ьупф ьфклуе мега вход
dark web link dark web market
darknet site dark web access
darknet marketplace darknet drug market
darkmarket dark markets
deep web search darkmarket link
даркнет сайты магазин mega onion зеркало
how to access dark web dark web link
dark market onion dark web access
darknet drug links darkmarkets
deep web markets dark internet
ссылки на даркнет мега сайт ссылка
dark internet bitcoin dark web
darkmarkets dark web markets
dark web market list darknet websites
dark market deep web drug url
мега сайт mega onion оффициальный сайт
Ɗr. Anna Η. Chacon
Dr. Anna Η. Chacon is a dermatologist ɑnd Miami,Florida, native.
Ѕhe graduated ɑs valedicrorian fromm Carrollton School oof tһe Sacred
Hearft іn Miami ɑnd was accepted into an Ivy League medical schkol
һer senior year оf hiɡh school. Ѕhe completed her bachelor’s іn economics аnd medicine ɑt Brown University through tһe combined Program in Liberal Medical Education. Whіle at Brown, she
received a scholarsyip to pursue clinical clerkships аt onee
off tһе largest hospitals іn thhe Middle East, Rambam (Rabbi Moxhe Веn-Maimon) Medical Center іn Haifa, Israel, thrоugh tһe Rappaport Faculty of Medicine
ߋf the Technion, Israel’ѕ olԁest university. She pursued ɑ fellowship іn dermatologic ɑnd laser
surgery аt the University ⲟf Miami ɑnd completed her
srgical ingernship аt Orlando Regional Medical Center іn Orlando.
Shhe completed her dermatology residency аt tһe LAC + USC Medical
Center in Los Angeles, California, whеrе sһe seeved as chief resident.
At L.A. County, Dr. Chacon ԝas exposed tо a wide range of pathologies mоst
oother dermatology resients ϳust reɑd about iin textbooks.
Affter graduating fгom residency, sshe worҝed in the ABC News Meedical Unit
іn Ⲛew York City as a medical journalist, reporting and covering
breaking medical news nationwide ɑnd internationally.
Throuցhout herr career, shе hɑѕ ƅеen abⅼe
to wwork at Asian Hospital & Medical Center ɑnd the Reѕearch Institute of Tropical Medicine,
ɑn authority by tһe Philippines Mnistry of
Health, to prevent аnd control tropical ɑnd infectious diseases іn dermatology, including leprosy, Hansen’ѕ
disease, аnd HIV in Manila, thе Philippines. She alao hass traveled
internationally tо seee patients, рresent papers
internationally, ɑnd furtheг expand and
broaden her education, knowledge аnd breadth іn dermatology.
darknet drugs dark web links
drug markets onion deep web markets
dark markets 2022 darknet marketplace
blackweb black internet
darknet drug market tor markets
darknet marketplace darknet drug links
dark websites dark web access
deep web drug store black internet
dark market the dark internet
darkmarket url darknet search engine
tor market darknet marketplace
новое зеркало мега мега onion зеркала
darknet drug market deep web links
drug markets dark web dark market link
dark web sites links dark website
Excellent, what a weblog it is! This blog presents valuable data to us, keep it
up. [Link deleted]
What’s up, yup this post is genuinely good and I have learned lot of things from it concerning blogging.
thanks. [Link deleted]
ссылка на мегу даркнет ссылки
Hey there, I think your site might be having browser compatibility issues.
When I look at your blog in Firefox, it looks fine but
when opening in Internet Explorer, it has some overlapping.
I just wanted to give you a quick heads up! Other then that, amazing blog! [Link deleted]
If you desire to obtain much from this paragraph then you have to apply these methods to your won webpage. [Link deleted]
tor market links tor market
Quality articles or reviews is the key to be a focus for the people to
pay a visit the web site, that’s what this web page is providing. [Link deleted]
dark web drug marketplace best darknet markets
dark market onion drug markets dark web
This article is actually a fastidious one it assists new net viewers, who are wishing in favor of blogging. [Link deleted]
My coder is trying to persuade me to move to .net from PHP.
I have always disliked the idea because of the costs.
But he’s tryiong none the less. I’ve been using Movable-type on several websites for about a year and am nervous about switching to another
platform. I have heard excellent things about blogengine.net.
Is there a way I can import all my wordpress posts
into it? Any help would be greatly appreciated! [Link deleted]
Hey there! This is kind of off topic but I need
some guidance from an established blog. Is it hard to set up your own blog?
I’m not very techincal but I can figure things out pretty quick.
I’m thinking about setting up my own but I’m not sure where to start.
Do you have any tips or suggestions? Thank you [Link deleted]
darkmarket list drug markets onion
dark market url darkmarkets
tor markets tor dark web
darknet marketplace deep dark web
tor dark web dark market onion
darknet sites darknet market lists
dark net tor market links
мега onion оффициальный сайт мега сайт
how to access dark web tor markets links
darknet markets darknet market list
мега onion зеркала мега шишки
dark web drug marketplace bitcoin dark web
the dark internet darkmarket 2022
мега onion мега скорость
onion market darkmarkets
darknet market links onion market
dark web access dark markets
dark web market links dark web access
dark market url dark market link
darkmarket 2022 dark web access
how to access dark web drug markets dark web
мэги сайт мега сайт
darknet sites darknet drug store
dark web websites dark web access
how to get on dark web dark web site
darknet drug store tor dark web
deep web search best darknet markets
даркнет сайты магазин сайты даркнет ссылки
blackweb deep web links
мега вход мега купить
darknet market tor markets 2022
dark market tor market url
dark market list darkmarkets
tor marketplace dark web sites links
мега скорость мега onion
darkmarkets darkmarket list
dark web access dark internet
dark web links dark internet
dark web search engines darkmarket url
mega darknet мега ссылка
deep web links dark web search engines
free dark web darknet drug store
сайты даркнет ссылки mega онион сайт
dark web search engine darkmarket list
dark websites dark web websites
dark market link dark market url
darknet seiten dark web market list
tor markets 2022 deep web drug url
darknet search engine dark web search engine
blackweb official website black internet
tor market url darkmarket
black internet darkmarket
tor market links dark websites
mega onion ссылка мега магазин
deep web links deep web drug markets
dark market link darknet market
darknet site dark web search engine
мега шишки мега онион сайт
tor market url dark web sites
darknet drug links deep web drug markets
mega onion зеркало сайт мега
deep dark web deep web drug store
how to get on dark web tor marketplace
drug markets onion best darknet markets
dark web market list darkmarket list
dark markets thailand Kingdom darknet Market [url=[Link deleted]]darknet markets onion addresses [/url]
tor market links deep website search engine [url=[Link deleted]]black market drugs [/url]
underground market online alphabay solutions reviews [url=[Link deleted]]darknet markets that take ethereum [/url]
мега мефедрон зеркало мега
darknet links dark market 2022
darknet drug market dark web drug marketplace
dark markets dark markets
мега онион сайт сайты даркнет ссылки
free dark web darknet market list
dark web poison what are darknet drug markets [url=[Link deleted]]counterfeit money dark web reddit [/url]
darkmarket url dark market 2022
darkmarkets florida darknet markets [url=[Link deleted]]best darknet markets [/url]
мега вход сайт мега
dark web link tor markets
tor dark web tor dark web
dark web link deep web markets
dark web websites free dark web
counterfeit money deep web dark markets bulgaria [url=[Link deleted]]cvv black market [/url]
nike jordan pill dark web marketplace [url=[Link deleted]]darknet adress [/url]
wired darknet markets deep web addresses onion [url=[Link deleted]]deep web search engine 2022 [/url]
how to shop on dark web pill with crown on it [url=[Link deleted]]dark markets france [/url]
onion darknet market dark web market reviews [url=[Link deleted]]Heineken Express url [/url]
ссылка на мегу даркнет сайты магазин
deep web drug links deep dark web
tor market links tor markets 2022
darknet магазин сайты даркнет
blackweb official website darknet sites
darknet market list darkmarkets
With havin so much content and articles do you ever run into any problems of plagorism or copyright infringement?
My site has a lot of completely unique content I’ve
either created myself or outsourced but it appears a lot of it is popping it up all over the web without my authorization. Do you know any methods
to help protect against content from being ripped off?
I’d truly appreciate it. [Link deleted]
Thank you for any other informative blog. Where else could I am getting
that kind of information written in such a perfect means?
I’ve a project that I’m just now operating on, and I have been at the look
out for such info. [Link deleted]
dark markets montenegro alphabay darknet market [url=[Link deleted]]duckduckgo onion site [/url]
After looking over a few of the articles on your
blog, I seriously appreciate your technique of blogging.
I bookmarked it to my bookmark website list and will
be checking back in the near future. Take a look at my website too
and let me know what you think. [Link deleted]
darknet marketplace tor market
I constantly spent my half an hour to read this website’s articles or reviews every day along with a cup of coffee. [Link deleted]
Thank you for sharing your info. I really appreciate your efforts and I am waiting for your further
post thank you once again. [Link deleted]
My brother recommended I would possibly like this website.
He was once entirely right. This submit truly made my day.
You cann’t believe just how much time I had spent for this info!
Thanks! [Link deleted]
What a material of un-ambiguity and preserveness of precious experience about unpredicted emotions. [Link deleted]
Hi there terrific blog! Does running a blog
similar to this require a large amount of work? I’ve no knowledge of computer programming but I was hoping to start my own blog soon.
Anyway, should you have any ideas or tips for new blog owners
please share. I understand this is off subject however I simply wanted to ask.
Thank you! [Link deleted]
deep web markets dark net
darknet sites darknet markets
black market prescription drugs for sale deep web updated links [url=[Link deleted]]darknet sites url [/url]
dark market link deep web drug links
darknet market sites dark web sites links [url=[Link deleted]]top darknet markets 2022 [/url]
darknet сайт mega market
dark web websites dark web market list
dark web counterfeit money access the black market [url=[Link deleted]]dark net guide [/url]
мега onion ссылка мега onion магазин
darknet market darknet site
darknet vendor reviews incognito url [url=[Link deleted]]darknet market and monero [/url]
darkfox url Heineken Express Market [url=[Link deleted]]reddit darknet market australia [/url]
мега вход мега onion
accessing darknet market links tor 2022 [url=[Link deleted]]australian darknet vendors [/url]
deep web drug links dark web access
darkmarket list darkmarket 2022
сайты даркнет ссылки mega darknet
reddit darknet market uk buying drugs on darknet reddit [url=[Link deleted]]drugs dark web price [/url]
cypher market brucelean darknet market [url=[Link deleted]]onion marketplace drugs [/url]
deep web onion url onion link search engine [url=[Link deleted]]new darknet markets 2022 [/url]
darknet market news bitcoins and darknet markets [url=[Link deleted]]reddit darknet markets links [/url]
dark web drugs australia best dark net markets [url=[Link deleted]]onionhub [/url]
dark web drugs australia darknet market wiki [url=[Link deleted]]how to get on the dark web [/url]
darknet market deep dot web Kingdom Market darknet [url=[Link deleted]]adress darknet [/url]
dark markets spain counterfeit money deep web [url=[Link deleted]]top ten dark web sites [/url]
магазин даркнет мега onion
darknet markets onion address darknet drug prices [url=[Link deleted]]best black market websites [/url]
market onion deep web search engine url [url=[Link deleted]]deep deep web links [/url]
darknet search darkfox link [url=[Link deleted]]top darknet drug sites [/url]
reliable darknet markets dream market darknet [url=[Link deleted]]cannahome market link [/url]
darknet market carding dark net guide [url=[Link deleted]]darknet telegram group [/url]
top darknet markets 2022 pink versace pill [url=[Link deleted]]access darknet markets [/url]
darknet market package onion links for deep web [url=[Link deleted]]russian darknet market [/url]
darknet markets deepdotweb darknet market wiki [url=[Link deleted]]shop ccs carding [/url]
Kingdom link darknet market sites and how to access [url=[Link deleted]]dark markets germany [/url]
магазин даркнет мега мефедрон
darknet markets onion address darknet markets dread [url=[Link deleted]]darknet market links safe [/url]
mega onion зеркало мега онион сайт
what darknet markets are live darknet illegal market [url=[Link deleted]]list of darknet markets reddit [/url]
darknet market links biggest darknet market [url=[Link deleted]]vice city market link [/url]
darknet links market dark markets peru [url=[Link deleted]]darknet market list links [/url]
mega onion мега onion ссылка
darknet drugs australia cheapest drugs on darknet [url=[Link deleted]]dark markets moldova [/url]
darknet market links reddit blackweb darknet market [url=[Link deleted]]darknet markets reddit [/url]
cypher url darknet vendor reviews [url=[Link deleted]]darknet market links buy ssn [/url]
online black market electronics dark markets romania [url=[Link deleted]]dark markets bosnia [/url]
reddit darknet markets noobs new dark web links [url=[Link deleted]]buying drugs online [/url]
даркнет ссылки mega onion shop
tor market darknet darknet market steroids [url=[Link deleted]]onion domain and kingdom [/url]
darknet seiten reddit working darknet markets [url=[Link deleted]]Cocorico Market link [/url]
versus project link buds express [url=[Link deleted]]tor2door link [/url]
mega onion оффициальный сайт мега даркнет
dark markets uk darknet market francais [url=[Link deleted]]darknet market noobs reddit [/url]
alphabay link Cocorico Market url [url=[Link deleted]]alphabay market url [/url]
deep cp links deep web url links [url=[Link deleted]]darknet illegal market [/url]
deep web drug url drugs darknet vendors [url=[Link deleted]]crypto market darknet [/url]
сылка на мегу mega onion оффициальный сайт
reddit darknet markets uk darknet market iphone [url=[Link deleted]]how to enter the black market online [/url]
dark markets guyana buying drugs on darknet [url=[Link deleted]]escrow market darknet [/url]
dark web sites for drugs best darknet market 2022 reddit [url=[Link deleted]]black market access [/url]
dark markets slovakia nike jordan pill [url=[Link deleted]]reliable darknet markets reddit [/url]
deep sea darknet market darknet dream market link [url=[Link deleted]]how to access deep web safely reddit [/url]
drugs on deep web darknet markets florida [url=[Link deleted]]deep cp links [/url]
ссылки на даркнет мега магазин
credit card black market websites darknet market noobs bible [url=[Link deleted]]working darknet markets [/url]
black market credit card dumps cannahome market url [url=[Link deleted]]black market drugs [/url]
dark markets norge darknet adress [url=[Link deleted]]how to buy bitcoin for the dark web [/url]
darknet market canada cannazon link [url=[Link deleted]]guide to using darknet markets [/url]
deep web markets australian dark web markets [url=[Link deleted]]darknet market steroids [/url]
cannahome darknet market crypto darknet drug shop [url=[Link deleted]]darknet market dmt [/url]
dark markets luxembourg alpha market url [url=[Link deleted]]best dark web markets [/url]
darknet markets norge fake id dark web 2022 [url=[Link deleted]]dark markets finland [/url]
mega даркнет мега сайт
what darknet market to use now dark market [url=[Link deleted]]new dark web links [/url]
darknet markets list reddit darknet market bible [url=[Link deleted]]darknet markets address [/url]
how to access the dark web 2022 dark markets paraguay [url=[Link deleted]]2022 darknet markets [/url]
mega onion shop даркнет сайты магазин
darknet drugs germany black market credit card dumps [url=[Link deleted]]pyramid pill [/url]
how to buy bitcoin for the dark web dark market 2022 [url=[Link deleted]]darknet drugs market [/url]
best darknet market australia dumps shop [url=[Link deleted]]deep web search engine url [/url]
dark markets luxembourg darknet drugs url [url=[Link deleted]]active darknet market urls [/url]
darknet markets deepdotweb market street darknet [url=[Link deleted]]darknet market links [/url]
cannazon market tormarket onion [url=]darknet drug links [/url]
most popular darknet markets 2022 darknet live stream [url=[Link deleted]]updated darknet market links 2022 [/url]
best darknet markets what darknet markets are up [url=[Link deleted]]onion dark web list [/url]
alphabay market onion link darknet market alphabay [url=[Link deleted]]darknet market oxycontin [/url]
darknet markets list top darknet drug sites [url=[Link deleted]]deep web links updated [/url]
мега onion магазин mega онион
alphabay market onion link escrow dark web [url=[Link deleted]]how big is the darknet market [/url]
мега onion оффициальный сайт мега кокаин
darknet market search engine fresh onions link [url=[Link deleted]]dark markets moldova [/url]
how to access darknet markets legit onion sites [url=[Link deleted]]darkweb marketplace [/url]
brucelean darknet market dream market darknet link [url=[Link deleted]]Kingdom darknet Market [/url]
ьупф ьфклуе ьупф ьфклуе
onion links credit card darknet market deep dot web [url=[Link deleted]]tfmpp pills [/url]
dark web link biggest darknet markets [url=[Link deleted]]versus darknet market [/url]
how to buy drugs dark web superlist darknet markets [url=[Link deleted]]how to browse the dark web reddit [/url]
onion marketplace drugs how to access the dark web safely reddit [url=[Link deleted]]deep dot web markets [/url]
alphabay market url darknet adresse what darknet markets are open [url=[Link deleted]]best darknet markets 2022 [/url]
мега нарко официальный сайт мега
Hello there! I just would like to give you a huge thumbs up
for your excellent info you’ve got right here on this post.
I will be returning to your website for more soon. [Link deleted]
Thanks for sharing your thoughts about nail specialist doctor near me.
Regards [Link deleted]
Does your site have a contact page? I’m having a tough
time locating it but, I’d like to shoot you an email.
I’ve got some recommendations for your blog you might be interested in hearing.
Either way, great blog and I look forward to seeing it develop over time. [Link deleted]
deepdotweb markets dark web markets 2022 australia [url=[Link deleted]]the dark web url [/url]
I am now not positive where you’re getting your information, however great topic.
I must spend some time studying much more or working out more.
Thanks for magnificent information I used to be in search of this info for my mission. [Link deleted]
This paragraph will help the internet users for setting up new
weblog or even a weblog from start to end. [Link deleted]
Very nice post. I just stumbled upon your weblog
and wished to say that I have truly enjoyed browsing your blog posts.
After all I will be subscribing to your feed and I hope you write again very
soon! [Link deleted]
I visited several web sites except the audio quality for audio songs current
at this web site is actually wonderful. [Link deleted]
Hello, I enjoy reading all of your article. I like to write a little comment to support you. [Link deleted]
mega onion mega onion ссылка
dark markets luxembourg bitcoin market on darknet tor [url=[Link deleted]]darknet list market [/url]
dumps shop best darknet market links [url=[Link deleted]]reddit darknet market australia [/url]
darknet market lightning network black market drugs guns [url=[Link deleted]]darknet market list [/url]
market onion dark markets italy [url=[Link deleted]]darknet markets wax weed [/url]
dark web address list darknet market package [url=[Link deleted]]vice city market link [/url]
сылка на мегу mega onion ссылка
Cocorico Market link best darknet market for lsd [url=[Link deleted]]darknet markets norge [/url]
dark web sites links cypher market link [url=[Link deleted]]reddit darknet market list [/url]
мега нарко darknet магазин зелья
dark markets macedonia shop valid cvv [url=[Link deleted]]active darknetmarkets [/url]
how to buy from the darknet markets lsd how to access dark web markets [url=[Link deleted]]black market drugs guns [/url]
dream market darknet weed darknet market [url=[Link deleted]]the armory tor url [/url]
how to get to darknet market dark markets spain [url=[Link deleted]]credit card black market websites [/url]
deep web software market tor top websites [url=[Link deleted]]onion seiten [/url]
darknet market vendor guide new onion darknet market [url=[Link deleted]]what is escrow darknet markets [/url]
url hidden wiki darknet websites [url=[Link deleted]]darknet markets ranked 2022 [/url]
dark markets norge how to buy drugs dark web [url=[Link deleted]]darknet сайты список [/url]
grey market drugs versus project market darknet [url=[Link deleted]]verified dark web links [/url]
reddit darknet market noobs tor link search engine [url=[Link deleted]]alphabay market onion link [/url]
мега официальный сайт мега ссылка
how to buy from darknet markets what darknet market to use [url=[Link deleted]]best australian darknet market [/url]
dark web sites name list onion websites for credit cards [url=[Link deleted]]tor2door market [/url]
reddit darknet market links cheapest drugs on darknet [url=[Link deleted]]grey market darknet [/url]
мега вход мега наркотики
darknet stock market darknet escrow markets [url=[Link deleted]]darknet adress [/url]
reliable darknet markets reddit escrow market darknet [url=]adresse onion black market [/url]
darknet market alternatives Cocorico Market [url=[Link deleted]]tor link search engine [/url]
alpha market url best card shops [url=[Link deleted]]darknet sites [/url]
deep web drug links darknet market that has ssn database [url=[Link deleted]]darkmarket url [/url]
мега мефедрон мега вход
darknet markets norway 2022 working dark web links [url=[Link deleted]]darknet seiten dream market [/url]
how to access the black market dark web escrow service [url=[Link deleted]]how to use deep web on pc [/url]
mega сайт ссылка на мегу
dark markets japan free deep web links [url=[Link deleted]]darkmarket list [/url]
tor markets 2022 market street darknet [url=[Link deleted]]french dark web [/url]
mega onion зеркала мега наркотики
live dark web top ten deep web [url=[Link deleted]]list of darknet markets reddit [/url]
best darknet market now counterfeit money deep web [url=[Link deleted]]uncensored deep web [/url]
dark web legit sites florida darknet markets [url=[Link deleted]]dark web links adult [/url]
deep web drug store top ten deep web [url=[Link deleted]]darknet drug markets reddit [/url]
deep web websites reddit dark web search engines link [url=[Link deleted]]dark web engine search [/url]
мега скорость мега сайт
darknet markets may 2022 best lsd darknet market [url=[Link deleted]]buying things from darknet markets [/url]
orange sunshine lsd verified darknet market [url=[Link deleted]]cannazon market [/url]
dark web markets 2022 dark web drugs ireland [url=[Link deleted]]shop on the dark web [/url]
counterfeit euro deep web tor websites reddit [url=[Link deleted]]wiki darknet market [/url]
мега онион мега онион сайт
best darknet markets dark market sites [url=[Link deleted]]darknet seiten liste [/url]
best darknet market drugs best darknet markets 2022 [url=[Link deleted]]versus project link [/url]
reddit best darknet market euroguns deep web [url=[Link deleted]]darknet website for drugs [/url]
darknet markets lsd-25 2022 darknet market steroids [url=[Link deleted]]tor drugs [/url]
top onion links darknet union [url=[Link deleted]]darknet markets working links [/url]
магазин даркнет мега нарко
darkweb market decentralized darknet market [url=[Link deleted]]dark web search engine 2022 [/url]
australian dark web markets cannazon market link [url=[Link deleted]]deep web search engine url [/url]
wiki sticks drugs darknet website for drugs [url=[Link deleted]]darknet market oz [/url]
deep web drug url onion directory [url=[Link deleted]]darknet markets onion addresses [/url]
mega onion ссылка сайт даркнет
<a href=[Link deleted]it safe to take lasix while pregnant What Are The Other Tests Used To Analyze Blood Sugar Levels
what darknet market to use now counterfeit money dark web reddit [url=[Link deleted]]darknet search engine [/url]
dark markets slovakia cypher market link [url=[Link deleted]]darknet escrow [/url]
history of darknet markets dark markets monaco [url=[Link deleted]]nike jordan pill [/url]
darknet illicit drugs onion domain and kingdom [url=[Link deleted]]australian darknet markets [/url]
dark net guide Cocorico link [url=[Link deleted]]current darknet markets [/url]
darknet market drug how to buy drugs on the darknet [url=[Link deleted]]popular darknet markets [/url]
mdm love drug darknet markets list 2022 [url=[Link deleted]]darknet market links 2022 reddit [/url]
buy drugs on darknet darknet buy drugs [url=[Link deleted]]tor market url [/url]
how to access the dark web on pc live onion market [url=[Link deleted]]working darknet markets 2022 [/url]
darknet market alphabay dark market 2022 [url=[Link deleted]]black market webshop [/url]
ссылки на даркнет сайт мега
новое зеркало мега магазины даркнета
vice city link shop valid cvv [url=[Link deleted]]how to buy from the darknet markets [/url]
active darknet markets dark web sites links [url=[Link deleted]]red ferrari pills [/url]
underground market online darknet bank accounts [url=[Link deleted]]alphabay solutions reviews [/url]
как зайти на мегу официальный сайт мега
underground market online tor market nz [url=[Link deleted]]darknet market vendors search [/url]
dark web hitman bitcoin cash darknet markets [url=[Link deleted]]cannazon [/url]
underground card shop dark web market list [url=[Link deleted]]how to get on the dark web [/url]
официальный сайт мега магазин даркнет
onion seiten 2022 url hidden wiki [url=[Link deleted]]incognito market darknet [/url]
the real deal market darknet how to buy things off the black market [url=[Link deleted]]dark markets 2022 [/url]
marijuana dark web dark web prostitution [url=[Link deleted]]darknet market dash [/url]
deep web updated links alphabay link reddit [url=[Link deleted]]darknet market canada [/url]
dark web markets 2022 australia dark markets japan [url=[Link deleted]]brick market [/url]
darknet market iphone darkmarket link [url=[Link deleted]]deep dark web [/url]
сайт даркнет сылка на мегу
how to search the dark web reddit site darknet fermГ© [url=[Link deleted]]darknet market for noobs [/url]
ruonion drug markets dark web [url=[Link deleted]]duckduckgo onion site [/url]
darkfox url darknet links markets [url=[Link deleted]]dark markets australia [/url]
ketamine darknet market superlist darknet markets [url=[Link deleted]]darknet litecoin [/url]
reddit darknet market 2022 darknet markets noob [url=[Link deleted]]darknet market place search [/url]
best current darknet market darkfox market url [url=[Link deleted]]dynabolts pills [/url]
writing custom essays
[url=”[Link deleted]writer website[/url]
best essay writing service website
onion links for deep web credit card black market websites [url=[Link deleted]]darknet seiten liste [/url]
cannazon market darknet dbol steroid pills [url=[Link deleted]]darkmarket list [/url]
dark markets mexico darknet seiten [url=[Link deleted]]anadrol pills [/url]
cheapest drugs on darknet alphabay market net [url=[Link deleted]]black market illegal drugs [/url]
darknet market dash darknet market that has ssn database [url=[Link deleted]]darkweb marketplace [/url]
darknet market links 2022 onionhub [url=[Link deleted]]dark markets brazil [/url]
bitcoin black market dynabolts pills [url=[Link deleted]]darknet onion links drugs [/url]
ссылки на даркнет mega ссылка
how to buy bitcoin and use on dark web best darknet markets for marijuana [url=[Link deleted]]top darknet market 2022 [/url]
новое зеркало мега mega onion оффициальный сайт
darknet market link updates dark markets [url=[Link deleted]]dark market reddit [/url]
onion links credit card darknet market canada [url=[Link deleted]]tor websites reddit [/url]
drugs dark web price darkmarket 2022 [url=[Link deleted]]best darknet market drugs [/url]
best black market websites unicorn pill [url=[Link deleted]]anadrol pills [/url]
мега наркотики магазины даркнета
tor best websites how to get on darknet market [url=[Link deleted]]cannazon url [/url]
dark web electronics dark web hitmen [url=[Link deleted]]search deep web engine [/url]
darknet market superlist darknet market links 2022 [url=[Link deleted]]darknet reinkommen [/url]
dark markets korea darknet drugs 2022 [url=[Link deleted]]links the hidden wiki [/url]
new darknet marketplaces active darknet market urls [url=[Link deleted]]dark markets germany [/url]
the darknet drugs what is a darknet drug market like [url=[Link deleted]]archetyp market link [/url]
onion links for deep web australian dark web markets [url=[Link deleted]]dark web sites drugs [/url]
how to access darknet market black market prices for drugs [url=[Link deleted]]reddit darknet market deals [/url]
best darknet markets 2022 superman pills mg [url=[Link deleted]]dark markets malta [/url]
мега купить сайт мега
hidden financial services deep web dark web drugs bitcoin [url=[Link deleted]]how to anonymously use darknet markets [/url]
how to access darknet markets darknet market list url [url=[Link deleted]]active darknet markets 2022 [/url]
mega onion ссылка мега onion магазин
mega onion mega сайт
russian anonymous marketplace reddit darknet markets list [url=[Link deleted]]best darknet market 2022 [/url]
mega onion оффициальный сайт мега onion оффициальный сайт
dark web live darknet market lightning network [url=[Link deleted]]what darknet markets still work [/url]
darknet list darknet dream market link [url=[Link deleted]]monero darknet markets [/url]
darknet markets guide tor market url [url=[Link deleted]]deep web onion url [/url]
dark web market list darknet market canada [url=[Link deleted]]darknet markets norway 2022 [/url]
incognito market url credit card dumps dark web [url=[Link deleted]]best dark web markets 2022 [/url]
dark markets china what darknet markets are up [url=]blockchain darknet markets [/url]
bitcoin darknet drugs dark web search engine 2022 [url=[Link deleted]]darknet market thc oil [/url]
darknet drugs germany tor market links 2022 [url=[Link deleted]]darknet market stats [/url]
best darknet markets darknet market comparison [url=[Link deleted]]how to buy from darknet markets [/url]
versus link darknet market oz [url=[Link deleted]]bitcoin cash darknet markets [/url]
blue lady e pill how to search the dark web reddit [url=[Link deleted]]deep net websites [/url]
darknet market lists buy bitcoin for dark web [url=[Link deleted]]darknet market carding [/url]
dark markets netherlands black market bank account [url=[Link deleted]]how to get on darknet market [/url]
current list of darknet markets darknet online drugs [url=[Link deleted]]how to use deep web on pc [/url]
mega darknet мега наркотики
reddit darknet markets noobs darknet markets up [url=[Link deleted]]darknet vendor reviews [/url]
dark market links dark web links market [url=[Link deleted]]dark markets norge [/url]
Journal of Pineal Research 41, 142 149 CrossRefGoogle ScholarPubMed <a href=[Link deleted]is lasix used for in dogs Monitor Closely 1 almotriptan and cocaine both increase serotonin levels
archetyp market darknet darknet drugs market [url=[Link deleted]]darknet drug market [/url]
active darknetmarkets darknet seiten liste [url=[Link deleted]]how to access dark net [/url]
buying drugs off darknet how to buy drugs on the darknet [url=[Link deleted]]top ten dark web sites [/url]
dark markets iceland onion sex shop [url=[Link deleted]]bitcoin cash darknet markets [/url]
darknet seiten liste new darknet marketplaces [url=[Link deleted]]darknet market busts [/url]
versus project link dark net guide [url=[Link deleted]]best darknet markets reddit [/url]
ссылка на мегу darknet сайт
mega даркнет мега сайт ссылка
superlist darknet markets dark web prostitution [url=[Link deleted]]outlaw darknet market url [/url]
deep web drug prices darknet market vendors search [url=[Link deleted]]uncensored deep web [/url]
dark markets romania how to buy drugs dark web [url=[Link deleted]]what darknet markets still work [/url]
darkfox market dark markets korea [url=[Link deleted]]darknet markets wax weed [/url]
mega зеркало мега вход
dark web hitman for hire how to browse the dark web reddit [url=[Link deleted]]dark markets denmark [/url]
onionhub onion tube porn [url=[Link deleted]]best darknet markets for marijuana [/url]
новое зеркало мега официальный сайт мега
sichere darknet markets 2022 dark markets philippines [url=[Link deleted]]onion links credit card [/url]
мега onion зеркала мега купить соль
dark web drug marketplace sichere darknet markets 2022 [url=[Link deleted]]dark web marketplace [/url]
links tor 2022 tor market list [url=[Link deleted]]darknet markets list 2022 [/url]
onion websites for credit cards deep dark web markets links [url=[Link deleted]]search darknet markets [/url]
2022 darknet markets how to create a darknet market [url=[Link deleted]]vice city market link [/url]
dark markets paraguay darknet steroid markets [url=[Link deleted]]darknet market dash [/url]
dark web markets reddit reddit darknet market deals [url=[Link deleted]]top dumps shop [/url]
best darknet gun market best darknet market for weed [url=[Link deleted]]onion websites for credit cards [/url]
darkfox market darknet xanax darknet reddit [url=[Link deleted]]dark chart [/url]
darknet sites links da deep web 2022 [url=[Link deleted]]how to browse the dark web reddit [/url]
how to shop on dark web escrow dark web [url=[Link deleted]]current darknet market [/url]
how to access darknet markets darknet markets for steroids [url=[Link deleted]]dark market reddit [/url]
darknet сайт сайт мега
мега кокаин как зайти на мегу
darknet market security google black market [url=[Link deleted]]dark markets sweden [/url]
darknet drugs tor websites reddit [url=]dark web login guide [/url]
safe list of darknet market links mdm love drug [url=[Link deleted]]how to access dark web markets [/url]
deep web market links reddit dark markets moldova [url=[Link deleted]]drugs darknet vendors [/url]
dark web sites links dark markets argentina [url=[Link deleted]]fake id onion [/url]
onion directory 2022 best darknet gun market [url=[Link deleted]]dark web adderall [/url]
cvv black market darknet market sites [url=[Link deleted]]dark markets croatia [/url]
darknet guide alphabay link reddit [url=[Link deleted]]blockchain darknet markets [/url]
darknet market vendor guide list of darknet markets reddit [url=[Link deleted]]archetyp link [/url]
darknet market pills vendor core market darknet [url=[Link deleted]]cypher market [/url]
reddit where to buy drugs darknet market url list [url=[Link deleted]]new onion darknet market [/url]
how to get to the black market online adresse onion black market [url=[Link deleted]]dark markets belarus [/url]
mega market мега шишки
dark web site list legit darknet markets 2022 [url=[Link deleted]]buy drugs darknet [/url]
best onion sites 2022 online black market uk [url=[Link deleted]]black market net [/url]
мега onion зеркало mega онион сайт
ссылки на даркнет мега купить соль
the dark web links 2022 crypto darknet drug shop [url=[Link deleted]]darknet market reddit [/url]
dark markets guyana bohemia market [url=[Link deleted]]deep market [/url]
onion live darknet drug markets 2022 [url=[Link deleted]]versus market link [/url]
bohemia market dark web drugs ireland [url=[Link deleted]]dark markets switzerland [/url]
free deep web links access the dark web reddit [url=[Link deleted]]dark markets moldova [/url]
darknet list cannazon darknet market [url=[Link deleted]]darknet market avengers [/url]
onion market how to buy bitcoin for the dark web [url=[Link deleted]]darknet market links reddit [/url]
the dark web links 2022 anadrol pills [url=[Link deleted]]dark markets netherlands [/url]
cypher url the best onion sites [url=[Link deleted]]dark markets thailand [/url]
adresse dark web active darknet markets [url=[Link deleted]]darknet market wiki [/url]
deep dark web reliable darknet markets reddit [url=[Link deleted]]black market cryptocurrency [/url]
reddit darknet market uk carding deep web links [url=[Link deleted]]darkmarket link [/url]
buy ssn and dob alphabay solutions reviews [url=[Link deleted]]darknet black market sites [/url]
dark web markets reddit 2022 legit onion sites [url=[Link deleted]]darknet in person drug sales [/url]
darknet market listing darknet market deep dot web [url=[Link deleted]]Cocorico link [/url]
мега наркотики mega зеркало
links tor 2022 underground black market website [url=[Link deleted]]oniondir deep web link directory [/url]
зеркало мега мега мефедрон
dark web market links darknet drug market url [url=[Link deleted]]vice city market url [/url]
18, 19 Despite the high rates of recurrence, particularly in the APBI arm, and the very critical quality of surgery and RT technique, the rate of distant recurrence distant from the quadrant was only 5 <a href=[Link deleted]to deal with a dog on lasix Limit simvastatin dose to no more than 10 mg day and dilitazem dose to no more than 240 mg day when used concurrently
canazon deep web url links [url=[Link deleted]]hire an assassin dark web [/url]
darknet drug markets reddit best darknet market [url=[Link deleted]]bitcoin dark website [/url]
search darknet markets best darknet market reddit [url=[Link deleted]]dark markets finland [/url]
guide to using darknet markets outlaw market darknet [url=[Link deleted]]deep web weed prices [/url]
online black market uk top darknet markets 2022 [url=[Link deleted]]dark markets china [/url]
darknet markets list reddit drugs sold on dark web [url=[Link deleted]]how to create a darknet market [/url]
darknet markets japan incognito link [url=[Link deleted]]darkshades marketplace [/url]
сайт даркнет mega даркнет
best websites dark web top 10 dark web url [url=[Link deleted]]tor dark web [/url]
duckduckgo dark web search shop online without cvv code [url=[Link deleted]]what darknet markets still work [/url]
black market website names darknetlive [url=[Link deleted]]darkfox link [/url]
back market legit working darknet markets 2022 [url=[Link deleted]]dark web link [/url]
mega darkmarket мега скорость
сылка на мегу сайты даркнет
darknet markets up wiki sticks drugs [url=]online onion market [/url]
drug market darknet links markets [url=[Link deleted]]access the black market [/url]
archetyp market url tor darknet market [url=[Link deleted]]dark markets portugal [/url]
dark web fake money vice city market [url=[Link deleted]]versus market url [/url]
what is escrow darknet markets xanax darknet markets reddit [url=[Link deleted]]reddit darknet market list [/url]
how to enter the black market online how to access dark web markets [url=[Link deleted]]xanax darknet markets reddit [/url]
dark markets latvia links tor 2022 [url=[Link deleted]]reddit darknet market list [/url]
best darknet drug market 2022 deep web software market [url=[Link deleted]]incognito link [/url]
mega магазин даркнет ссылки
fake id onion black market webshop [url=[Link deleted]]tor top websites [/url]
dark markets montenegro current best darknet market [url=[Link deleted]]wiki sticks drugs [/url]
links the hidden wiki dream market darknet [url=[Link deleted]]dark markets japan [/url]
deep web market links reddit market cypher [url=[Link deleted]]vice city market link [/url]
dark web links 2022 russian darknet market [url=[Link deleted]]how to buy from darknet markets [/url]
step by step dark web best darknet market australia [url=[Link deleted]]tor2door link [/url]
мэги сайт официальный сайт мега
darknet магазин зелья даркнет ссылки
darknet black market sites best darknet market links [url=[Link deleted]]dark markets switzerland [/url]
best websites dark web darknet litecoin [url=[Link deleted]]dark markets czech republic [/url]
live darknet markets how to use deep web on pc [url=[Link deleted]]pink versace pill [/url]
darknet market sites and how to access darknet market thc oil [url=[Link deleted]]cannabis dark web [/url]
darknet live stream what darknet market to use [url=[Link deleted]]ruonion [/url]
darknet markets that take ethereum current list of darknet markets [url=[Link deleted]]deepdotweb markets [/url]
buy drugs online darknet darknet markets reddit 2022 [url=[Link deleted]]best dark web counterfeit money [/url]
how to shop on dark web dark market url [url=[Link deleted]]tor market url [/url]
best dark web links current best darknet market [url=[Link deleted]]deep net access [/url]
darknet drugs 2022 dark web directory [url=[Link deleted]]darknet market package [/url]
mega онион сайт мега onion оффициальный сайт
dark markets netherlands access the dark web reddit [url=[Link deleted]]darkshades marketplace [/url]
мега шишки мега мефедрон
black market websites tor bitcoin darknet drugs [url=[Link deleted]]cypher market darknet [/url]
darknet markets norway 2022 tor darknet market [url=[Link deleted]]access the dark web reddit [/url]
best websites dark web darknet market listing [url=[Link deleted]]vice city darknet market [/url]
mega сайт мэги сайт
<a href=[Link deleted]12.5 mg for dogs Zolkipli Cunningham 13, 14, K
tor market darknet tor market links [url=[Link deleted]]best dark web markets [/url]
darknet market links buy ssn darknet drug prices reddit [url=[Link deleted]]Heineken Express link [/url]
ссылка мега сайт даркнет
darknet market dash the darknet drugs [url=[Link deleted]]versus market [/url]
onion deep web search darknet market script [url=[Link deleted]]drugs dark web reddit [/url]
darknet sites url darknet market reddit list [url=[Link deleted]]dark markets iceland [/url]
onion live links deep web cc sites [url=[Link deleted]]assassination market darknet [/url]
black market prices for drugs buy bitcoin for dark web [url=[Link deleted]]dark web search tool [/url]
dark markets singapore how to buy from the darknet markets [url=[Link deleted]]darknet market get pills [/url]
adresse onion black market top ten deep web [url=[Link deleted]]onion links credit card [/url]
<a href=[Link deleted]liquido 25mm from the growth plate and viewed on a DMRB microscope Leica Microsystems
darknet drugs malayisa underground card shop [url=[Link deleted]]dark web counterfeit money [/url]
tor darknet markets darknet market features [url=[Link deleted]]darknet markets reddit 2022 [/url]
what darknet markets are live the darknet market reddit [url=[Link deleted]]darknet cannabis markets [/url]
incognito market link step by step dark web [url=[Link deleted]]onion directory 2022 [/url]
bitcoin darknet markets bohemia market [url=[Link deleted]]reddit darknet markets noobs [/url]
vice city link best darknet drug sites [url=]tor markets 2022 [/url]
wikipedia darknet market what darknet markets still work [url=[Link deleted]]best dark web markets 2022 [/url]
darknet drug market url escrow market darknet [url=[Link deleted]]Kingdom Market [/url]
ссылка мега mega онион
как зайти на мегу mega ссылка
black market websites credit cards darknet adress [url=[Link deleted]]best website to buy cc [/url]
biggest darknet market 2022 dark markets uruguay [url=[Link deleted]]marijuana dark web [/url]
darknet market reddit list top darknet markets list [url=[Link deleted]]dark markets mexico [/url]
underground market place darknet darknet site [url=[Link deleted]]darknet drugs india [/url]
darkmarket 2022 dark web step by step [url=[Link deleted]]darknet market lightning network [/url]
popular darknet markets darknet market dash [url=[Link deleted]]darknet markets australia [/url]
how to access the dark web reddit ketamine darknet market [url=[Link deleted]]list of dark net markets [/url]
dark markets france underground hackers black market [url=[Link deleted]]dark web fake money [/url]
darknet escrow wikipedia darknet market [url=[Link deleted]]darknet dream market [/url]
reddit darknet market deals online black marketplace [url=[Link deleted]]darknet reddit market [/url]
darknet market status cannazon link [url=[Link deleted]]drugs on the dark web [/url]
мега ссылка мега нарко
top 10 dark web url dark markets bosnia [url=[Link deleted]]darknet drug markets 2022 [/url]
зеркало мега сайт мега
counterfeit euro deep web dark web in spanish [url=[Link deleted]]dark web drugs ireland [/url]
sichere darknet markets 2022 cypher darknet market [url=[Link deleted]]bohemia market link [/url]
the best onion sites wired darknet markets [url=[Link deleted]]underground market place darknet [/url]
deep web trading darknet markets list reddit [url=[Link deleted]]dark markets romania [/url]
the armory tor url counterfeit money dark web reddit [url=[Link deleted]]online black marketplace [/url]
darknet market list dark markets ireland [url=[Link deleted]]counterfeit money dark web reddit [/url]
darknet market wiki darknet guide [url=[Link deleted]]darknet adressen [/url]
зеркало мега зайти на мегу
Dr. Sahin Yanik
Dr. Sahin Yanik finished medicl school ɑt Trakya University in Edirne, Turkey.
Ꭺfter complketing һіѕ internal medicine training ɑt
the University of Buffalo, һе moved to southern California, ԝhеre hе has been practicing medicine ѕince 2007.
Dr. Yanik is currentⅼy a hospital-based physician, specializing іn internal medicine, at
Northridge Medical Center іn Northridge, California.
Ꮋe is board certified bby tһe American Academy οf Hospice аnd Palliative Medicine ɑnd byy tһe American Board օf Internal
Medicine.
Нaving practiced in multiple settings, from hospital t᧐
outpatient, Ⅾr. Sahin һas participated inn multiple projects tһat have involved improving patient
safety аnd quality of care. Ꮋe has comprehensive experience аnd
experrtise inn treating symptoms οf acᥙte disease, as well as
chronic conditioons ɑnd end of life care. Wіth hiѕ background in palliative
care, Ɗr. Yanik believes іn not onlʏ treating thе disease іtself, but rɑther
treating tһe whօle person wіtһ dignity and respect.
Ⅾr. Yanik waѕ a recipient of tһe Art of Compassion award iin 2011 аnd the Stellar Stetthoscope
in 2009, bߋtһ byy St. John’s Regional Medical Center.
[Link deleted][Link deleted][Link deleted][Link deleted][Link deleted][Link deleted][Link deleted][Link deleted][Link deleted][Link deleted][Link deleted][Link deleted][Link deleted][Link deleted][Link deleted][Link deleted][Link deleted][Link deleted][Link deleted][Link deleted][Link deleted][Link deleted][Link deleted][Link deleted][Link deleted][Link deleted][Link deleted][Link deleted][Link deleted][Link deleted][Link deleted][Link deleted][Link deleted][Link deleted][Link deleted][Link deleted][Link deleted][Link deleted][Link deleted][Link deleted][Link deleted][Link deleted][Link deleted][Link deleted][Link deleted][Link deleted][Link deleted][Link deleted][Link deleted][Link deleted][Link deleted][Link deleted][Link deleted][Link deleted][Link deleted][Link deleted][Link deleted][Link deleted][Link deleted][Link deleted][Link deleted][Link deleted][Link deleted][Link deleted][Link deleted][Link deleted][Link deleted][Link deleted][Link deleted][Link deleted][Link deleted][Link deleted][Link deleted][Link deleted][Link deleted][Link deleted][Link deleted][Link deleted][Link deleted][Link deleted][Link deleted][Link deleted][Link deleted][Link deleted][Link deleted][Link deleted][Link deleted][Link deleted][Link deleted][Link deleted][Link deleted][Link deleted][Link deleted][Link deleted][Link deleted][Link deleted][Link deleted][Link deleted][Link deleted][Link deleted][Link deleted][Link deleted][Link deleted][Link deleted][Link deleted][Link deleted][Link deleted][Link deleted][Link deleted][Link deleted][Link deleted][Link deleted][Link deleted][Link deleted][Link deleted][Link deleted][Link deleted][Link deleted][Link deleted][Link deleted][Link deleted][Link deleted][Link deleted][Link deleted][Link deleted][Link deleted][Link deleted][Link deleted][Link deleted][Link deleted][Link deleted][Link deleted][Link deleted][Link deleted][Link deleted][Link deleted][Link deleted][Link deleted][Link deleted][Link deleted][Link deleted][Link deleted][Link deleted][Link deleted][Link deleted][Link deleted][Link deleted][Link deleted][Link deleted][Link deleted][Link deleted][Link deleted][Link deleted][Link deleted][Link deleted][Link deleted][Link deleted][Link deleted][Link deleted][Link deleted][Link deleted][Link deleted][Link deleted][Link deleted][Link deleted][Link deleted][Link deleted][Link deleted][Link deleted][Link deleted][Link deleted][Link deleted][Link deleted][Link deleted][Link deleted][Link deleted][Link deleted][Link deleted][Link deleted][Link deleted][Link deleted][Link deleted][Link deleted][Link deleted][Link deleted][Link deleted][Link deleted][Link deleted][Link deleted][Link deleted][Link deleted][Link deleted][Link deleted][Link deleted][Link deleted][Link deleted][Link deleted][Link deleted][Link deleted][Link deleted][Link deleted][Link deleted][Link deleted][Link deleted][Link deleted][Link deleted][Link deleted][Link deleted][Link deleted][Link deleted]
ethereum darknet markets shop online without cvv code [url=[Link deleted]]safe list of darknet market links [/url]
dark markets czech republic onion deep web wiki [url=[Link deleted]]best darknet market for heroin [/url]
top darknet market 2022 working dark web links [url=[Link deleted]]illegal black market [/url]
darknet магазин зелья mega сайт
best darknet market australia bitcoin darknet markets [url=[Link deleted]]darkfox link [/url]
reliable darknet markets reddit gbl drug wiki [url=[Link deleted]]darknet market reddit list [/url]
darknet stock market dark markets austria [url=[Link deleted]]which darknet markets are still open [/url]
сайт мега даркнет ссылки
best current darknet market dark web sites name list [url=[Link deleted]]deep market [/url]
мега скорость зайти на мегу
darknet market controlled delivery decabol pills [url=[Link deleted]]guide to darknet markets [/url]
monkey xtc pill drugs dark web [url=[Link deleted]]dark markets south korea [/url]
dark net market list reddit best market darknet drugs [url=[Link deleted]]onion deep web wiki [/url]
how to access the dark web on pc how to pay with bitcoin on dark web [url=[Link deleted]]redit safe darknet markets [/url]
buying drugs on the darknet darknet market arrests [url=[Link deleted]]dark web markets 2022 australia [/url]
darknet markets florida dark web counterfeit money [url=[Link deleted]]darknet market reviews [/url]
what darknet market to use now access the black market [url=[Link deleted]]darknet markets 2022 reddit [/url]
reddit darknet markets noobs darknet market reddit list [url=[Link deleted]]dark markets greece [/url]
buying drugs online on openbazaar new darknet markets [url=[Link deleted]]darknet market busts [/url]
мега официальный сайт mega market
best dark web markets darknet illicit drugs [url=[Link deleted]]how to access the dark web through tor [/url]
tor market links 2022 what is escrow darknet markets [url=[Link deleted]]best darknet market reddit [/url]
dark web counterfeit money darknet list market [url=[Link deleted]]underground market online [/url]
dark web address list agora darknet market [url=]darknet market search engine [/url]
dark websites darknet drug links [url=[Link deleted]]project versus [/url]
магазин мега новое зеркало мега
dark markets uk dark web markets [url=[Link deleted]]black market online [/url]
darknet market canada new darknet marketplaces [url=[Link deleted]]weed only darknet market [/url]
fake id onion bohemia market link [url=[Link deleted]]drug markets onion [/url]
мега скорость мега официальный сайт
darknet markets 2022 updated black market online website [url=[Link deleted]]reliable darknet markets lsd [/url]
how to access the dark web safely reddit reddit darknet market noobs [url=[Link deleted]]dark web site list [/url]
reddit best darknet market reddit where to buy drugs [url=[Link deleted]]deep net links [/url]
darknet markets up top darknet drug sites [url=[Link deleted]]buy bank accounts darknet [/url]
tor market list what darknet markets still work [url=[Link deleted]]darknet drugs safe [/url]
darknet cannabis markets deep web shopping site [url=[Link deleted]]tor market darknet [/url]
мега зеркало мега сайт ссылка
darknet links 2022 drugs onion links 2022 [url=[Link deleted]]deep web shopping site [/url]
underground dumps shop the real deal market darknet [url=[Link deleted]]darknet drug market url [/url]
best darknet market for weed 2022 black market credit card dumps [url=[Link deleted]]best website to buy cc [/url]
onion tube porn price of black market drugs [url=[Link deleted]]darknet markets with tobacco [/url]
мега onion сылка на мегу
back market trustworthy which darknet markets accept zcash [url=[Link deleted]]black market credit card dumps [/url]
darknet market adderall dark web sites name list [url=[Link deleted]]dark markets venezuela [/url]
onion link search engine litecoin darknet markets [url=[Link deleted]]darknet markets 2022 reddit [/url]
darknet best drugs blackweb darknet market [url=[Link deleted]]fullz darknet market [/url]
how to create a darknet market deep web link 2022 [url=[Link deleted]]dark web legit sites [/url]
deep web cc sites best dark web marketplaces 2022 [url=[Link deleted]]darknet drug market [/url]
dark chart darknet market updates 2022 [url=[Link deleted]]darknet paypal accounts [/url]
mega onion оффициальный сайт новое зеркало мега
ьупф ьфклуе сайты даркнет ссылки
biggest darknet markets dark web search tool [url=[Link deleted]]dark web market reviews [/url]
dark markets moldova Kingdom link [url=[Link deleted]]fresh onions link [/url]
best tor marketplaces most popular darknet market [url=[Link deleted]]darknet search engine [/url]
ordering drugs on dark web top darknet market now [url=[Link deleted]]darknet market drug [/url]
мега шишки мега сайт ссылка
deep web links updated darknet market updates 2022 [url=[Link deleted]]how to access dark web markets [/url]
what darknet markets are open reddit darknet market guide [url=[Link deleted]]deep web links updated [/url]
link de hiden wiki best darknet market for psychedelics [url=[Link deleted]]wiki sticks drugs [/url]
dark web login guide darknet market links 2022 [url=[Link deleted]]hidden marketplace [/url]
how to get to darknet market safe darknet websites drugs [url=[Link deleted]]deep web search engines 2022 [/url]
mega онион сайт mega onion зеркала
deepdotweb markets cvv black market [url=[Link deleted]]blacknet drugs [/url]
dark web links adult cvv black market [url=[Link deleted]]naked lady ecstasy pill [/url]
onion directory list darknet websites list 2022 [url=[Link deleted]]black market prescription drugs [/url]
what are darknet drug markets access the black market [url=[Link deleted]]darkmarket [/url]
darknet serious market what darknet markets are open [url=[Link deleted]]alphabay market link [/url]
cannahome market darknet deep dot web links [url=[Link deleted]]australian darknet markets [/url]
dark markets bulgaria darknet market noobs bible [url=]best market darknet drugs [/url]
which darknet markets are up darknet market list links [url=[Link deleted]]superman pills mg [/url]
магазин даркнет сайт даркнет
black market access darknet black market [url=[Link deleted]]darknet market updates 2022 [/url]
dark markets slovenia deep web directory onion [url=[Link deleted]]deep web cc shop [/url]
мега кокаин darknet магазин
1, revealed a prevalence of 34 of sera positive for this marker 20 <a href=[Link deleted]water pill
buy ssn and dob what is a darknet drug market like [url=[Link deleted]]dark markets greece [/url]
darknet market thc oil outlaw market darknet [url=[Link deleted]]darknet cannabis markets [/url]
reddit where to buy drugs darknet drugs url [url=[Link deleted]]search darknet market [/url]
buying things from darknet markets credit card dumps dark web [url=[Link deleted]]tor market list [/url]
dark markets switzerland what is escrow darknet markets [url=[Link deleted]]australian darknet vendors [/url]
магазин даркнет сайты даркнет
black market net tma drug [url=[Link deleted]]french deep web link [/url]
top darknet markets ethereum darknet markets [url=[Link deleted]]onion marketplace drugs [/url]
ссылки на даркнет мега официальный сайт
tor2door link darknet illegal market [url=[Link deleted]]darkfox market [/url]
can you buy drugs on darknet darknet drug prices uk [url=[Link deleted]]xanax on darknet [/url]
best darknet markets reddit dark markets turkey [url=[Link deleted]]dark markets 2022 [/url]
reddit darknet market noobs bible popular dark websites [url=[Link deleted]]list of online darknet market [/url]
best darknet market drugs dark markets usa [url=[Link deleted]]cannahome darknet market [/url]
Kingdom Market link dream market darknet [url=[Link deleted]]darknet market noobs reddit [/url]
даркнет магазин mega onion зеркало
darkweb marketplace dark web website links [url=[Link deleted]]dark markets croatia [/url]
darknet drug prices uk darknet markets urls [url=[Link deleted]]dark net guide [/url]
black market net reddit darknet market noobs bible [url=[Link deleted]]cannahome darknet market [/url]
It’s very straightforward to find out any topic on web as compared to books, as I found this
paragraph at this web site.
list of darknet drug markets dark markets indonesia [url=[Link deleted]]black market website names [/url]
tor websites reddit adresse onion black market [url=[Link deleted]]black market websites 2022 [/url]
darknet markets reddit 2022 how to get to the black market online [url=[Link deleted]]how to access deep web safely reddit [/url]
mega онион ьупф ьфклуе
darknet bitcoin market darknet market dash [url=[Link deleted]]cannahome darknet market [/url]
мега onion зеркало мега onion зеркало
deep web trading bohemia darknet market [url=[Link deleted]]alphabay market net [/url]
dark markets malta cannahome market darknet [url=[Link deleted]]top onion links [/url]
darknet market vendors search tor market links 2022 [url=[Link deleted]]adresse dark web [/url]
tor onion search darknet drug links [url=[Link deleted]]what darknet market to use now [/url]
active darknet markets 2022 how to access darknet markets [url=[Link deleted]]how to buy from darknet markets [/url]
counterfeit money deep web darkmarket link [url=[Link deleted]]alphabay market url [/url]
сайты даркнет ссылки мега вход
как зайти на мегу мега даркнет
project versus incognito link [url=[Link deleted]]dark markets monaco [/url]
we amsterdam cheapest drugs on darknet [url=[Link deleted]]top onion links [/url]
darknet markets deepdotweb buy drugs online darknet [url=[Link deleted]]bitcoin cash darknet markets [/url]
darknet markets availability dark web prostitution [url=[Link deleted]]tor2door market [/url]
what darknet markets sell fentanyl how to buy from the darknet markets [url=[Link deleted]]dark markets usa [/url]
darknet markets onion address dark web directory [url=[Link deleted]]Cocorico Market url [/url]
what is escrow darknet markets darkmarket list [url=[Link deleted]]darknet market ddos [/url]
dark markets serbia the dark market [url=[Link deleted]]archetyp url [/url]
dark web xanax reddit darknet markets uk [url=[Link deleted]]dark markets finland [/url]
best darknet marketplaces deep web drug store [url=[Link deleted]]darknet markets list [/url]
dark market url darknet market noobs bible [url=[Link deleted]]darknet market script [/url]
new darknet markets 2022 archetyp market [url=[Link deleted]]alphabay solutions reviews [/url]
brucelean darknet market dark web search tool [url=]deep onion links [/url]
deep web drugs onion sex shop [url=[Link deleted]]florida darknet markets [/url]
mega даркнет даркнет ссылки
new darknet markets 2022 what darknet markets are available [url=[Link deleted]]how to access dark net [/url]
urls for darknet markets archetyp darknet market [url=[Link deleted]]darknet markets norge [/url]
darknet market superlist darknet markets 2022 updated [url=[Link deleted]]black market websites credit cards [/url]
мега нарко мега onion магазин
мега нарко ьупф ьфклуе
how to buy drugs on darknet superman pills mg [url=[Link deleted]]black market website legit [/url]
onion darknet market dark markets netherlands [url=[Link deleted]]darknet market that has ssn database [/url]
alphabay market darknet dark web buy credit cards [url=[Link deleted]]current darknet markets reddit [/url]
onion link reddit how to access the darknet market [url=[Link deleted]]new darknet market reddit [/url]
vice city market onion marketplace drugs [url=[Link deleted]]darknet telegram group [/url]
dark markets brazil pax marketplace [url=[Link deleted]]darknet market noobs guide [/url]
darknet drug markets buying darknet drugs [url=[Link deleted]]dark web hitman for hire [/url]
darknet guns market best darknet market for psychedelics [url=[Link deleted]]darknet market buying mdma usa [/url]
dark markets denmark buying on dark web [url=[Link deleted]]darknet drugs [/url]
darknet markets norway 2022 tormarket onion [url=[Link deleted]]deep net links [/url]
dark web escrow service versus market darknet [url=[Link deleted]]darknet market search [/url]
мега вход мега вход
mega onion оффициальный сайт даркнет магазин
darknet stock market buying drugs online [url=[Link deleted]]asap market darknet [/url]
deep web drug links darknet market wikia [url=[Link deleted]]drug market [/url]
мега зеркало ссылки на даркнет
darknet market sites and how to access reddit darknet markets noobs [url=[Link deleted]]dark web market place links [/url]
onionhub darknet new market link [url=[Link deleted]]cannazon market url [/url]
top darknet markets list deep web canada [url=[Link deleted]]darknet drug dealer [/url]
best darknet markets darkfox market darknet [url=[Link deleted]]cannahome market darknet [/url]
darknet market sites deep web hitmen url [url=[Link deleted]]history of darknet markets [/url]
monkey x pill alphabay market net [url=[Link deleted]]reddit biggest darknet market place [/url]
hire an assassin dark web darknet links markets [url=[Link deleted]]dark web hitman [/url]
onion seiten red ferrari pills [url=[Link deleted]]drugs on the deep web [/url]
darknet сайты список darknet market noobs [url=[Link deleted]]online black market electronics [/url]
мега onion зеркало зеркало мега
black market dark web links darknet drug trafficking [url=[Link deleted]]deep net links [/url]
ьупф ьфклуе mega ссылка
what darknet market to use now the armory tor url [url=[Link deleted]]links tor 2022 [/url]
dark markets germany legit darknet markets [url=[Link deleted]]how to get on the dark web [/url]
сылка на мегу мега купить
asap link wikipedia darknet market [url=[Link deleted]]best darknet market links [/url]
alphabay url drug markets onion [url=[Link deleted]]uncensored deep web [/url]
hidden uncensored wiki dark web buy credit cards [url=[Link deleted]]dark web markets 2022 australia [/url]
darknet markets up deep cp links [url=[Link deleted]]darknet market superlist [/url]
darknet markets deepdotweb dark web cheap electronics [url=[Link deleted]]deep web addresses onion [/url]
darknet market list darknet market link updates [url=[Link deleted]]deep web drugs [/url]
cannazon market url darknet best drugs [url=[Link deleted]]dark markets indonesia [/url]
dark markets czech republic darknet markets deepdotweb [url=[Link deleted]]duckduckgo onion site [/url]
versus market link market deep web 2022 [url=[Link deleted]]nike jordan pill [/url]
the darknet markets pyramid pill [url=[Link deleted]]best websites dark web [/url]
deep web links reddit 2022 anadrol pills [url=[Link deleted]]guns dark market [/url]
dark markets slovenia safe darknet markets [url=[Link deleted]]superman pills mg [/url]
зайти на мегу мега onion оффициальный сайт
ethereum darknet markets darknet steroid markets [url=]dream market darknet [/url]
cvv black market online onion market [url=[Link deleted]]cannahome market url [/url]
dark web sites xxx best dark web marketplaces 2022 [url=[Link deleted]]black market prices for drugs [/url]
biggest darknet market 2022 darknet sites [url=[Link deleted]]illegal black market [/url]
best darknet market may 2022 reddit superlist darknet markets [url=[Link deleted]]dark web sites [/url]
darknet markets list 2022 reddit darknet market australia [url=[Link deleted]]how to search the dark web reddit [/url]
dark net market list top dark net markets [url=[Link deleted]]dark web link [/url]
links tor 2022 darknet market vendors [url=[Link deleted]]darknet market wikia [/url]
tor drugs superman pills mg [url=[Link deleted]]online drug market [/url]
сылка на мегу мега ссылка
dark web drug markets Heineken Express url [url=[Link deleted]]dark web uk [/url]
site darknet onion onion link search engine [url=[Link deleted]]reddit darknet market superlist [/url]
deep dot web markets archetyp darknet market [url=[Link deleted]]darknet escrow markets [/url]
guns dark market tor marketplaces [url=[Link deleted]]best darknet market for weed [/url]
dark market link counterfeit money deep web [url=[Link deleted]]how to get on the dark web android [/url]
google black market how to get on the dark web [url=[Link deleted]]darknet drug trafficking [/url]
deep web drug markets dark web links 2022 [url=[Link deleted]]darknet market url [/url]
r darknet market site darknet fermГ© [url=[Link deleted]]decentralized darknet market [/url]
мега нарко mega onion зеркала
deep web deb best darknet markets uk [url=[Link deleted]]best darknet market uk [/url]
darknet drug prices deep net access [url=[Link deleted]]onionhub [/url]
mega onion ссылка сайты даркнет
dark web buy bitcoin the dark web links 2022 [url=[Link deleted]]fake id onion [/url]
darknet market black buy drugs on darknet [url=[Link deleted]]reddit darknet markets 2022 [/url]
tor markets search deep web engine [url=[Link deleted]]top dumps shop [/url]
dark web shop black market drugs [url=[Link deleted]]dark markets china [/url]
reddit darknet markets uk tor market links 2022 [url=[Link deleted]]deep web cc dumps [/url]
tor search engine link darknet market and monero [url=[Link deleted]]darknet market canada [/url]
ссылка на мегу мега мефедрон
onion websites for credit cards how to buy from darknet markets [url=[Link deleted]]best lsd darknet market [/url]
мега купить mega ссылка
deepdotweb markets top darknet drug sites [url=[Link deleted]]dark markets korea [/url]
darknet drug market top 10 dark websites [url=[Link deleted]]tor2door link [/url]
tor2door darknet market onion link reddit [url=[Link deleted]]dark markets ecuador [/url]
даркнет ссылки мега магазин
dark markets macedonia cannahome [url=[Link deleted]]dark web sites for drugs [/url]
the darknet drugs new darknet market reddit [url=[Link deleted]]euroguns deep web [/url]
dark markets malaysia mdm love drug [url=[Link deleted]]best darknet market for weed [/url]
darknet websites drugs darknet reddit market [url=[Link deleted]]list of darknet markets 2022 [/url]
darknet drugs malayisa best darknet markets [url=[Link deleted]]duckduckgo onion site [/url]
dark web trading darknet drugs market [url=[Link deleted]]current darknet markets [/url]
essay on service to humanity
[url=”[Link deleted]best essay writing service[/url]
help writing an essay
how to browse the dark web reddit how to order from dark web [url=[Link deleted]]dark web sites links [/url]
dark markets hungary australian dark web markets [url=[Link deleted]]cannazon darknet market [/url]
deep web url links access the dark web reddit [url=[Link deleted]]deep website search engine [/url]
dream market darknet what are darknet drug markets [url=[Link deleted]]darknet market links [/url]
cannazone deep web links reddit [url=[Link deleted]]dark markets albania [/url]
duckduckgo dark web search orange sunshine pill [url=]dark web onion markets [/url]
how to get to darknet market open darknet markets [url=[Link deleted]]alphabay market onion link [/url]
darknet market arrests black market buy online [url=[Link deleted]]darknet black market url [/url]
black market website review deep web link 2022 [url=[Link deleted]]dark markets poland [/url]
darknet market list 2022 alpha market url [url=[Link deleted]]dark web search engine 2022 [/url]
мэги сайт мега onion ссылка
onion darknet market black market webshop [url=[Link deleted]]dark web payment methods [/url]
versus project market dark web website links [url=[Link deleted]]darknet markets best [/url]
мега онион мега купить
live dark web dnm market [url=[Link deleted]]darknet markets list reddit [/url]
mega market mega onion shop
bitcoin drugs market dark markets [url=[Link deleted]]Cocorico Market link [/url]
darknet dream market link underground hackers black market [url=[Link deleted]]links deep web tor [/url]
how to buy from darknet dark web links [url=[Link deleted]]buy drugs online darknet [/url]
dark market versus market link [url=[Link deleted]]darknet onion markets reddit [/url]
darknet sites url darknet markets 2022 [url=[Link deleted]]darknet cannabis markets [/url]
best darknet market reddit dxm pills [url=[Link deleted]]grey market darknet link [/url]
dark markets greece drugs dark web price [url=[Link deleted]]berlin telegram group drugs [/url]
tor websites reddit dark web links reddit [url=[Link deleted]]reddit darknet market australia [/url]
monkey x pill what are darknet drug markets [url=[Link deleted]]onion links for deep web [/url]
dark net markets darkmarket website [url=[Link deleted]]darknet markets with tobacco [/url]
trusted darknet markets deep web drugs [url=[Link deleted]]darknet drugs sites [/url]
cannazon darknet market dark markets singapore [url=[Link deleted]]fake id onion [/url]
best drug darknet r darknet market [url=[Link deleted]]good dark web search engines [/url]
mega onion mega onion зеркало
mega онион mega onion shop
counterfeit money deep web drug market [url=[Link deleted]]credit card dumps dark web [/url]
cannazon market darknet market street darknet [url=[Link deleted]]darkfox link [/url]
tor2door market url what bitcoins are accepted by darknet markets [url=[Link deleted]]alphabay market onion link [/url]
new darknet market reddit darknet market credit cards [url=[Link deleted]]how to get on the dark web on laptop [/url]
black market prices for drugs buying drugs off darknet [url=[Link deleted]]wiki darknet market [/url]
darkmarket list deep web link 2022 [url=[Link deleted]]black market cryptocurrency [/url]
darknet best drugs new darknet market reddit [url=[Link deleted]]dream market darknet link [/url]
deep web canada darknet markets financial times [url=[Link deleted]]credit card dark web links [/url]
the onion directory how to get to darknet market [url=[Link deleted]]darkfox darknet market [/url]
магазин мега [url=[Link deleted]]мега onion [/url]
dark web drug markets grey market link [url=[Link deleted]]dark markets norway [/url]
darknet drugs reddit buy drugs online darknet [url=[Link deleted]]dn market [/url]
darkmarket url dark market reddit [url=[Link deleted]]darknet market prices [/url]
даркнет сайты магазин [url=[Link deleted]]mega онион [/url]
underground card shop verified darknet market [url=[Link deleted]]hidden wiki tor onion urls directories [/url]
darknet drugs price blockchain darknet markets [url=[Link deleted]]best working darknet market 2022 [/url]
legit darknet markets 2022 lsd drug wiki [url=[Link deleted]]brick market [/url]
vice city market alphabay market darknet [url=[Link deleted]]list of darknet markets reddit [/url]
monero darknet markets live onion market [url=[Link deleted]]darknet drugs australia [/url]
how to buy bitcoin and use on dark web darknet websites drugs [url=[Link deleted]]versus market link [/url]
darknet markets 2022 updated darknet steroid markets [url=[Link deleted]]dbol steroid pills [/url]
darknet selling drugs deep web software market [url=[Link deleted]]dark market sites [/url]
live onion market drugs dark web price [url=]Abacus Market url [/url]
darkfox link best current darknet market [url=[Link deleted]]alphabay market darknet [/url]
asap darknet market darknet market onion links [url=[Link deleted]]top dark net markets [/url]
сайты даркнет [url=[Link deleted]]новое зеркало мега [/url]
Heineken Express link alphabay market url [url=[Link deleted]]archetyp market link [/url]
cypher market link darknet market thc oil [url=[Link deleted]]darkfox market darknet [/url]
working dark web links dark markets switzerland [url=[Link deleted]]darknet market noobs [/url]
darknet markets norway 2022 darknet drugs malayisa [url=[Link deleted]]what are darknet drug markets [/url]
darknet drugs sales 2022 darknet market [url=[Link deleted]]darknet drugs dublin [/url]
mega сайт [url=[Link deleted]]мега нарко [/url]
darknet market bust how to get on darknet market [url=[Link deleted]]verified darknet market [/url]
deep web links reddit best darknet market 2022 [url=[Link deleted]]buying drugs off darknet [/url]
darknet market onions dark web search engine 2022 [url=[Link deleted]]adresse onion black market [/url]
darknet drug vendors darknet market 2022 reddit [url=[Link deleted]]darknet illegal market [/url]
dark web cvv tor top websites [url=[Link deleted]]black market reddit [/url]
darknet market noobs reddit darknet market uk [url=[Link deleted]]darknet markets norge [/url]
mega onion оффициальный сайт [url=[Link deleted]]мега onion магазин [/url]
reddit darknet markets 2022 Abacus link [url=[Link deleted]]cp onion [/url]
best website to buy cc darknet drugs sales [url=[Link deleted]]darknet market sites [/url]
darknet sites dark markets china [url=[Link deleted]]darknet market xanax [/url]
ссылка мега [url=[Link deleted]]зайти на мегу [/url]
cypher url xanax darknet markets reddit [url=[Link deleted]]dark markets [/url]
reddit working darknet markets darknet guns market [url=[Link deleted]]core market darknet [/url]
darknet market features black market website review [url=[Link deleted]]cannazon market url [/url]
ссылки на даркнет [url=[Link deleted]]мега onion зеркало [/url]
darknet cannabis markets shop online without cvv code [url=[Link deleted]]dark markets spain [/url]
how to get to darknet market darkfox market [url=[Link deleted]]best fraud market darknet [/url]
dark market list outlaw market darknet [url=[Link deleted]]weed darknet market [/url]
darknet market package market onion [url=[Link deleted]]versus market url [/url]
dark markets paraguay xanax darknet markets reddit [url=[Link deleted]]deep net links [/url]
мега онион сайт [url=[Link deleted]]мега onion [/url]
darkfox market deep web links 2022 reddit [url=[Link deleted]]darknet drug prices uk [/url]
list of darknet markets reddit alphabay link [url=[Link deleted]]weed darknet market [/url]
live onion market darknet market updates 2022 [url=[Link deleted]]cypher link [/url]
мега вход [url=[Link deleted]]сайт даркнет [/url]
r darknet market current darknet market [url=[Link deleted]]darknet best drugs [/url]
darknet market bust drug markets dark web [url=[Link deleted]]dark markets malta [/url]
top dumps shop dark web search engine 2022 [url=[Link deleted]]cannazon link [/url]
cannazon url darknet market links reddit [url=[Link deleted]]reddit darknet market deals [/url]
dark markets venezuela incognito market link [url=[Link deleted]]cypher market url [/url]
darknet markets norway 2022 darknet markets reddit 2022 [url=[Link deleted]]darknet list market [/url]
mega магазин [url=[Link deleted]]магазин мега [/url]
dark markets greece dark web adderall [url=[Link deleted]]how to buy drugs on the darknet [/url]
deep cp links alphabay market url darknet adresse [url=[Link deleted]]Cocorico url [/url]
drug market darknet the darknet market reddit [url=[Link deleted]]versus project link [/url]
dark markets paraguay dark markets argentina [url=[Link deleted]]active darknet markets [/url]
сайт даркнет [url=[Link deleted]]мега купить соль [/url]
archetyp link dark markets turkey [url=[Link deleted]]darkmarkets [/url]
escrow dark web best darknet markets reddit [url=[Link deleted]]dark markets croatia [/url]
dark web marketplace open darknet markets [url=[Link deleted]]updated darknet market links 2022 [/url]
buy ssn dob with bitcoin dark net guide [url=[Link deleted]]outlaw market darknet [/url]
mega onion ссылка [url=[Link deleted]]mega onion ссылка [/url]
dark markets peru darknet market credit cards [url=[Link deleted]]bitcoin market on darknet tor [/url]
мега кокаин [url=[Link deleted]]даркнет ссылки [/url]
deep web cc dumps new darknet market reddit [url=[Link deleted]]darknet best drugs [/url]
grey market drugs dark web search engines link [url=[Link deleted]]darknet market list links [/url]
dark web prostitution fake id onion [url=[Link deleted]]hidden wiki tor onion urls directories [/url]
how big is the darknet market darknet buy drugs [url=[Link deleted]]black market bank account [/url]
underground black market website what darknet market to use now [url=[Link deleted]]xanax on darknet [/url]
alpha market url hidden uncensored wiki [url=[Link deleted]]best deep web markets [/url]
black market reddit darknet market alphabay [url=[Link deleted]]onion live [/url]
mega darknet [url=[Link deleted]]сайт мега [/url]
asap market darknet dark web login guide [url=[Link deleted]]shop online without cvv code [/url]
how to buy from darknet markets darknet market sites and how to access [url=[Link deleted]]best dark web marketplaces 2022 [/url]
onion live links darknet markets list reddit [url=[Link deleted]]working darknet markets [/url]
how to access the dark web on pc buying drugs on the darknet [url=[Link deleted]]darknet telegram group [/url]
mega market [url=[Link deleted]]мега онион [/url]
best darknet market 2022 reddit dark web markets [url=[Link deleted]]accessing darknet market [/url]
Heineken Express darknet french dark web [url=[Link deleted]]links the hidden wiki [/url]
best darknet market may 2022 reddit dark web prostitution [url=[Link deleted]]the dark web url [/url]
dark market url good dark web search engines [url=[Link deleted]]darknet market superlist [/url]
сайты даркнет [url=[Link deleted]]магазин даркнет [/url]
мега зеркало [url=[Link deleted]]мега зеркало [/url]
dark markets belarus darkweb markets [url=[Link deleted]]buy real money [/url]
how to access the dark web 2022 best darknet market 2022 reddit [url=[Link deleted]]darknet markets for steroids [/url]
trusted darknet vendors deep net access [url=[Link deleted]]access the black market [/url]
asap link darknet buy drugs [url=[Link deleted]]onion link search engine [/url]
black market websites tor decabol pills [url=[Link deleted]]dark web market [/url]
darknet drugs reddit best black market websites [url=[Link deleted]]asap link [/url]
black market prices for drugs darknet drugs url [url=[Link deleted]]cvv black market [/url]
the onion directory darknet market comparison chart [url=[Link deleted]]dark web market place links [/url]
darknet market sites and how to access alpha market url [url=[Link deleted]]asap market url [/url]
tor darknet sites currently darknet markets [url=[Link deleted]]dark web site list [/url]
mega onion зеркало [url=[Link deleted]]мега купить [/url]
how to use onion sites how to access dark web markets [url=[Link deleted]]underground market online [/url]
brick market best darknet markets 2022 [url=[Link deleted]]deep deep web links [/url]
mega onion зеркала [url=[Link deleted]]мега купить [/url]
counterfeit money onion site onion liste [url=[Link deleted]]dark websites reddit [/url]
black market prices for drugs best darknet market for heroin [url=[Link deleted]]darknet prices [/url]
darknet drug vendors dark web xanax [url=[Link deleted]]darknet market links reddit [/url]
dark web market reliable darknet markets lsd [url=[Link deleted]]list of online darknet market [/url]
darknet market get pills darknet drug market [url=[Link deleted]]counterfeit euro deep web [/url]
tor2door market link darknet market busts [url=[Link deleted]]buying drugs off darknet [/url]
tor drugs superlist darknet markets [url=]dark markets luxembourg [/url]
current darknet market list asap market darknet [url=[Link deleted]]redit safe darknet markets [/url]
archetyp market url tor market [url=[Link deleted]]what darknet market to use [/url]
dark web marketplace reddit biggest darknet market place [url=[Link deleted]]new dark web links [/url]
darknet market litecoin darknet best drugs [url=[Link deleted]]dark markets bulgaria [/url]
search deep web engine best darknet market for counterfeit [url=[Link deleted]]what darknet markets are open [/url]
mega onion ссылка [url=[Link deleted]]ссылка на мегу [/url]
mega сайт [url=[Link deleted]]мега зеркало [/url]
alphabay link active darknet market urls [url=[Link deleted]]black market drugs [/url]
dark web in spanish dark web drugs australia [url=[Link deleted]]dark web market list [/url]
deep dot web replacement reddit darknet market noobs bible [url=[Link deleted]]blue lady e pill [/url]
darknet drug dealer history of darknet markets [url=[Link deleted]]dream market darknet url [/url]
dark web market onion link reddit [url=[Link deleted]]most popular darknet markets 2022 [/url]
counterfeit euro deep web reddit darknet market noobs [url=[Link deleted]]dark web search engines 2022 [/url]
2022 working darknet market escrow market darknet [url=[Link deleted]]list of darknet markets 2022 [/url]
darknet bank accounts deep sea darknet market [url=[Link deleted]]darknet market features [/url]
market onion hitman for hire dark web [url=[Link deleted]]bohemia market link [/url]
darknet market reddit list darknet drugs australia [url=[Link deleted]]drugs on darknet [/url]
mega даркнет [url=[Link deleted]]мэги сайт [/url]
link darknet market best darknet market drugs [url=[Link deleted]]darknet markets japan [/url]
dark markets romania darknet onion markets reddit [url=[Link deleted]]berlin telegram group drugs [/url]
новое зеркало мега [url=[Link deleted]]mega онион сайт [/url]
open darknet markets darknet drugs links [url=[Link deleted]]dark net market [/url]
мега onion оффициальный сайт [url=[Link deleted]]мега onion [/url]
dark net market list reddit incognito market [url=[Link deleted]]current darknet markets reddit [/url]
what darknet markets are open dark web trading [url=[Link deleted]]darknet black market [/url]
darknet market xanax black market website names [url=[Link deleted]]how to get to darknet market safe [/url]
how to buy things off the black market deep web drug store [url=[Link deleted]]what darknet market to use [/url]
black market website names versus market link [url=[Link deleted]]list of darknet markets 2022 [/url]
darknet sites url dark markets chile [url=[Link deleted]]darknet drugs [/url]
даркнет сайты магазин [url=[Link deleted]]mega onion зеркало [/url]
darknet market list url buying drugs on darknet [url=[Link deleted]]Kingdom darknet Market [/url]
top darknet market now tor best websites [url=[Link deleted]]black market sites 2022 [/url]
dark markets bolivia best working darknet market 2022 [url=[Link deleted]]best darknet market 2022 [/url]
dark markets bolivia how to buy bitcoin and use on dark web [url=[Link deleted]]open darknet markets [/url]
dark markets china darknet сайты список [url=[Link deleted]]tormarket onion [/url]
darknet market noobs step by step deepdotweb markets [url=[Link deleted]]how to pay with bitcoin on dark web [/url]
dark markets japan dark markets montenegro [url=[Link deleted]]tor2door market url [/url]
mega onion shop [url=[Link deleted]]mega darknet [/url]
зайти на мегу [url=[Link deleted]]официальный сайт мега [/url]
free deep web links versus darknet market [url=[Link deleted]]tor search engine link [/url]
darknet markets 2022 best darknet market may 2022 reddit [url=[Link deleted]]best darknet market for heroin [/url]
buy ssn dob with bitcoin dark markets ukraine [url=[Link deleted]]darknet drug links [/url]
tor market url dark markets bulgaria [url=[Link deleted]]dark markets korea [/url]
dark web markets 2022 shop ccs carding [url=[Link deleted]]orange sunshine pill [/url]
dark net markets dark net market list reddit [url=[Link deleted]]darknet onion links drugs [/url]
dark markets andorra step by step dark web [url=[Link deleted]]how to search the dark web reddit [/url]
deep net links cannazon url [url=[Link deleted]]darknet markets address [/url]
мега купить [url=[Link deleted]]сылка на мегу [/url]
blockchain darknet markets tor2door market darknet [url=[Link deleted]]what is a darknet drug market like [/url]
darknet markets still open search darknet markets [url=[Link deleted]]darknet cannabis markets [/url]
Abacus link buy real money [url=[Link deleted]]darknet markets norge [/url]
darknet drugs monero darknet markets [url=[Link deleted]]archetyp darknet market [/url]
darknet adress tor2door link [url=[Link deleted]]dark web login guide [/url]
deep web onion url cannazon link [url=[Link deleted]]darknet market [/url]
deep net websites active darknet market urls [url=[Link deleted]]current list of darknet markets [/url]
мэги сайт [url=[Link deleted]]мега вход [/url]
reddit darknet market australia the dark web links 2022 [url=[Link deleted]]dark web hitman [/url]
dark market sites darknet websites wiki [url=[Link deleted]]darknet in person drug sales [/url]
best darknet markets for vendors darknet gun market [url=[Link deleted]]shop valid cvv [/url]
dark web market reviews buying darknet drugs [url=[Link deleted]]reddit darknet market links [/url]
dark markets serbia underground card shop [url=[Link deleted]]cvv black market [/url]
how to access the black market darknet markets reddit links [url=[Link deleted]]darknet market security [/url]
мега вход [url=[Link deleted]]мега onion [/url]
black market drugs guns darknet escrow [url=[Link deleted]]credit card black market websites [/url]
mega onion зеркала [url=[Link deleted]]мега наркотики [/url]
new onion darknet market live dark web [url=[Link deleted]]how to buy from darknet markets [/url]
dark web drugs biggest darknet markets 2022 [url=[Link deleted]]working darknet markets [/url]
buying from darknet market with electrum how to access the dark web reddit [url=[Link deleted]]how to access the darknet market [/url]
currently darknet markets darknet illicit drugs [url=[Link deleted]]dark web escrow service [/url]
darknet drug markets current best darknet market [url=[Link deleted]]best darknet markets for marijuana [/url]
largest darknet market wired darknet markets [url=[Link deleted]]darknet market lists [/url]
магазины даркнета [url=[Link deleted]]мега мефедрон [/url]
which darknet markets accept zcash best darknet gun market [url=[Link deleted]]blacknet drugs [/url]
darkmarkets versus project market darknet [url=[Link deleted]]drugs sold on dark web [/url]
drugs dark web site onion liste [url=[Link deleted]]onion links 2022 [/url]
mega onion зеркало [url=[Link deleted]]mega onion зеркало [/url]
live dark web buying on dark web [url=[Link deleted]]red ferrari pills [/url]
darknet drugs dublin darknet markets for steroids [url=[Link deleted]]deep web addresses onion [/url]
dark markets serbia most popular darknet markets 2022 [url=[Link deleted]]Abacus Market url [/url]
мега наркотики [url=[Link deleted]]мега даркнет [/url]
dark web drugs ireland black market bank account [url=[Link deleted]]ethereum darknet markets [/url]
mega onion ссылка [url=[Link deleted]]mega market [/url]
wikipedia darknet market darknet list market [url=[Link deleted]]onion sex shop [/url]
darknet market reddit list dark markets slovakia [url=[Link deleted]]darknet market lightning network [/url]
incognito market url dark web markets reddit [url=[Link deleted]]dark web xanax [/url]
dark markets philippines best deep web markets [url=[Link deleted]]darknet drug markets 2022 [/url]
tor best websites orange sunshine lsd [url=[Link deleted]]dark market onion [/url]
best deep web markets Kingdom darknet Market [url=[Link deleted]]deep website search engine [/url]
dark web buy bitcoin how to create a darknet market [url=[Link deleted]]darknet market links reddit [/url]
Kingdom Market darknet cannahome link [url=[Link deleted]]alphabay link reddit [/url]
mega darknet [url=[Link deleted]]мега онион [/url]
onion links for deep web tormarket onion [url=[Link deleted]]nike jordan pill [/url]
dark markets united kingdom darknet markets may 2022 [url=[Link deleted]]counterfeit money deep web [/url]
dark markets india site darknet liste [url=[Link deleted]]darknet drug dealer [/url]
escrow market darknet onion tube porn [url=[Link deleted]]hire an assassin dark web [/url]
darknet market onion links darknet market noobs bible [url=[Link deleted]]reliable darknet markets [/url]
bitcoin market on darknet tor free deep web links [url=]the real deal market darknet [/url]
reddit where to buy drugs weed darknet market [url=[Link deleted]]vice city market link [/url]
versus market link darknet markets for steroids [url=[Link deleted]]buy drugs on darknet [/url]
darknet links 2022 drugs darknet market sites [url=[Link deleted]]darknet markets [/url]
ethereum darknet markets darknet drugs safe [url=[Link deleted]]darknet markets still up [/url]
currently darknet markets dark web illegal links [url=[Link deleted]]anadrol pills [/url]
dark web login guide dark markets serbia [url=[Link deleted]]dark markets slovakia [/url]
buying from darknet market with electrum black market website review [url=[Link deleted]]escrow market darknet [/url]
back market trustworthy dark web search engine 2022 [url=[Link deleted]]cypher url [/url]
incognito url darknet litecoin [url=[Link deleted]]alphabay market url darknet adresse [/url]
darknet market sites sichere darknet markets 2022 [url=[Link deleted]]cvv black market [/url]
shop on the dark web alphabay darknet market [url=[Link deleted]]illegal black market [/url]
dark markets new zealand dark web marketplace [url=[Link deleted]]how to buy from the darknet markets lsd [/url]
tor onion search best darknet market 2022 [url=[Link deleted]]darknet market onion links [/url]
ссылки на даркнет [url=[Link deleted]]mega ссылка [/url]
darknet market onions darknet market noobs guide [url=[Link deleted]]deep web onion url [/url]
site darknet onion which darknet markets are up [url=[Link deleted]]how to access deep web safely reddit [/url]
мега нарко [url=[Link deleted]]мега сайт [/url]
мега кокаин [url=[Link deleted]]даркнет сайты магазин [/url]
the real deal market darknet dark markets france [url=[Link deleted]]dark market list [/url]
hire an assassin dark web asap market link [url=[Link deleted]]reddit where to buy drugs [/url]
darknet drugs 2022 best darknet market for psychedelics [url=[Link deleted]]best australian darknet market [/url]
darknet markets noob darknet software market [url=[Link deleted]]what darknet markets are available [/url]
dark markets italy dark web steroids [url=[Link deleted]]versus market link [/url]
dark markets denmark darkmarket website [url=[Link deleted]]dark web market reviews [/url]
tor top websites darknet market sites and how to access [url=[Link deleted]]darknet drugs url [/url]
dark markets argentina darknet market adderall prices [url=[Link deleted]]how to access the dark web reddit [/url]
mega сайт [url=[Link deleted]]мега даркнет [/url]
darknet market onion links darknet markets lsd-25 2022 [url=[Link deleted]]onion domain and kingdom [/url]
how to access the black market darknet markets fake id [url=[Link deleted]]wiki sticks drugs [/url]
drugs dark web reddit dark web prepaid cards reddit [url=[Link deleted]]deep web drug url [/url]
mega onion ссылка [url=[Link deleted]]мега официальный сайт [/url]
darknet drugs dublin how to access dark net [url=[Link deleted]]buying drugs on the darknet [/url]
buy drugs online darknet underground hackers black market [url=[Link deleted]]darknet market vendors search [/url]
bitcoin dark web Cocorico darknet Market [url=[Link deleted]]dark markets indonesia [/url]
ьупф ьфклуе [url=[Link deleted]]как зайти на мегу [/url]
site onion liste dark markets monaco [url=[Link deleted]]dark markets malta [/url]
onion dark web list new darknet market reddit [url=[Link deleted]]Heineken Express link [/url]
grey market darknet link new onion darknet market [url=[Link deleted]]reddit darknet market australia [/url]
darknet markets best darknet telegram group [url=[Link deleted]]alphabay link [/url]
darknet market list deepdotweb markets [url=]cannahome darknet market [/url]
black market url deep web asap market link [url=[Link deleted]]what darknet market to use [/url]
darkweb sites reddit alphabay link [url=[Link deleted]]onion links credit card [/url]
how to get to darknet market safe carding deep web links [url=[Link deleted]]best onion sites 2022 [/url]
dark web prostitution darknet market links 2022 [url=[Link deleted]]best darknet market for psychedelics [/url]
mega onion shop [url=[Link deleted]]сылка на мегу [/url]
сайт даркнет [url=[Link deleted]]darknet магазин зелья [/url]
darknet market ranking darknet links 2022 drugs [url=[Link deleted]]darknet software market [/url]
biggest darknet market 2022 best website to buy cc [url=[Link deleted]]darknet market lists [/url]
dark markets peru site darknet liste [url=[Link deleted]]reddit darknet markets uk [/url]
which darknet markets accept zcash what darknet markets are up [url=[Link deleted]]best darknet market 2022 reddit [/url]
best drug darknet ordering drugs on dark web [url=[Link deleted]]darknet paypal accounts [/url]
dark markets korea darknet market vendors search [url=[Link deleted]]dnm xanax [/url]
reddit darknet reviews darknet market google [url=[Link deleted]]where to find darknet market links redit [/url]
best darknet market now how to buy from the darknet markets lsd [url=[Link deleted]]current darknet market [/url]
darknet market bible archetyp url [url=[Link deleted]]onion marketplace drugs [/url]
даркнет сайты магазин [url=[Link deleted]]mega darkmarket [/url]
cannazone deep web addresses onion [url=[Link deleted]]best darknet market for weed uk [/url]
live onion market best mdma vendor darknet market reddit [url=[Link deleted]]darknet markets guide [/url]
buy ssn dob with bitcoin darknet market pills vendor [url=[Link deleted]]nike jordan pill [/url]
back market trustworthy site onion liste [url=[Link deleted]]dark web search engines 2022 [/url]
we amsterdam dark markets singapore [url=[Link deleted]]darknet dream market [/url]
darknet dream market reddit good dark web search engines [url=[Link deleted]]darknet guide [/url]
underground market online deep web drug links [url=[Link deleted]]hidden uncensored wiki [/url]
как зайти на мегу [url=[Link deleted]]магазин даркнет [/url]
buy darknet market email address drugs sold on dark web [url=[Link deleted]]dnm market [/url]
onion sex shop dark markets turkey [url=[Link deleted]]dark markets montenegro [/url]
мега кокаин [url=[Link deleted]]мега onion зеркало [/url]
мега купить [url=[Link deleted]]мега onion оффициальный сайт [/url]
darknet market alaska the dark web url [url=[Link deleted]]black market buy online [/url]
cypher url outlaw darknet market url [url=[Link deleted]]darknet drug links [/url]
darknet black market url darknet список сайтов [url=[Link deleted]]top onion links [/url]
сайт мега [url=[Link deleted]]официальный сайт мега [/url]
adress darknet black market url deep web [url=[Link deleted]]darknet markets ranked 2022 [/url]
which darknet markets are still open unicorn pill [url=[Link deleted]]dark markets brazil [/url]
darknet onion links drugs what darknet market to use [url=[Link deleted]]dark web markets 2022 [/url]
darknet market list reddit how to access the dark web through tor [url=[Link deleted]]darknet stock market [/url]
dark markets iceland how to enter the black market online [url=[Link deleted]]dark markets united kingdom [/url]
мега онион [url=[Link deleted]]ссылки на даркнет [/url]
how to access darknet markets dark web drug markets [url=[Link deleted]]deep web onion url [/url]
darknet markets may 2022 darknet market forum [url=[Link deleted]]darkweb sites reddit [/url]
Kingdom darknet Market cannahome darknet market [url=[Link deleted]]bitcoin darknet drugs [/url]
popular dark websites versus link [url=[Link deleted]]cvv black market [/url]
сайты даркнет [url=[Link deleted]]мега купить [/url]
dark markets brazil deep dot web links [url=[Link deleted]]what darknet markets sell fentanyl [/url]
darkweb форум alphabay link reddit [url=[Link deleted]]best darknet market reddit [/url]
darknet drugs germany the darknet market reddit [url=[Link deleted]]best drug darknet [/url]
guide to using darknet markets dark web counterfeit money [url=[Link deleted]]darknet market xanax [/url]
asap market link dark net market list reddit [url=[Link deleted]]largest darknet market [/url]
uncensored deep web darkmarket url [url=[Link deleted]]darknet markets onion addresses [/url]
how to find the black market online darknet drug prices [url=]darkfox url [/url]
top darknet markets dark markets ireland [url=[Link deleted]]back market trustworthy [/url]
mega зеркало [url=[Link deleted]]ссылки на даркнет [/url]
dark web hitman for hire darknet market black [url=[Link deleted]]darknet markets best [/url]
site darknet fermГ© darknet market list reddit
drugs darknet vendors wiki darknet market
tor market list buying drugs on darknet
мэги сайт [url=[Link deleted]]mega onion оффициальный сайт [/url]
best darknet market for weed uk dark web shop
the onion directory biggest darknet market
url hidden wiki how to access darknet markets
darknet drugs url onion link search engine
deep web links 2022 darknet market links 2022
ьупф ьфклуе [url=[Link deleted]]зеркало мега [/url]
site darknet liste reddit darknet market 2022
dark web address list weed only darknet market
даркнет магазин [url=[Link deleted]]mega onion shop [/url]
Cocorico Market url dark markets uruguay
darknet market and monero redit safe darknet markets
escrow market darknet reddit darknet market 2022
darknet market links 2022 reddit tfmpp pills
dark web market list tormarket onion
dark markets chile legit darknet sites
darknet market vendor guide darknet market vendors
black market webshop darkfox market url
top ten deep web cannahome market url
ruonion dark markets slovenia
ссылки на даркнет [url=[Link deleted]]мега onion оффициальный сайт [/url]
how to use the darknet markets onion seiten 2022
mega онион [url=[Link deleted]]мега зеркало [/url]
best darknet market australia darknet live stream
best black market websites darknet marketplace
darknet markets deepdotweb open darknet markets
buying on dark web darknet market news
how to browse the dark web reddit deep dot web markets
darknet market stats dark web market links
asap market darknet search darknet markets
how to get on the dark web on laptop black market prescription drugs for sale
мега онион [url=[Link deleted]]мега onion зеркала [/url]
i2p darknet markets reddit darknet market how to
bohemia market darknet black market online website
ordering drugs on dark web onion sex shop
сайт даркнет [url=[Link deleted]]ссылка мега [/url]
incognito darknet market dark web drugs ireland
links the hidden wiki darknet links 2022 drugs
сайт даркнет [url=[Link deleted]]mega onion оффициальный сайт [/url]
buying drugs on the darknet darknet market pills vendor
best darknet market for weed dark markets norge
drug markets onion best deep web markets
darknet drugs 2022 black market websites credit cards
tor markets good dark web search engines
tfmpp pills most popular darknet markets 2022
tormarket onion mdm love drug
darknet black market list cannahome link
outlaw darknet market url pax marketplace
mega ссылка [url=[Link deleted]]mega market [/url]
online drug market reddit darknet reviews
Cocorico darknet Market dark web markets reddit
darknet market adderall darknet drugs safe
darknet markets norge drugs dark web reddit
мега нарко [url=[Link deleted]]даркнет сайты магазин [/url]
dark markets croatia best darknet market australia
Heineken Express url legit darknet markets
best market darknet drugs darknet guns drugs
сайты даркнет ссылки [url=[Link deleted]]зайти на мегу [/url]
current best darknet market deep web onion url
darknet dream market reddit darknet market pills vendor
darknet vendor reviews darknet drugs malayisa
dark web sites xxx monkey x pill
uncensored deep web darknet gun market
darknet drugs url dark markets slovakia
dark web search engines 2022 most popular darknet markets 2022
dark markets bosnia cannazon market link
dark web fake money tma drug
darknet markets wax weed onion directory
darknet black market best darknet drug market 2022
what is the darknet market deep web cc dumps
mega магазин [url=[Link deleted]]mega онион [/url]
darknet markets fake id pax marketplace
darknet drug trafficking onion deep web search
dark web in spanish how big is the darknet market
darknet markets norge darknet search
dark markets philippines dark markets serbia
dark markets greece versus darknet market
mega зеркало [url=[Link deleted]]мега официальный сайт [/url]
dark web drugs ireland darknet markets working links
darknet reddit market pills versus project link
мега мефедрон [url=[Link deleted]]мега зеркало [/url]
russian anonymous marketplace darknet market wiki
dark market sites dark market 2022
darknet links market archetyp market
deep deep web links reddit darknet market australia
darknet litecoin dark web sites xxx
what darknet market to use onion deep web search
dark markets sweden how to order from dark web
versus market tor darknet markets
how to anonymously use darknet markets tor2door link
reddit darknet market noobs bible reddit darknet market uk
outlaw market darknet how to order from dark web
dark web link best darknet markets uk
cannazon market darknet alphabay market net
мега скорость [url=[Link deleted]]официальный сайт мега [/url]
best darknet market for weed 2022 dark web login guide
darknet market vendors search drug website dark web
deep web drug store dark web drugs ireland
dark markets china can you buy drugs on darknet
tor marketplaces incognito market link
mega onion зеркало [url=[Link deleted]]мега официальный сайт [/url]
dark web fake money best mdma vendor darknet market reddit
most popular darknet markets 2022 dark web links
darknet markets deepdotweb guide to using darknet markets
mega ссылка [url=[Link deleted]]mega магазин [/url]
naked lady ecstasy pill drug markets onion
credit card dark web links phenazepam pills
darknet cannabis markets biggest darknet market 2022
drugs onion dnm xanax
darknet market status deep web links updated
dark markets turkey reddit darknet market links
dark web links adult darknet live stream
how to access the black market tor darknet market address
best darknet market for weed uk dark web directory
cypher darknet market deep web search engines 2022
мега onion ссылка [url=[Link deleted]]мега onion ссылка [/url]
marijuana dark web darknet markets may 2022
tor market links 2022 deep web drug url
reddit working darknet markets darknet market reddit 2022
mega onion зеркала [url=[Link deleted]]мега мефедрон [/url]
dark markets norway dark markets bulgaria
best darknet markets 2022 adress darknet
carding dark web darknet market wiki
dark web illegal links darknet markets that take ethereum
dark market cannazon darknet market
how to use darknet markets superman pills mg
даркнет магазин [url=[Link deleted]]мега onion оффициальный сайт [/url]
cannazon market darknet reliable darknet markets
darknet market links 2022 dark markets andorra
мега onion зеркала [url=[Link deleted]]сайт даркнет [/url]
darknet drug trafficking darknet market dmt
cannazon darknet market reddit where to buy drugs
dark web link buying credit cards on dark web
mega магазин [url=[Link deleted]]мега мефедрон [/url]
site darknet market versus market url
dbol steroid pills darknet market noobs guide
hire an assassin dark web access darknet markets
dark markets india cannazon market link
best darknet markets for marijuana darknet drug prices reddit
tor markets onion links credit card
darknet markets wax weed drugs on the darknet
escrow market darknet best darknet market for weed 2022
dark net market links 2022 deep web shopping site
vice city market phenethylamine drugs
florida darknet markets deep web drug links
darknet software market verified dark web links
официальный сайт мега [url=[Link deleted]]магазин мега [/url]
best onion sites 2022 xanax darknet markets reddit
new darknet marketplaces market links darknet
cannahome market link darknet market adderall
Abacus Market url darknet online drugs
dark markets united kingdom dark web payment methods
reddit where to buy drugs what is darknet markets
Would it be OK <a href=[Link deleted]cialis online pharmacy
black market website legit uk darknet markets
working darknet markets 2022 dark web sites xxx
current darknet market list phenazepam pills
alphabay darknet market top ten dark web sites
cannazon market darknet blockchain darknet markets
how to buy drugs dark web black market sites 2022
dark markets united kingdom darknet market links 2022
black market illegal drugs buying on dark web
the onion directory darknet market vendors
darknet market and monero darknet drug delivery
reddit biggest darknet market place dark markets albania
how to search the dark web reddit dark web cvv
onion market dark web store
darknet market prices cypher market darknet
mega зеркало [url=[Link deleted]]даркнет сайты магазин [/url]
мега onion ссылка [url=[Link deleted]]магазин мега [/url]
как зайти на мегу [url=[Link deleted]]мега скорость [/url]
how to get on the dark web onion darknet market
dark markets andorra darknet market vendors
top dumps shop dark markets peru
darknet markets list 2022 darknet markets financial times
dark web drugs nz darknet drugs reddit
list of darknet markets 2022 tor onion search
darkfox link new dark web links
drug market dark net market links 2022
мэги сайт [url=[Link deleted]]мега кокаин [/url]
order custom essays
[url=”[Link deleted]my essay custom writing[/url]
can i get someone to write my essay
pink versace pill dark markets peru
buy darknet market email address darkfox market darknet
links deep web tor best onion sites 2022
магазин даркнет [url=[Link deleted]]мега шишки [/url]
current list of darknet markets guns dark market
hire an assassin dark web dark web hitman for hire
мега даркнет [url=[Link deleted]]мега onion зеркало [/url]
best deep web markets darkfox market darknet
dark net guide dark markets usa
darknet market iphone versus market url
online onion market darknet market bible
the real deal market darknet tor search engine link
cannahome black market buy online
how to install deep web darknet market adderall
darkmarket link dark markets argentina [url=[Link deleted]]darknet список сайтов [/url]
bohemia market url dark markets hungary
tma drug deep web search engines 2022
adresse dark web active darknet markets 2022
dark markets 2022 alpha market url [url=[Link deleted]]search darknet markets [/url]
bitcoin black market darknet market place search
top dumps shop darknet drugs
buying drugs off darknet biggest darknet market
dark web access tor top websites [url=[Link deleted]]top darknet markets 2022 [/url]
reliable darknet markets lsd dark markets korea
cannazon darknet market dark markets belgium
the dark web shop buy ssn and dob
darknet drugs dublin darknet market wikia
cannabis dark web cvv black market
cypher market link darknet market noobs
darkweb markets how to use deep web on pc
drugs dark web price core market darknet
crypto darknet drug shop canazon
darknet market buying mdma usa darknet market superlist
deep web links 2022 reddit dark web drugs australia
darknet market prices phenethylamine drugs
darknet market litecoin darknet onion markets
live onion market darknet software market
dark web sites cannazon link [url=[Link deleted]]buy drugs online darknet [/url]
darkmarkets underground market online [url=[Link deleted]]how to order from dark web [/url]
dark web illegal links darknet market drug
versus project market darknet market links 2022
best darknet markets 2022 dark markets greece
black market net darkshades marketplace
fresh onions link how to use darknet markets
dark web market dark markets colombia [url=[Link deleted]]black market website names [/url]
asap market darknet buy drugs
darkmarkets best darknet market for counterfeit [url=[Link deleted]]market links darknet [/url]
dark market 2022 darknet black market sites
uk darknet markets darknet market reddit 2022
what are darknet drug markets alphabay link reddit
dark web market links reddit darknet market deals [url=[Link deleted]]how to get on the dark web android [/url]
darknet market wikia cannazon url
xanax on darknet popular darknet markets
darknet market security cannazone
how to access the dark web on pc Abacus link
how to get to darknet market alphabay market url darknet adresse
largest darknet market australian dark web vendors
dark markets ireland how to get to darknet market safe
tor marketplace darkfox market url [url=[Link deleted]]phenylethylamine [/url]
darknet drugs market darknet websites wiki
darknet drugs sales dark markets netherlands
darknet market list url darknet market ranking
darknet market list url currently darknet markets
dark markets bosnia black market sites 2022
darknet drugs dark markets korea [url=[Link deleted]]dark markets bulgaria [/url]
black market websites 2022 the onion directory
darknet markets onion address darknet market ddos
onion deep web wiki darknet market search engine
drugs dark web price dark market onion
tor marketplace black market website review [url=[Link deleted]]best australian darknet market [/url]
dark web links reddit new darknet markets
how to access deep web safely reddit canazon
tor darknet market dark web sites name list
dark markets reddit best darknet market [url=[Link deleted]]dark web hitmen [/url]
cannazon darknet market tor darknet sites
black market prescription drugs onion seiten
counterfeit money dark web reddit dream market darknet link
how to get on the dark web links tor 2022
Abacus Market darknet deep web onion url
archetyp market link which darknet market are still up
darknet market ddos dark markets poland
cypher link how to access the black market
dark market links list of darknet markets 2022
asap market link onion links credit card
dark web escrow service best darknet market for weed
tor marketplace darknet markets list reddit [url=[Link deleted]]bitcoin black market [/url]
Abacus Market xanax on darknet
deep web links tormarket onion [url=[Link deleted]]Kingdom Market link [/url]
popular darknet markets dark markets ecuador
dark web websites darknet market iphone [url=[Link deleted]]dark web illegal links [/url]
french deep web link darknet marketplace drugs
dark market 2022 darknet market alternatives
dark markets new zealand escrow market darknet
darknet market and monero black market bank account
onion sex shop black market illegal drugs
darknet market reddits orange sunshine pill
darknet site dark markets portugal [url=[Link deleted]]blockchain darknet markets [/url]
dark web drugs dark markets bolivia
outlaw darknet market url legit onion sites
vice city market url darknet guide
dark web link reliable darknet markets [url=[Link deleted]]top ten dark web sites [/url]
darknet markets urls underground black market website
darknet websites wiki dnm xanax
dark market list new darknet markets 2022 [url=[Link deleted]]tor2door darknet market [/url]
deep web links updated dark markets macedonia
darknet market iphone dark web search engine 2022
buy drugs online darknet tor darknet market address
best working darknet market 2022 black market website
darknet websites black market credit card dumps
drug market cannahome market
tor drugs darknet market drug prices
darknet market arrests darknet market url list
dark web search engines 2022 dark markets australia
dark market onion how to buy drugs on the darknet
darknet adressen best mdma vendor darknet market reddit
dark markets usa how to access the dark web on pc
tramadol dark web darknet market canada
dark markets korea dark market
darknet seiten darknet dream market link [url=[Link deleted]]market links darknet [/url]
dark net market list live onion market
dark web legit sites dark markets ukraine
dark markets philippines best dark net markets
darknet websites reddit darknet reviews [url=[Link deleted]]darknet market list url [/url]
Abacus darknet Market best darknet market 2022 reddit
dark web market links dark web cvv [url=[Link deleted]]what bitcoins are accepted by darknet markets [/url]
Heineken Express darknet Market darknet market status
dark markets brazil dn market
core market darknet deep web links updated
deep dot web replacement onion deep web wiki
darknet market status best darknet drug market 2022
buy bank accounts darknet bitcoin cash darknet markets
cypher darknet market dark web markets reddit
cannahome market dark markets mexico
buying darknet drugs drug website dark web
darknet market bust onion sex shop
dark web search tool black market cryptocurrency
buy ssn dob with bitcoin darknet prices
best drug darknet reddit darknetmarket
dark web link anadrol pills [url=[Link deleted]]dark markets peru [/url]
But rather than simply removing it from the market themselves or demonstrate its safety, the antibacterial soap industry continued to use the questionable chemicals and sell personal hygiene products that may not be safe until the FDA announced that the products were banned <a href=[Link deleted]cialis online europe The microwave oven is therefore considered to be an interesting alternative to conventional thermal techniques for the investigation of drug excipient interactions during preformulation
tor markets darknet marketplace [url=[Link deleted]]dark web drugs [/url]
darknet market deep dot web archetyp market link
how to buy drugs on the darknet wiki sticks drugs
dark markets norge 0day onion
tor dark web best black market websites [url=[Link deleted]]list of darknet markets reddit [/url]
Cocorico link how to get on the dark web android
guide to darknet markets Kingdom Market
core market darknet tor2door link
weed only darknet market wiki sticks drugs
buy ssn and dob darknet market lists
bohemia market url brucelean darknet market
darknet new market link alphabay link reddit
Cocorico url how to get on darknet market
dark markets 2022 archetyp market darknet [url=[Link deleted]]how to buy drugs dark web [/url]
darkmarket link darknet market list 2022
alphabay url counterfeit money dark web reddit
bohemia link alphabay solutions reviews
darkmarket url darknet market reddit
darknet reddit market pills underground website to buy drugs
dark web drug marketplace darkfox market url
most reliable darknet markets shop valid cvv
dark web step by step tor marketplaces
links the hidden wiki darknet market lightning network
darknet market steroids darknet market links
uk darknet markets best market darknet drugs
darknet market news incognito market darknet
deep web sites darkfox market link [url=[Link deleted]]site darknet fermГ© [/url]
darknet links 2022 drugs url hidden wiki
drugs on the deep web darknet xanax
dark net how to darknet market [url=[Link deleted]]fake id onion [/url]
dark net markets onion seiten
darknet reddit market pills how to get on darknet market
deep web search engine 2022 deep web links 2022
darknet markets dark web hitman for hire [url=[Link deleted]]darknet black market [/url]
brucelean darknet market reddit darknet market list
blacknet drugs australian darknet vendors
deep web markets dark web market links
updated darknet market list how to buy from darknet markets
links da deep web 2022 darkmarkets
darknet drug links dark web drugs ireland
dark markets croatia dark market links
darknet seiten versus market url [url=[Link deleted]]reddit darknet market noobs [/url]
deep web hitmen url search deep web engine
Redeem your points for Sony PlayStation Store Digital Card 10 Gift Card <a href=[Link deleted]generic cialis available Aqueous solutions in some embodiments are those in which the water content is at least 20 wt
darknet market forum dark markets philippines
darknet drug links dread onion
2022 working darknet market deep web links reddit
deep web sites darknet market drug [url=[Link deleted]]dark markets colombia [/url]
best drug darknet darknet dream market link
darknet steroid markets black market drugs guns
bitcoin dark web accessing darknet market [url=[Link deleted]]best websites dark web [/url]
darknet marketplace dark websites reddit
dark markets 2022 darknet market reddits
darknet site darknet market litecoin [url=[Link deleted]]darknet market adderall prices [/url]
best darknet market for weed 2022 darkfox market link
best darknet market reddit which darknet markets accept zcash
incognito market url carding dark web
black market dark web links market cypher
darknet drug market cannahome darknet market [url=[Link deleted]]dark web login guide [/url]
darknet markets reddit 2022 links tor 2022
darknet market noobs guide alphabay market
what is darknet markets 0day onion
best darknet markets weed only darknet market
counterfeit money onion deep dot web markets
dark markets south korea best current darknet market
alpha market url what is the best darknet market
dark web search engines tor darknet market [url=[Link deleted]]darknet markets that take ethereum [/url]
how to access darknet market how to buy things off the black market
black market website review most popular darknet markets 2022
darknet guns drugs how to access the dark web through tor
bitcoin darknet drugs best darknet market for heroin
darknet markets that take ethereum dark markets netherlands
bitcoin cash darknet markets reliable darknet markets lsd
links tor 2022 site darknet fermГ©
deep web drug links alphabay link reddit [url=[Link deleted]]darknet onion markets reddit [/url]
darkfox market link dark web electronics
we amsterdam grey market link
darknet drug market list darknet markets list
deep sea darknet market darknet bank accounts
dark web drugs nz Kingdom Market url
deep dark web list of online darknet market [url=[Link deleted]]darknet market listing [/url]
darknet drug store black market drugs [url=[Link deleted]]which darknet markets accept zcash [/url]
deep web drug markets uk darknet markets
uncensored hidden wiki link black market drugs
dark markets greece alphabay link reddit
how to access the dark web on pc buy bitcoin for dark web
deep web hitmen url darknet market 2022 reddit
buying things from darknet markets darknet markets with tobacco
darknet market drug prices dark markets lithuania
superlist darknet markets darknet markets guide
dark web counterfeit money deep net access
how to find the black market online dark markets bulgaria
tor markets links the darknet markets [url=[Link deleted]]buy drugs on darknet [/url]
darknet seiten deep web websites reddit [url=[Link deleted]]versus link [/url]
best darknet drug market 2022 cannazon market
hidden uncensored wiki link de hiden wiki
tor darknet market live darknet markets
tormarket onion onionhub
accessing darknet market how to access dark web markets
trusted darknet vendors accessing darknet market
darknet market ddos darknet market status
dark web sites links brucelean darknet market [url=[Link deleted]]darknet market vendors [/url]
dark websites dark markets norge [url=[Link deleted]]tor darknet market [/url]
deep web sites alphabay market [url=[Link deleted]]dark markets belarus [/url]
pink versace pill grey market drugs
current darknet market guns dark market
darknet markets japan cannahome url
dark markets paraguay alpha market url
darknet market status how to access darknet markets
which darknet market are still up darknet market google
darknet live stream dark market list
dark web escrow service deep web software market
underground black market website uncensored hidden wiki link
gbl drug wiki how to buy drugs on darknet
onion dark web list best darknet market urs
darknet market noobs bible Kingdom Market
darknet market buying mdma usa onion darknet market
incognito market link deep web drug prices
darknet market controlled delivery darknet database market
deep web drug links dark markets hungary [url=[Link deleted]]what is a darknet drug market like [/url]
darknet illegal market best darknet market now
darknet reddit market darknet market buying mdma usa
darknet market alternatives alphabay link reddit
black market drugs guns best darknet drug sites
underground market online onion market url
darkmarket list how to get access to darknet [url=[Link deleted]]Abacus Market [/url]
site darknet fermГ© top ten deep web
drugs on deep web darknet market steroids
dark web live darkmarket website
Kingdom Market current darknet markets
live onion darknet market noobs guide
dark web sites darknet markets still up
darknet website for drugs good dark web search engines
dark web links 2022 links the hidden wiki
blackweb darknet market black market net
dark market list darknet guns market [url=[Link deleted]]tor marketplaces [/url]
how to access deep web safely reddit tor onion search
buying drugs on darknet dark web payment methods
the dark internet dark markets spain [url=[Link deleted]]dark markets paraguay [/url]
deep web drug markets gbl drug wiki
darknet market reddit dark web steroids
dark web sites links incognito market url [url=[Link deleted]]underground dumps shop [/url]
darknet links market dark markets malaysia
darknet markets with tobacco darknet market noobs step by step
versus link darknet guns market
2022 working darknet market asap market
dream market darknet link darknet stock market
onion directory 2022 cypher market url
orange sunshine pill reddit darknet markets 2022
live onion market deep web software market
darknet drug vendors darknet market alphabay
deep web websites reddit darknet software market
dark web market links onion market [url=[Link deleted]]darknet market adressen [/url]
darkmarket list best darknet markets for marijuana [url=[Link deleted]]darknet market forum [/url]
drug markets dark web carding dark web [url=[Link deleted]]darknet markets 2022 reddit [/url]
list of darknet drug markets dark markets uk
deep web drugs bohemia market link
dark markets latvia best darknet market for heroin
dark markets luxembourg dark web market place links
darknet market deep dot web tor market darknet
darknet reddit market Abacus Market
The best arms and shoulder workout should totally work your arms and shoulders in equal measure <a href=[Link deleted]cheap generic cialis online They penis enlargement strapon for males held her arm to prevent her from falling, and it took a lot of effort to hug her to the nearest chair, and she collapsed on it
how to buy from darknet markets best dark web marketplaces 2022
reddit darknet markets 2022 darknet website for drugs
darknet market thc oil darknet market list url
dark web link Cocorico link [url=[Link deleted]]how to access the dark web through tor [/url]
dark web links 2022 how to buy from darknet markets
darknet market noobs reddit deep web drugs reddit
best darknet market 2022 reddit black market net
darknet market list dark market links [url=[Link deleted]]darknet market google [/url]
darknet guide underground black market website
vice city market url darknet live markets
darknet market ddos darknet guns market
how to anonymously use darknet markets best dark web links
best black market websites darknet steroid markets
cannahome darknet market how to access the dark web through tor
darkmarket darknet market news [url=[Link deleted]]darknet gun market [/url]
darknet markets availability asap market link
counterfeit euro deep web dark markets slovenia
tor market links 2022 dark markets luxembourg
dark web links 2022 archetyp market darknet
dark markets macedonia dark web drugs ireland
best darknet market australia dumps shop
dark websites drug markets onion
darknet drugs reddit deep web software market
dark market 2022 deep web url links [url=[Link deleted]]best darknet market now [/url]
how to buy bitcoin for the dark web cannahome
grey market drugs Cocorico link
buying drugs on darknet monkey x pill
darknet markets 2022 reddit steroid market darknet
black internet dark market [url=[Link deleted]]dark web hitman [/url]
deep net links counterfeit euro deep web
darkweb marketplace dark web buy bitcoin [url=[Link deleted]]darknet market url [/url]
dark market url dark web sites name list
darknet markets address buy ssn dob with bitcoin
darknet market controlled delivery dark markets brazil
darknet market features darknet markets reddit links
cannahome market dark markets norge
dark markets germany darknet markets reddit links
onion market how to get to darknet market [url=[Link deleted]]current darknet markets [/url]
dark markets ireland darknet market lists
onion marketplace drugs buying credit cards on dark web
0day onion 2022 working darknet market
darknet search engine darknet bitcoin market [url=[Link deleted]]dark markets venezuela [/url]
reddit biggest darknet market place tor2door darknet market
stx21 [Link deleted]kegads kegads Vurroume noclegi pracownicze nieopodal augustowa noclegi w augustowie z wyzywieniem noclegi w augustowie nad jeziorem noclegi augustow agroturystyka pensjonaty w augustowie
cypher market url tor markets 2022
archetyp url top onion links
darknet markets list 2022 darkfox darknet market
the dark internet black market bank account [url=[Link deleted]]dark markets guyana [/url]
dynabolts pills darknet market iphone
duckduckgo onion site darknet markets without login
darknet market comparison chart how to buy from the darknet markets lsd
dark markets monaco exploit market darknet
french deep web link vice city link
new darknet market reddit how to buy from the darknet markets lsd
how to browse the dark web reddit best black market websites
tor darknet market darkmarket list
darknet drug prices reddit list of dark net markets
what darknet markets are live site darknet fermГ©
alphabay link florida darknet markets
darkweb market buying darknet drugs
darkweb форум bohemia market url
darknet market darknet drugs shipping [url=[Link deleted]]bitcoin drugs market [/url]
darkfox market link dumps shop
best darknet market urs darknet market black
darknet drug prices tor2door darknet market
best darknet market reddit dark web login guide
reddit darknet market australia xanax darknet markets reddit
tor websites reddit darknet market place search
access the black market darknet onion links drugs
darknet market bible archetyp market
how to get on the dark web on laptop site darknet fermГ©
buying drugs on darknet biggest darknet markets 2022
asap market darknet market drug prices
live onion dark markets ireland
updated darknet market links 2022 dark websites reddit
darknet markets norge cannahome market link
dark web marketplace best darknet market now
dark web engine search pink versace pill
crypto darknet drug shop russian anonymous marketplace
blackweb tor drugs [url=[Link deleted]]deep web cc sites [/url]
credit card dumps dark web darknet market links reddit
top darknet markets deep web drug url
deep web markets deep net links [url=[Link deleted]]darknet escrow [/url]
how to access the dark web reddit dark websites reddit
weed only darknet market cannazon market
online black market uk dnm xanax
darknet market links 2022 reddit i2p darknet markets
dark markets liechtenstein tor market url
tor websites reddit dark web market
darknet markets that take ethereum unicorn pill
deep net websites top ten deep web
black internet darknet market updates 2022 [url=[Link deleted]]darknet seiten liste [/url]
drugs on deep web what is darknet markets
tor2door market what darknet market to use
deep web trading dark web search tool
darknet market onion links cannahome link
dark web drug markets best darknet market 2022 reddit
darknet search engine dark web sites drugs [url=[Link deleted]]safe darknet markets [/url]
tor marketplace darknet markets list reddit
archetyp market url black market websites tor
dxm pills active darknet markets 2022
alphabay url what darknet markets are available
darknet market links 2022 black market cryptocurrency
how to access darknet markets reddit cypher link
black market websites 2022 darknet market deep dot web
site darknet liste darknet link drugs
naked lady ecstasy pill list of online darknet market
uncensored deep web asap darknet market
darknet market tor2door link
cp onion blue lady e pill
dark markets mexico darknet markets urls
online onion market darknet seiten liste
deep web links 2022 deep web market links reddit
dma drug dark web search engines link
darknet market links drugs on the darknet [url=[Link deleted]]trusted darknet vendors [/url]
darknet markets pill with crown on it [url=[Link deleted]]darknet market bust [/url]
free dark web darknet drugs price [url=[Link deleted]]dxm pills [/url]
deep web link 2022 darknet market noobs step by step
darknet software market best dark web counterfeit money
dnm market credit card dumps dark web
what darknet markets are available dark web link
tor markets how to search the dark web reddit [url=[Link deleted]]buying drugs online on openbazaar [/url]
underground market online the darknet market reddit
deep website search engine french deep web link
how to get on darknet market dark markets korea
onion darknet market darknet market link updates
dark markets romania darknet list
darknet market 2022 reddit best darknet market for weed
deep sea darknet market tor market links 2022
how to use deep web on pc dark markets thailand
darknet market avengers what darknet markets are open
deep web search dark web links market [url=[Link deleted]]darknet drugs guide [/url]
tor markets links versus project market link [url=[Link deleted]]buy real money [/url]
the best onion sites url hidden wiki
black market sites 2022 search darknet markets
dark web drugs ireland dark web store
working darknet markets 2022 dark markets sweden
deep web canada biggest darknet markets 2022
darknet drug prices counterfeit money onion
dark web live bitcoin drugs market
best darknet market uk buying drugs on the darknet
deep web onion url reddit best darknet market
darknet markets may 2022 tor markets links
alphabay market link dark web market list
best darknet market may 2022 reddit tor2door market
dark markets estonia dark web sites name list
litecoin darknet markets drugs on the darknet
darknet marketplace top onion links [url=[Link deleted]]tor darknet markets [/url]
adresse onion onion directory
darknet drugs darknet market comparison [url=[Link deleted]]darknet market controlled delivery [/url]
asap market url top onion links
darknet drug prices reddit darknet guide
dark markets ukraine darknet websites drugs
darkmarket url hidden wiki tor onion urls directories
dark markets ecuador best darknet market for heroin
australian dark web markets tor link search engine
dark market list darknet adress
dark internet cypher link [url=[Link deleted]]dark web illegal links [/url]
buying drugs on darknet adresse onion
tor dark web dark markets moldova [url=[Link deleted]]2022 working darknet market [/url]
Kingdom Market link darknet markets best
deep web software market darknet live stream
darknet market controlled delivery Kingdom link
deep net websites how to get access to darknet
darknet market buying mdma usa online black market uk
deep website search engine darknet stock market
dark markets ecuador darknet drugs sites
dark web counterfeit money how to access deep web safely reddit
darknet drug vendors darknet market noobs
top ten dark web tor2door market darknet
dark web access weed only darknet market [url=[Link deleted]]dot onion websites [/url]
darknet markets japan top ten dark web sites
dark web websites dark net markets [url=[Link deleted]]onion deep web wiki [/url]
largest darknet market current list of darknet markets
best onion sites 2022 black market website
wiki darknet market list of dark net markets
dark websites reddit online onion market
hidden uncensored wiki vice city market
dark markets brazil onion directory
onion market darknet markets 2022 reddit [url=[Link deleted]]xanax on darknet [/url]
exploit market darknet dark web sites drugs
deep web links 2022 reddit dark web markets reddit 2022
darknet market that has ssn database lsd drug wiki
dark markets new zealand darknet market drug
darknet onion links drugs Cocorico Market url
what darknet markets sell fentanyl dream market darknet url
best dark web markets 2022 darknet drugs sales
darknet selling drugs darknet market vendors search
darknet market list deep web markets [url=[Link deleted]]history of darknet markets [/url]
darkmarket link darknet market onion links
versus project link how to buy things off the black market
noclegi augustow zarzecze [Link deleted]kegads kegads Vurroume w augustowie noclegi pracownicze augustow noclegi augustow ul.rajgrodzka noclegi augustow ul. zarzecze noclegi pracownicze w augustowie
JPN onani paipan sexy sight on man [Link deleted]newbie bbw major titsasian bbwbbw and bbwbeautiful bbw high defbeautiful bbw genderbeautiful bbw gender online videobeautiful bbw video tutorialsbest totally free bbw video tutorialsbest totally free bbw pornbest gender bbwbest bb
Jeune nymphomane anglaise chauffe deux types qui la baisent [Link deleted]White slutty Co-Worker Wants My Dick Inside Her White Wet Cunt
Thanks.
azithromycin antibiotic class – zithromax pills
Wonderful data, Cheers.
Tombul kızıl saçlı kız iki asılı adamla cinsel fantezilerini keşfediyor bedavaseks.
Işığı kapatın. Anal Son derece Coed Gal Aarin Ah-Me.
Sıcak açık havada bir lanet ayında iki Sexy.
Canlı yayın aktarımı: Kitap galası Mohamed Amjahid:
Hadi Seks Hakkında Konuşalım, Habibi @
Oyoun-Club. 27 Eylül 18:30 20: 00 Ücretsiz.
Genç kızın zorla annesinden izin alarak gitmiş olduğu amcasının evinde,
kız amcasıyla birlikte yatmak istiyor. Amcası bu kızın sexi olmasından dolayı.
81 Furthermore, pomegranate extract has been reported to have microbiocidal effects on HIV 1 <a href=[Link deleted]prospect Coadministration of triazolam or midazolam PO with darunavir ritonavir may cause large increases in the concentrations of these benzodiazepines
Ücretsiz bebek kıçını sıcak seks ile porno kategori bebek kıçını videolar.
TOP SITES: HQ Bebek kıçını xxx klipleri. En iyi videolar.
Nature 2003; 424 797 801 <a href=[Link deleted]canada over the counter Our study contributes to a better understanding and prediction of ovarian reserve in young early breast cancer patients undergoing chemotherapy
<a href=[Link deleted]philippines The rats were anesthetized with Hypnorm fentanyl citrate 0
Our results suggest that in postmenopausal BC patients such estrogen deprivation does not result in measurable cognitive effects <a href=[Link deleted]stromectol para que sirve When using Nolvadex to ward off the effects of estrogen during the cycle, it should similarly not be removed until the user is confident that hormone levels are well under control
So it s like it just grew naturally <a href=[Link deleted]prescription In addition, six of the ten studies included were clinical trials of oral contraceptives, in which the samples may not be representative of the general population
Use of your body fat distribution <a href=[Link deleted]for humans amazon 2021 Oct; 47 10 2602 2608
Which means, yoou actively industdy your content to relevant blogs in your vertical so they
may perhaps share with their audience.
Some professionals say North Korea’s current weapons tests are also designed to bolster its
arsenals to increase its leverage in future negotiations with its rivals.
Even so, if it is an academic requirement, you will most likely have the opportunity arranged for you.
These variants include punto banco, mini-baccarat, chemin de fer, and baccarat banque.
When you opt for the cash alternative, your prize is deducted at around 40%.
In response, other gambling stakeholders in the Sunshine State
successfully challenged the law in court as a violation of each state and federal statutes.
He has been with uus due to the fact 2017 and serves as SBO’s Editor-in-Chief.
Purchased into digbital media corporation Barstool Sportys in early 2020 at a $450 million valuation.
All the key DFS companies – DraftKings, FanDuel,
Yahoo Fantasy and Fantasy Draft – operate in the Buckeye State.
Downloadung a betting app enables you to bet on your mobile devices.
Sports betting is hugely popular overseas, paryicularly in Europe.
A game of Baccarat is played with 8 decks of cards contained in the shoe on the Baccarat taable
with boxes to place your chips on.
But there are handful of Las Vegas spoorts internet websites likemany of the siteswe advocate right here att VegasBetting.
Crawlers will locate these links and comply with them, discovering
new content material and downloading updates to your older content.
With states making their own laws, sports betting laws and industries are distinctive.
Qualifying credit, service, and more line (two+ total) expected.
HB 29 incorporates provisions for as several as 25 licejses for OH
sports betting app offerings.
On the internet operators went reside iin the Volunteer
State in November of 2020.
Here, wwe have outlined some of the most standard strategies for beginners.
The app utilizes Kambi for its back-endcomputer software annd threat management.
It iis a risk-free of charge opportunity to make a guaranteed profit by exploiting differences in odds.
The University of Albertaseeks candidates for a tenure track position at the
rank of Assistant Professor in the Department of Women’s andd Gender Research.
For the previous two decades, bettors could count on Tom Brady and Aaron Rodgfers to bounce back from a
loss aand not only win thhe next week, but cover.
Along with their health-related license,
loved ones medicine physicians will have to safe certification from the
ABFM or AOBFP.
Easinng the transition is thee reality that mst of thee staff
curently knows each other, aand a lot of of thhe players.
They also add more security, permitting you to conceal the nature of
your transactions if ever asked too do so.
This suggests that players will transfer ETH tokens intoo the Ethereum sportsboopk directly.
The exclusive version offered for U.S. residents was officially
launched on 2011 December 14.
Conversely, Barrett held anti-abortion views
in 1998, she wrote in a law journal report that abortion is “usually immoral”.
That in turn, leaves a vast gray regin iin terms of
their capability to legally access South Korean betting websites.
In the thrd phase, labeled the “roots of the revolution” encompassing the time from
1950– mid-to-late 1970s, the movement began to approach the
warning indicators of a revolution.
On the internet gambling in Korea’s expanse also permits Sic
Bo, where participants spot their chips on their prospective outcomes.
OB/GYN nurses, medical doctors, sonographers, aand lactation consultants continue to play an critical function in women’s
health.
The path to becoming a Florida nurse practitioner begins with
graduate nursing education.
One particular of tthe most frequent hedge betting scenarios involves championship futures tickets.
People interested in advancing the University’s strategic diversity goals are strongly encouraged to apply.
The second way to bet on a favored oor an underdog is
on the moneyline.
Administrators of these groups can arrange Meetups ffor members to get to know every other in particular person.
Pregnant women worked up until the day they gave birth and returned to work as quickly as
they were physically in a position.
<a href="[Link deleted]pa 40000 kr
The developer supplied this data and may update it over time.
We will look at the terms and circumstances tthat are attached to totally free bets and the
size of deposit expected.
For instance, BetAnySpors andd Bet105 would
present -105 on either group to cover thatt spread.
South Carolina, Georgia, and Florida may possibly try add legal sports betting
in 2023.
If that particular person were to bet $300 rather, and Team A nevertheless won, they would win $200.
New York Plenum Press, 1979 <a href=[Link deleted]i buy priligy in mexico The treatment RR among HR positive patients was not statistically different from the treatment RR among HR negative patients for either survival P
A frresh and slick ingerface greets bettors upon arrivial, with SI sportsbook catering to aall levels
oof betting calibre.
Bettors can wager onn bingo, horse racing, on the games
provided at tribal casinos positioned all through the state, and on the state lottery.
Our website [url=[Link deleted]best crazy games[/url] has begun to discharge changed games and driving games, and reborn opportunities to enjoy them here are added. We come prosaic driving games nearby trucks, bikes, racing, cars, and other vehicle types. Another recommended list is games championing girls with fashion dress-up and make-up. If you know what is playing these days is the best standard .io games, multifarious developers released new io games on the browser in pattern years, such as hole.io, venge.io, voxiom.io, and much more .io super games. Also, we are striving to count up some refrigerate new kid scholarship games to get better the wisdom and reflective abilities. Also, some other types of car games online when one pleases better your reflex and timing abilities.
macrobid medication <a href="[Link deleted]100 mg online pharmacy macrobid over the counter
<a href=[Link deleted]bodybuilding Fluvoxamine provided escalation to the highest EC 50 values for all algae species tested 3563 10, 208 Ојg l
Our website [url=[Link deleted]games online[/url] and we classify our multiplayer games free online into the 11 most preferred classifications: driving, capturing, clicker, and.io. We started as a driving game internet site and have collected around 1000 of the best driving games. These multiplayer games best include car games, bike games, monster trucks games, and any other two-player games you can consider. Later our shooting games have taken off.
loratadine without a prescription <a href="[Link deleted]to purchase loratadine loratadine cheap
A lot of thanks for all your hard work on this blog and alo try to [url=[Link deleted]play kizi10 games [/url]. Ellie takes pleasure in setting aside time for investigations and it’s really simple to grasp why. My spouse and i hear all concerning the compelling method you deliver powerful items on this website and as well strongly encourage participation from website visitors on the area plus my princess is undoubtedly being taught so much.
<a href="[Link deleted]100000 kroner
s main duties with the Pirates is analyzing numbers, statistics and so forth whether itГў <a href=[Link deleted]30mg 53 2 222 226 Feb
where to buy augmentin <a href="[Link deleted]to buy augmentin 875/125 mg augmentin online pharmacy
<a href="[Link deleted]Schmidt
diamox cost [url=[Link deleted]otc[/url] diamox cheap
injection of 6c on AMPH induced neurochemical overflow and locomotion was investigated using a well defined protocol Zestos et al, 2016 <a href=[Link deleted]for sale 50 mg
<a href="[Link deleted]
<a href=[Link deleted]contraindications Tamoxifen is indicated, on resetting your face of treatment of 12, elsevier saunders, or over the send me
<a href=[Link deleted]usa shippments online Read the Patient Information Leaflet provided by your pharmacist before you start using exemestane and each time you get a refill
services essay
[url=”[Link deleted]custom essay site[/url]
hire essay writer
<a href=[Link deleted]treat std Hopefully, we will have a better chance to win tomorrow
Abedi Nejad M, Nikbakht M, Afsa M, Malekzadeh K <a href=[Link deleted]and doxycycline
Hirayama T, Wynder EL A study of the epidemiology of cancer of the breast <a href=[Link deleted]3mg tablets
Management of Invasive Early Stage High Risk Disease Stage IA and IB, High Grade, Stage IC and Stage II <a href=[Link deleted]dosage for male testosterone
Adjuvant intensity modulated whole abdominal radiation therapy for high risk patients with ovarian cancer FIGO stage III final results of a prospective phase 2 study <a href=[Link deleted]tamoxifen and clomid And they would go to Adam and say O Adam, thou art the father of mankind
<a href="[Link deleted]Halstenbek
My activities include working on my radio show on holistic health, marketing my latest book on lung cancer on television, radio, or magazine, acting as a resource to cancer patients who contact me, working on my Foundation for Holistic Cancer, writing a monthly newsletter, <a href=[Link deleted]pharmacies that sell clomid Sahlberg PhD, Lars Ottestad MD, Rolf KГҐresen Prof
reviews of essay writing services
[url=”[Link deleted]essays services[/url]
custom admission essay
Watch Nikki Benz pro on SpankBang now! Porn Star, Blonde, Big Ass Porn SpankBang.
Outstanding post, you have pointed out some fantastic
points, I besides conceive this is a very good website.
i need help writing an argumentative essay
[url=”[Link deleted]college essays online[/url]
buy essay
<a href=[Link deleted]dosage for scabies In addition, the vitamin E family has known antioxidant actions to fight cell damaging free radicals in the body and therefore reduce inflammation in all tissues
essay help
[url=”[Link deleted]essay service[/url]
what are good essay writing services
Antibodies against Maspin and PPARОі were purchased from BD Biosciences Mississauga, ON and Santa Cruz Biotechnology Santa Cruz, CA respectively <a href=[Link deleted]i take lasix for bloating
<a href=[Link deleted]dosing pct com 20 E2 AD 90 20Harga 20Viagra 20Kimia 20Farma 20 20Cum 20Se 20Administreaza 20Viagra harga viagra kimia farma Across the border in the British province of NorthernIreland the economic picture is also blurred, with productivitygains in the 15 years since a peace agreement ended threedecades of sectarian violence threatened by renewed outbreaks ofcivil unrest
29 Owing to the multiple diseases that may cause VS, it is important for physicians to exclude mimics before diagnosing VSS <a href=[Link deleted]and spironolactone ratio Stick to proven treatments Hepatitis C
legitimate essay writing service
[url=”[Link deleted]essay writers for hire[/url]
cheap essay writing service us
هنا في مطابخ هدون نقدم جميع انواع الذبائح ومنها خروف حري صغير
خروف حري صغير
cheapest essay writers
[url=”[Link deleted]help me write my essay[/url]
will someone write my essay for me
community service essays
[url=”[Link deleted]essay writing service[/url]
admission college essay help
pyridium 200 mg prices <a href="[Link deleted]200 mg coupon pyridium 200mg tablets
<a href="[Link deleted]Stadtbergen
buy custom essays online
[url=”[Link deleted]customer service[/url]
what is the best custom essay writing service
what is a good essay writing service
[url=”[Link deleted]essays online[/url]
essay writing services online
cymbalta united states <a href="[Link deleted]60 mg nz cymbalta australia
<a href="[Link deleted]
rosuvastatin nz <a href="[Link deleted]of rosuvastatin rosuvastatin price
sildenafil 20 mg tablet <a href="[Link deleted]the counter viagra substitute walgreens herbal substitutes for viagra
<a href="[Link deleted]Hailu Abate
luvox 50 mg without prescription <a href="[Link deleted]for sale luvox 50mg usa
<a href="[Link deleted]euron lainaa
<a href="[Link deleted]Remagen
diamox 250mg canada <a href="[Link deleted]pharmacy diamox 250 mg tablet
<a href="[Link deleted]40000 euros
nortriptyline 25mg online pharmacy <a href="[Link deleted]australia nortriptyline tablets
viagra <a href="[Link deleted]from india viagra connect usa
mestinon 60 mg without a prescription <a href="[Link deleted]60 mg otc mestinon pills
<a href="[Link deleted]Herbert Schulze
where to buy donepezil <a href="[Link deleted]5 mg uk donepezil no prescription
<a href="[Link deleted]8000 kr
<a href=[Link deleted]priligy online uk com 20 E2 AD 90 20Generico 20Viagra 20Medley 20 20Viagra 20Kopen 20Bij 20Drogist viagra kopen bij drogist The first stage should build on national resolutionauthorities taking coordinated decisions, with a board at thecentral level to ensure quick, effective and coherentdecision making, Schaeuble wrote
<a href="[Link deleted]
digoxin price <a href="[Link deleted]0.25mg coupon digoxin canada
viagra connect <a href="[Link deleted]otc over the counter sildenafil
According to the researchers, mean copayment cost for a 30 day prescription was 7 <a href=[Link deleted]provera and clomid online 5375 P glycoprotein substrate Substrate 0
rosuvastatin coupon <a href="[Link deleted]usa rosuvastatin canada
All animal procedures were in strict accordance with the National Institutes of Health Guide for Care and Use of Laboratory Animals, and were approved by the local Institutional Care and Use Committee <a href=[Link deleted]side effects He really did not want to agree now, but there was no way
roulette en live [Link deleted]blackjack entre amis en ligne [Link deleted]en ligne casino [Link deleted]technique du 24 roulette [Link deleted]numeros roulette [Link deleted]casino slot en ligne [Link deleted]jeux casino reel [Link deleted]casino avec bonus encaissable sans depot [Link deleted]casino machine a sous carte de france [Link deleted]casino jeux france [Link deleted]gagner de l’argent a la roulette [Link deleted]jouer a la roulette gratuite sans telechargement [Link deleted]jeux casino telecharger [Link deleted]jeu machine a sous casino [Link deleted]jeux casino gratuit pragmatic [Link deleted]casino rival pour francais [Link deleted]casino la roulette gratuit [Link deleted]poker a 2 carte [Link deleted]jouer au casino astuce [Link deleted]regle.poker carte [Link deleted]casino en ligne est fiable [Link deleted]blackjack carte [Link deleted]jeux casino gratuit chinois [Link deleted]casino en ligne sur mobile [Link deleted]roulette en ligne argent reel france [Link deleted]les jeux du casino
meilleures casino en ligne [Link deleted]gagner a la roulette astuce [Link deleted]casino machine a sous gratuit bonus [Link deleted]casino machine a sous a luxembourg [Link deleted]blackjack probabilite [Link deleted]casino gratuit machine a sous zorro [Link deleted]double casino gratuit [Link deleted]strategie roulette casino [Link deleted]valeur as blackjack [Link deleted]jeu roulette francaise gratuit [Link deleted]le jeu de la roulette [Link deleted]casino suisse poker [Link deleted]casino en ligne retrait immediat [Link deleted]casino en ligne paypal depot [Link deleted]jeux gratuit casino poker [Link deleted]liste des casinos en ligne autorises en france [Link deleted]jeux de casino pc [Link deleted]online casino francais [Link deleted]jeux casino bonus gratuit [Link deleted]site de casino en ligne avec bonus sans depot [Link deleted]inscription casino en ligne [Link deleted]casino virtuel gratuit machine a sous [Link deleted]meilleur casino en ligne [Link deleted]jeux goal casino [Link deleted]liste casino jeux france [Link deleted]jouer blackjack en ligne
Frontiers in Immunology, 11, 590794 <a href=[Link deleted]alternatives
<a href="[Link deleted]Euro Kredit
procardia uk <a href="[Link deleted]30 mg canada how to buy procardia
viagra vs vardenafil <a href="[Link deleted]goodrx vardenafil and tadalafil
83 Comments to The Role of Calcium D Glucarate in Hormone Balance <a href=[Link deleted]to start clomid
cheap pulmicort 100 mcg <a href="[Link deleted]without a prescription pulmicort cost
<a href=[Link deleted]stromectol ivermectin online Damion PwkBPEVfsTJz 6 26 2022
anastrozole online <a href="[Link deleted]online anastrozole pharmacy
<a href=[Link deleted]price in south africa The tumor was removed, however, during the surgery, her vet Dr
<a href=[Link deleted]coupon free trial Denise K Oelschlager Department of Pathology; University of Alabama at Birmingham; Birmingham, AL USA
<a href="[Link deleted]lotion
glimepiride tablet <a href="[Link deleted]cheap how to purchase glimepiride
vardenafil canada <a href="[Link deleted]generic topiramate and vardenafil
<a href=[Link deleted]effects for clomid The changes by the British Horseracing Authority BHA came as a result of a comprehensive review of the Equine Anti Doping Rules undertaken in 2018, following a number of Disciplinary Panel cases which called into question previous assumptions regarding the rules and how they should be applied prompted largely by the case of malicious doping involving a filly trained by Hughie Morrison
370, 734 743 2014 <a href=[Link deleted]pronunciation The only thing I have achieved in getting are multiple cysts on my ovaries
com 20 E2 AD 90 20Viagra 20Online 20Auf 20Rechnung 20Kaufen 20 20Que 20Es 20Mejor 20Cialis 20O 20Viagra 20Yahoo que es mejor cialis o viagra yahoo Salehi was foreign minister under Rouhani s predecessor Mahmoud Ahmadinejad <a href=[Link deleted]package insert com website states that the pills can be open up and spread on food, although it shouldn t be hot food or hot liquids
However, when Master Skeleton was about to reach this hole, a black bird stared at him tightly, and opened its mouth wide, coumadin high blood pressure waiting for him to burrow into his own <a href=[Link deleted]1mg
Hortobagyi, and F <a href=[Link deleted]comprar priligy mexico JAMA 293 1073 1081
cost of sildenafil <a href="[Link deleted]sildenafil sildenafil generic
is cvs generic vardenafil available in my area? <a href="[Link deleted]hcl generic vardenafil hcl 20
ceftin for sale <a href="[Link deleted]250mg nz ceftin 250mg without a doctor prescription
<a href="[Link deleted]von Hodenkrebs
and Sugimura, Y <a href=[Link deleted]indication 0 NS Ovarian volume, cm 3 b 6
jouer au casino gratuitement [Link deleted]comment gagner de l’argent au casino [Link deleted]meilleur casino du monde [Link deleted]jeux roulette francaise gratuit [Link deleted]jeux casino en ligne sans depot [Link deleted]jeux casino tour gratuit [Link deleted]jeux casino quick hit [Link deleted]casino machine a sous region parisienne [Link deleted]casino en ligne jeux du poulet [Link deleted]statistique roulette casino [Link deleted]au poker 3 cartes de meme valeur [Link deleted]le poker se joue avec combien de carte [Link deleted]casino jeux a proximite [Link deleted]astuces roulette [Link deleted]site casino suisse [Link deleted]regle du poker 5 cartes [Link deleted]carte poker francais [Link deleted]live double ball roulette [Link deleted]casino avec bonus encaissable sans depot [Link deleted]casino roulette en live [Link deleted]casino en ligne bonus sans wager [Link deleted]jeux casino avec bonus bienvenue sans depot [Link deleted]technique gagner roulette [Link deleted]roulette casino truque [Link deleted]comment bien jouer au casino [Link deleted]casino paris en ligne
comment marche la roulette au casino [Link deleted]site de jeux casino [Link deleted]meilleurs casino francais en ligne [Link deleted]technique pour gagner a la roulette electronique au casino [Link deleted]jeux casino reel [Link deleted]jeux machine a sous casino [Link deleted]regle du poker 5 cartes en main [Link deleted]casino bonus sans depot immediat [Link deleted]jeu demineur casino [Link deleted]jeux gratuit carte poker [Link deleted]jeux de roulette casino [Link deleted]astuce jeu mines casino [Link deleted]suite de carte au poker [Link deleted]technique roulette casino couleur [Link deleted]casinos belgique [Link deleted]casino en ligne france [Link deleted]casino en ligne france [Link deleted]a quoi jouer au casino [Link deleted]liste de casino en ligne [Link deleted]jeux de casino dice [Link deleted]casinos de jeux [Link deleted]regle de jeu roulette [Link deleted]casino jeux en france [Link deleted]grille roulette casino [Link deleted]jeu du penalty casino [Link deleted]casino international en ligne
how to purchase ampicillin 250mg <a href="[Link deleted]500 mg uk ampicillin 250mg cheap
levofloxacin united kingdom <a href="[Link deleted]canada order levofloxacin
brand cialis <a href="[Link deleted]cialis sur amazone cialis and aspirin
ciprofloxacin united states <a href="[Link deleted]250 mg purchase ciprofloxacin cheap
cheapest verapamil <a href="[Link deleted]generic verapamil 120 mg without prescription
<a href="[Link deleted]in Echtzeit
ceftin purchase <a href="[Link deleted]of ceftin cost of ceftin 250mg
antivert australia <a href="[Link deleted]25mg online pharmacy antivert otc
[Link deleted]
<a href="[Link deleted]
[url=[Link deleted]
[Link deleted]
<a href="[Link deleted]
[url=[Link deleted]
[Link deleted]
<a href="[Link deleted]
[url=[Link deleted]
[Link deleted]
<a href="[Link deleted]
[url=[Link deleted]
[Link deleted]
<a href="[Link deleted]
[url=[Link deleted]
[Link deleted]
<a href="[Link deleted]
[url=[Link deleted]
loratadine usa <a href="[Link deleted]10mg generic loratadine without a prescription
narcos ringtone <a href="[Link deleted]
chrome// dino <a href="[Link deleted]
protonix purchase <a href="[Link deleted]20 mg medication protonix pharmacy
best ringtones <a href="[Link deleted]
prescription free cialis <a href="[Link deleted]cialis cost per pill
music ringtones <a href="[Link deleted]
canadian pharmacy ezzz cialis <a href="[Link deleted]black cialis
<a href="[Link deleted]zodiacali del cancro
scary halloween sounds <a href="[Link deleted]
meclizine over the counter <a href="[Link deleted]25 mg canada meclizine without prescription
how to buy symbicort inhaler <a href="[Link deleted]inhaler 160/4,5 mcg no prescription how to purchase symbicort inhaler 160/4,5 mcg
loratadine usa <a href="[Link deleted]online loratadine over the counter
<a href="[Link deleted]sociale ГЁ una malattia mentale
Oily Fuck With The Asian Step Sister. 769.2k 99%
34min 1080p. 71,774 thailand teen premium videos on.
catapres tablets <a href="[Link deleted]without prescription catapres 100 mcg coupon
does cialis lower blood pressure <a href="[Link deleted]ingredients cialis medication
levofloxacin usa <a href="[Link deleted]levofloxacin levofloxacin united kingdom
bluelight gabapentin <a href="[Link deleted]half life nerve medicine gabapentin
loperamide without a prescription <a href="[Link deleted]2 mg united kingdom loperamide medication
<a href="[Link deleted]arterial baja
cheap lamotrigine <a href="[Link deleted]100mg purchase cheap lamotrigine
<a href="[Link deleted]und Antidepressiva